Maker Select calibration tool
thingiverse
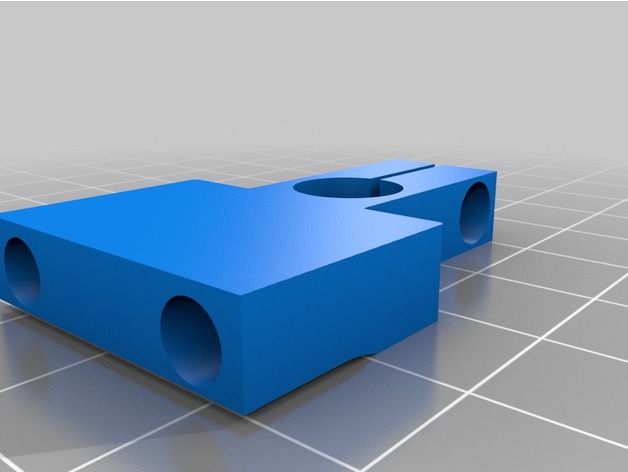
Calibration tool for Monoprice Maker Select attaches securely with 2 M4 x 25mm screws directly to the bearing from the back. Installing a dial indicator will greatly enhance leveling of the Z axis and bed, resulting in precise adjustments. To secure the dial indicator, an M3 x 12 screw and nut are used to tighten it firmly into place. To level the Z axis accurately, start by lowering the bed completely in all four corners. Then, home the Z axis, taking precise measurements of the height closest to the Z limit switch (home position). Next, move the carriage to the opposite side and compare this measurement to the home position. Adjust the lead screw to make both values equal. Move the carriage back to the home position and recheck the value; this will change after adjusting the opposite side. Continue readingjusting as in steps 4-8 until the values are perfectly even, even after adjustment. My consistent results have been within .001. To streamline the process, I utilize Octoprint to move the carriage back and forth effortlessly. Without it, I would manually grab the belt to move the carriage. For additional information, visit http://imgur.com/a/Qm6pf.
With this file you will be able to print Maker Select calibration tool with your 3D printer. Click on the button and save the file on your computer to work, edit or customize your design. You can also find more 3D designs for printers on Maker Select calibration tool.