MakerBot Laser Cutter Upgrade - Laser-Bot.com
thingiverse
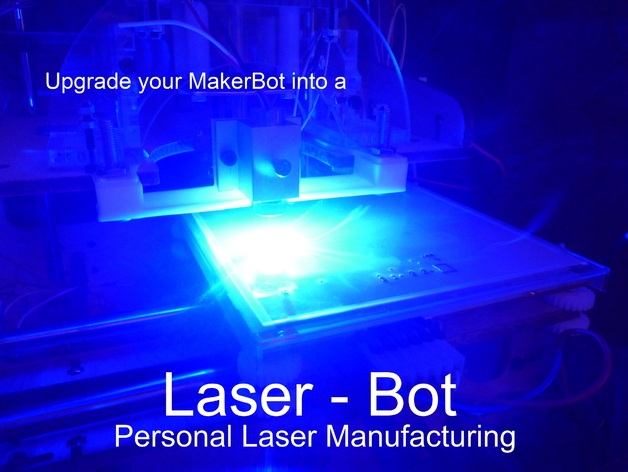
Upgrade your MakerBot 3D printer to a laser cutter with a 445nm, 1.7W laser. This powerful tool can cut through plastic, hobby balsa wood, paper, foam board, and vinyl while engraving multiple materials. Visit http://laser-bot.com for more details and check out the laser cutting solder stencils video at http://www.youtube.com/watch?v=4Gaz_gt1olM and laser cutting wood video at http://www.youtube.com/watch?v=dQkePnhR8JA. To install, purchase J Tech Photonics' laser upgrade kit and print out the holder and connector pieces. Attach the laser to the holder with M3x20 screws and the holder to the connector pieces with M4x25 screws. Replace thumb screws under the extruder assembly with connector pieces, place the laser holder underneath, and tighten with nuts and screws. Connect the laser driver board to the heated build platform motor control pins and laser connections, plug in the adapter, modify G code files, protect your platform, focus the laser, and set 0,0 coordinates. Remember safety goggles and precautions as this is a high-powered project. Find more information at http://laser-bot.com and http://jtechphotonics.com/?page_id=52.
With this file you will be able to print MakerBot Laser Cutter Upgrade - Laser-Bot.com with your 3D printer. Click on the button and save the file on your computer to work, edit or customize your design. You can also find more 3D designs for printers on MakerBot Laser Cutter Upgrade - Laser-Bot.com.