Makerbot Light Halo
thingiverse
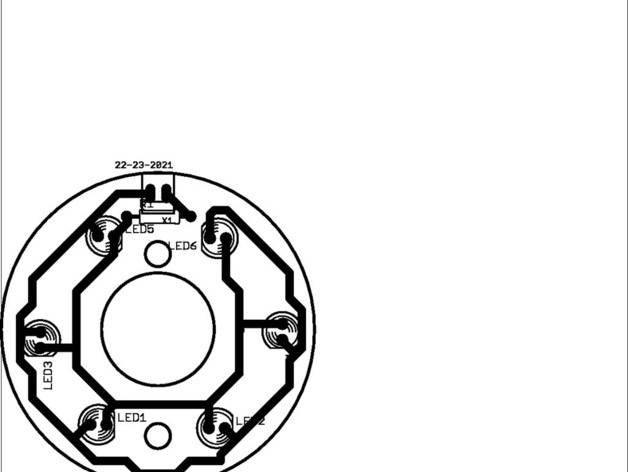
This is a PCB design for 6 leds which can be attached to the extruder nozel head via the 2 threaded bolts. This is a derivative of the printable Makerbot light ring. The circuit is a simple one, however there is an added function. This is designed to be wired into the extruder motor connectors 1A and 1B, therfore when the motor runs forward, it lights 3 LEDs (White) When it reverses, it illumiates the Blue LED's. Check out my video for an example here: http://www.youtube.com/watch?v=lRiLqAD1rlk and in actual use (Pinting PrintruderV2) http://www.youtube.com/watch?v=VoPX63fTHiw Alternativly, use this pcb and add the LED's all the right way wound and have this as a circuit just to illuminate! its like potatoe waffles - lovely and versatile! Instructions Etch the board in your favourite way Drill holes and enlarge the central hole to accomodate your ceramic heater tape. Solder in the LEDs (alternate colour and directions for longer leg) 3 LEDs should be wired in the other way round, ie blue +- differ from white +-. Attach to makerbot by using 4 nuts to secure it to the nozel Connect wires to the extruder motor connector Print!
With this file you will be able to print Makerbot Light Halo with your 3D printer. Click on the button and save the file on your computer to work, edit or customize your design. You can also find more 3D designs for printers on Makerbot Light Halo.