Makerbot Printable Aluminum Nichrome Heated Build Platform
thingiverse
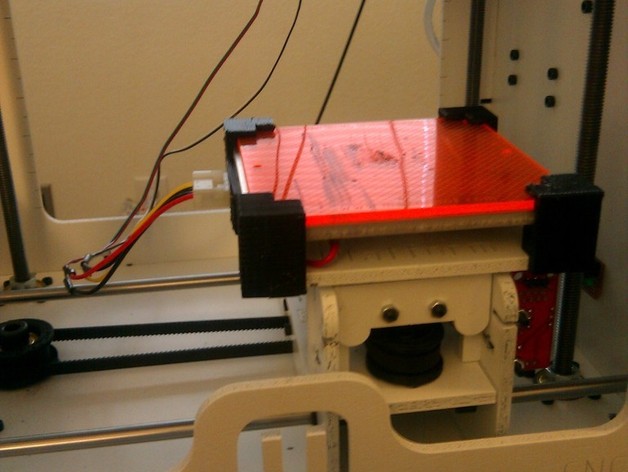
I wanted a heated build platform, but I don\\\\'t have a way to work with metal. Thus, I designed this Aluminum with NiCr heating element heated build platform to be put together with little modification from parts that can easily be ordered online or picked up at a local store. 2010-02-28 - UPDATE: Tested it and it works great. The corners do not melt and, in fact, provide an easy way to handle the hot build platform. 2010-04-07 - UPDATE: I covered the AL with Kapton tape (1" strips) and it seemed to work much better than the Lexan, but then my extruder started having "issues" so I am fixing that. I did not re-print the four "standoff" pieces when I did this, but one could download the scad file and change the variables to 0 for the lexan height since the small gap is not necessary. Instructions I) Prepare the Heated Build Platform 1) Print 3x the small corner pieces. 2) Print 1x the larger corner piece with molex connector holder. 3) Bolt two of the small corner pieces to the right edge of the standard Cupcake wooden build platform (facing build platform). 4) Prepare AL build surface (Obtained from OnlineMetals.com, 4in x 4in x 0.1875 in) with 10 Ohms of nichrome wire and a 100 kOhm thermistor. (Obtained from Makerbot) (See the NiCr Pattern for a nice template to use to lay the NiCr wire on the AL surface). --> Note: You may want to try to use 6 Ohms instead. 10 Ohms worked well for me but others have suggested 6 Ohms to heat the platform faster. 5) Solder one end of a 4 wire Molex connector to the build platform (2 wires to the thermistor, 2 wires to the nichrome -- follow instructions for soldering plastruder). (I cut a Molex hard drive power extension cable in half). 6) Place the AL and stock orange lexan pieces into the two corner pieces bolted to the build surface. 7) Place the remaining corner pieces onto the build platform and bolt in. The molex connector should be on the back left of the build platform. II) Wiring Harness 8) Build wiring harness to connect the extruder to the build platform. See http://pleasantsoftware.com/developer/3d/2009/11/23/how-to-connect-the-2nd-thermistor/ 9) Install tension relief parts in the two empty M5 holes on the Z platform. 10) Update firmware:http://wiki.makerbot.com/plastruder-firmware-update
With this file you will be able to print Makerbot Printable Aluminum Nichrome Heated Build Platform with your 3D printer. Click on the button and save the file on your computer to work, edit or customize your design. You can also find more 3D designs for printers on Makerbot Printable Aluminum Nichrome Heated Build Platform.