Makerbot Replicator 1,2,2X Z Axis Upgrade
thingiverse
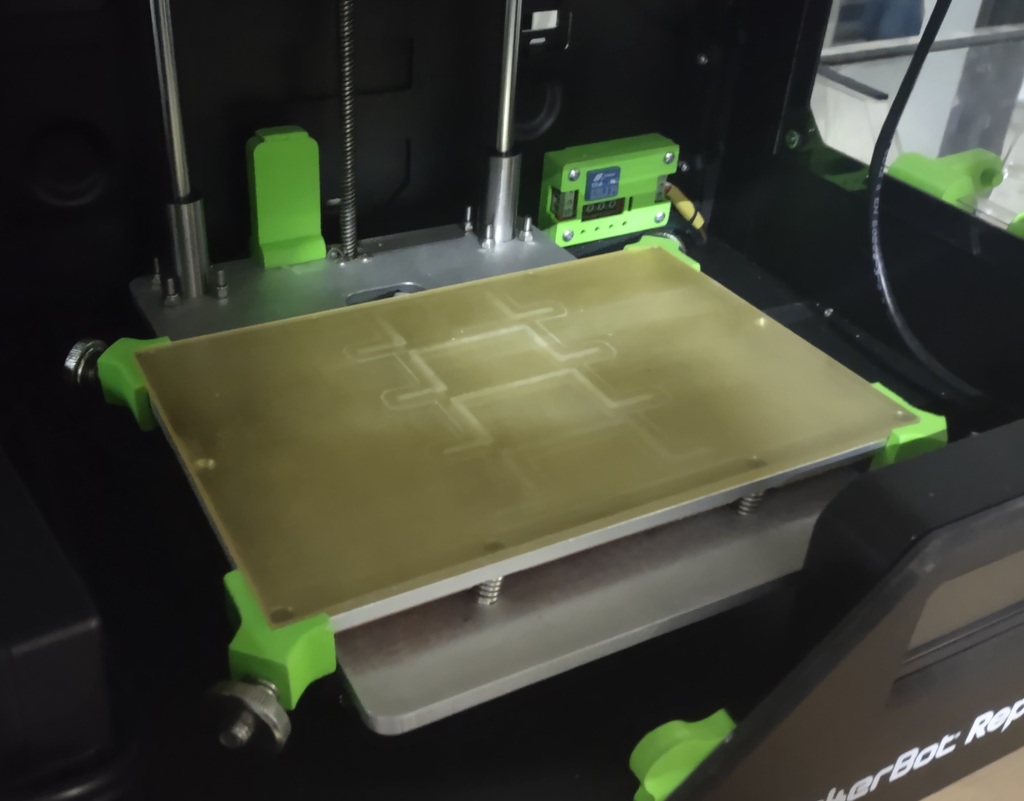
Upgrade the Z axis on the Makerbot Printers, i have these installed on my Makerbot Replicator 1's, 2's and 2X's. The plate needs to be made from 6mm (1/4") aluminum, i used sendcutsend.com to have the plates cut out of T6061 aluminum. After receiving them i just sanded the plates to remove sharp edges and they were ready to install. The other hardware needed is... 2 - 300mm length 10mm diameter hardened linear bearing rods, not needed for Rep 1 8 - M4-20mm cap head screws 8 - M4 Nylock Nuts 2 - LMK10LUU Linear Bearings for Rep 2 and Rep 2x, LMK8LUU for Rep 1 The Z pusher file needs to be printed before tearing down the printer unless you have multiple printers do this first, the adjustment piece is for gluing onto the top of the Z pusher if you need more space for your bed, for example if you run a glass plate and PEI sheet on top of the heated bed you will need more space for the Z offset, print the adjustment block and glue it on top of the Z pusher with a bit of super glue, i glue these on then fine tune the height with a dremel and sanding drum to get the offset right where i want it, you could also tape it to the top of the pusher then test and remove and sand or file some off then put back on and test again, after you get it where you want testing it by leveling the bed then just glue it on permanently. The two 300m linear bearing rods are needed because the stock Z axis rods on the Replicator 2 and 2X are just soft aluminum with a teflon coating, the bearings will eat into them so they need to be replaced. If you install this on a Rep 1 just buy the LMK8LUU 8mm bearings and re-use the stock 8mm linear rods, if you want they can also be upgraded to 10mm, i have done a few this way but i find over the 300mm height there is not a huge improvement over the stock 8mm diameter rods. You will need to remove the back and bottom covers from the Rep2/2X printer and remove the heated bed from the Z platform, unplug the Z stepper motor, remove the four screws holding the Z motor from the top, then spin the stepper screw lead and remove it from the platform and pull out of the printer from the bottom. Then remove all the screws and remove the rear metal spreader plate, unplug the Z axis limit switch cable from the limit switch, the entire Z axis assembly can now be removed, there is two screws in the bottom plastic piece that held the Z motor that screw into the bottom of the printer, remove those two screws and the entire Z axis assembly now pulls out, this includes the top and bottom plastic pieces, the Z rods and platform. Once this is removed, remove the Z rods from the top and bottom plastic pieces, remove the brass Z axis leadscrew nut from the bottom of the platform and discard the platform and aluminum rods. Install the bearings into the plate, install the brass nut on the bottom of the plate, push the Z pusher onto the back edge of the plate as shown in the photo, install the new hardened rods into the bottom plastic piece and slide the platform down onto the rods, install top plastic piece onto the rods, now put the entire Z axis back into the printer, install the two screws through the bottom plastic piece into the metal bottom of the printer, connect the Z axis limit switch while its easier to get to, then reinstall the rear metal spreader plate and all the screws. Reinstall the Z axis motor by threading it up through into the brass nut and spinning it until the motor is all the way up against the bottom of the printer, reinstall the four screws holding the motor, plug the motor back in, and reinstall the bottom cover. Reinstall the back cover, the heated build platform, and move on to leveling and adjustment of the Z pusher. That's it, from this point on its just leveling and adjustment and test printing to make sure everything is right. The Replicator 1 is a little more effort, it requires removing the Z axis rod caps and sliding the rods out of the printer then pulling the platform out, installing the new platform and sliding the rods back in. Its a bit more fiddly with the number of parts involved but pretty self explanatory and there is other sites describing how to remove and replace the Z axis arms on the Rep 1 so i won't go into too much detail as its the same process except your using this platform and linear bearings in place of aluminum arms. If you have questions post them and i will help as i can!
With this file you will be able to print Makerbot Replicator 1,2,2X Z Axis Upgrade with your 3D printer. Click on the button and save the file on your computer to work, edit or customize your design. You can also find more 3D designs for printers on Makerbot Replicator 1,2,2X Z Axis Upgrade.