Makerbot Replicator 2/2X LCD Display Holder
thingiverse
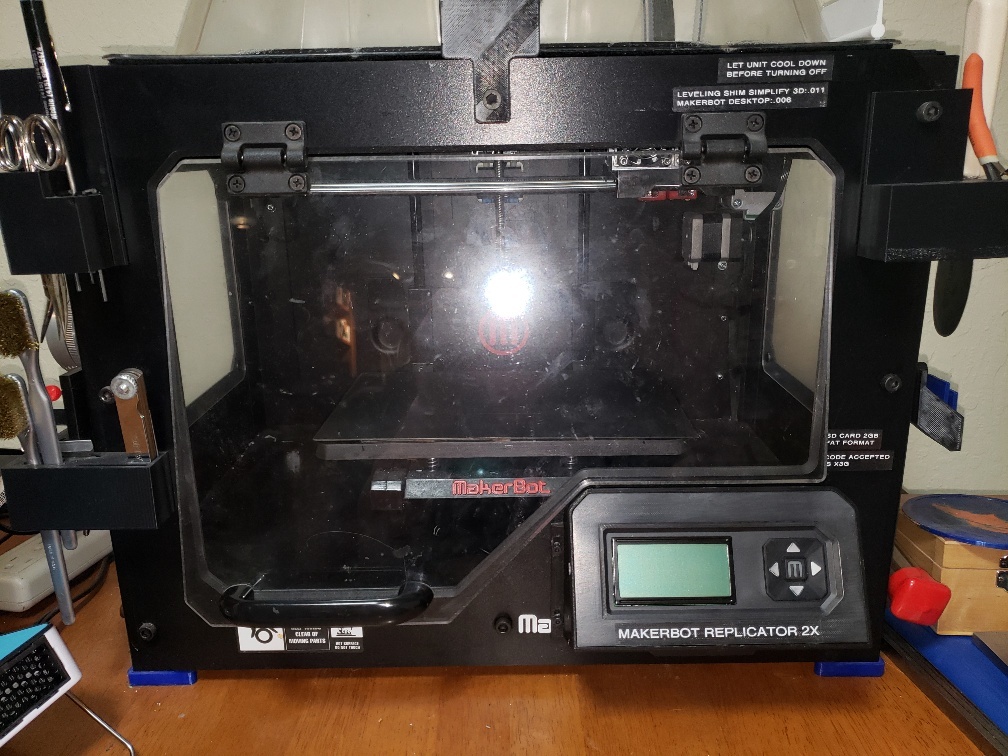
This guide explains how to mount your Makerbot Replicator 2/2X LCD display on the front of the unit at a 30-degree tilt, making it much easier to see the display at this angle. Three STL files are provided for printing in black ABS: 1- The LCD TILT BRACKET supports the LCD display at a 30-degree tilt, with two small holes for tapping and screwing it into place. Six slots are designed for mounting it to the front of the Makerbot. 2- The LCD TILT BRACKET COVER snaps into place after inserting the LCD display into the LCD TILT BRACKET. 3- The LCD BACK COVER FOR RIBBON mounts inside the printer, backed up to the original LCD display cutout. It has two slots for screwing it in using the existing tapped holes. To reach the front of the printer, you'll need a longer 26-pin ribbon cable, which can be purchased on Amazon for $3.69 (uxcell F/F IDC Connector 26 Pin Flat Ribbon Cable 2.54mm Pitch 20 Inch Length). The assembly process is as follows: 1- Buy a longer ribbon cable and M3x0.5 screws to mount the LCD display to the front of the Makerbot. 2- Print the three STL files: A- Position the LCD TILT BRACKET so that its six slots lay flat on the print surface, using 30% infill with a .3mm layer height. Only support is needed at the SD card opening. B- Lay the LCD TILT BRACKET COVER flat, with the tab offsets facing down. Print at .2 layer height with 100% infill to achieve a smooth finish. C- Position the LCD BACK COVER FOR RIBBON so that its mounting slots lay flat on the print surface. Use .3mm layer height and 30% infill. 3- Remove the Makerbot lcd display by unscrewing it, then replace the old ribbon cable with a longer one and feed it through the opening left behind. 4- Tap the LCD TILT BRACKET's two small holes with an M3x0.5 tap. 5- Feed the ribbon through the newly printed LCD TILT BRACKET, which has a stopping point for the top of the Makerbot lcd display unit. Secure it using two M3 screws and the bottom bracket of the lcd display unit to the LCD TILT BRACKET. 6- Insert the LCD TILT BRACKET COVER into the front of the LCD TILT BRACKET, noticing how its tabs snap into small slots. 7- Place the assembled unit over the front opening where the lcd display used to be, marking the location on the front of the Makerbot for the M3 mounting screws. Ensure there's enough clearance for the front window to open slightly and allow room for inserting and removing the SD card when it is opened. 8- Drill and tap the front of the Makerbot for M3x0.5 screws, being cautious not to damage metal brackets behind some locations on the panel. It may be best to remove the front panel to drill and tap safely. Use screws of the correct length (no longer than 9mm). 9- Screw the LCD TILT BRACKET to the front of the Makerbot. 10- Install the LCD BACK COVER FOR RIBBON to the back side of the panel wall that the lcd display is mounted to, using the existing two holes.
With this file you will be able to print Makerbot Replicator 2/2X LCD Display Holder with your 3D printer. Click on the button and save the file on your computer to work, edit or customize your design. You can also find more 3D designs for printers on Makerbot Replicator 2/2X LCD Display Holder.