Makerbot Replicator 2X PLA Fan Mount
thingiverse
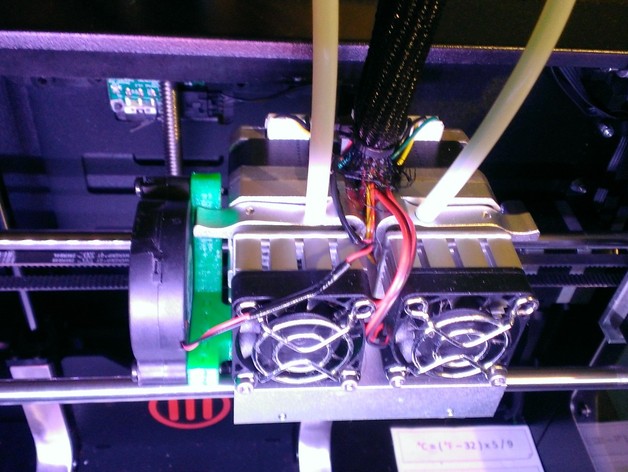
This is a printable mount for attaching a stock Makerbot PLA Active Cooling Fan Blower to the Makerbot Replicator 2X. This upgrade takes about 30 minutes to complete and is designed to work seamlessly with your printer's existing components. Despite any upgrades you've made to your printer, this part will function as intended without issue. Please note that using PLA in a Makerbot Replicator 2X will void any factory warranty. To activate the fan during printing in Makerbot desktop, change the material setting from ABS to PLA. If you experience clogging issues with PLA, try lubricating your filament with vegetable oil. We recommend printing a filament oiler/sponge holder for optimal results. Note that only use vegetable oil, as other oils can combust at temperatures below 230F, causing black "gunk" to build up in your extruder nozzle and thermal barrier tube. To upgrade your Makerbot Replicator 2X with a PLA Active Cooling Fan, follow these steps: Call Makerbot and order a "Replacement Active Cooling Nozzle" (~$10.00), a "Replacement PLA Active Cooling Fan Blower (Turbo Fan)" (~$25.80), and the two screws that connect the fan to the mount. - Order bolts from a reliable retailer, such as McMaster-Carr, as Makerbot may forget to send them. - Bolt information: 6-32, 25mm (.985") long threads, Philips head 6.56mm (.26") dia Print the PLA Active Cooling Mount designed for your printer. Unscrew the left-side fan and heat sink assembly. Place the printed mount in place of the stock cylinder spacers. Reassemble the printer. Attach the "Replacement PLA Active Cooling Fan Blower (Turbo Fan)" to the mount with the ordered bolts. Gently slide the "Active Cooling Nozzle" into the bottom of the "Replacement PLA Active Cooling Fan Blower (Turbo Fan)". Flip the printer over and remove the Mighty Board cover. Plug the wire from the fan into the last open slot on the Makerbot Mighty Board. Reinstall the Mighty Board cover and turn the printer upright. Tuck the fan wire into the black mesh sleeve, starting at the Mighty Board and working towards the fan. Adjust your slicing software by plugging in the printer via USB to avoid impacting the extruder head. Using Makerbot Desktop: Plug in printer via USB cable. Adjust X offset +/- 30mm or settings to prevent the extruder head from traveling too far to the left. We recommend adjusting settings before installing the fan to confirm you're making the correct changes. You'll know it's working when you can see the extruder carriage moving closer or farther from the edge of the printer on the steel rods. Using Simplify 3D: Edit process settings > scripts > Adjust the x value from -130 to -90, as positive numbers represent movement to the right (from the front). Note: Downloadable print file is set for the right extruder head with PLA material. Settings: -Speed: 25% (1200 mm/min) -Quality: Standard -Raft: Unchecked -Support: Unchecked -Layer Height: 0.20 mm -Infill: 10% (Rectilinear) -Number of Shells: 2 -Material: --Right: Makerbot PLA --Left: Makerbot ABS -Extruder Temperature: --Right: 235C --Left: 230F -Bed Temp: 80C
With this file you will be able to print Makerbot Replicator 2X PLA Fan Mount with your 3D printer. Click on the button and save the file on your computer to work, edit or customize your design. You can also find more 3D designs for printers on Makerbot Replicator 2X PLA Fan Mount.