Makerfarm Magma Hotend Fan Duct w/ Auto-Bed Leveling Servo Mount and LED's
thingiverse
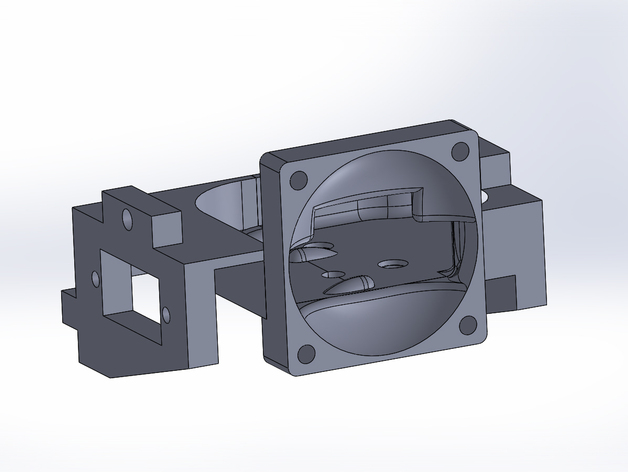
Designed/Inspired from various other designs as a fan ducting for Makerfarm printers using the Magma Hotend and Auto-Bed Leveling. There is also a version with holes for flush mounted 5mm LED's to the inside of the ducting. For the Z-Probe holder I used Zennmasters Design, http://www.thingiverse.com/thing:167430/#files, but due to the tight fit I had to take a sliver off the top where it connects to the servo. Parametric 9g Servo mount for Makerfarm i3 with auto bed levelinghttp://www.thingiverse.com/thing:167440 MakerFarm Prusa i3 Magma cooling system remixhttp://www.thingiverse.com/thing:161066 Customized Makerfarm i3 X-Carriagehttp://www.thingiverse.com/thing:232872 Instructions Forewarning, this can be a pain to assemble!!!!! But, once its in place it is so nice to have. When it comes to mounting this to the carriage, I first wired in the LED's with a bit of slack in the cables to allow the wire to run around the hotend without touching, then applied a bit of super glue to hold the LED's in place on the ducting. At this point both the Left and right pieces will be connected but only by the wires attached to the LED's. In order to get the right Duct in I had to take the nut and pre-thread it around the length of the spacing in the wooden mount. I then worked the ducts around the hotend till i could attach the right duct. and tightened it down,it should fit in nice and easy. Now to get the left in make sure the servo is not attached and work the left side into place, with the nut pre-threaded to match the slot in the ducting. Once you get it in, this can be tricky, line up the bases and tighten it in place making sure the base locks into the clips. The clips might break, not a big deal, once the fan adapter is on it should hold it in place well enough. In order to get the servo and endstop on, I pre-attached the endstop to the probe then fed the probe threw the servo hole giving enough room to tighten the probe to the servo. Once it is tightened I just fed the servo-probe back threw the servo mount hole. I had to take a sliver of plastic off the probe in order to get it to fit back threw the mount hole. Then just screw down the servo and make some minor adjustments. Once the ducting is in place take fan adapter, fan, and fan cover and screw them in place. Make sure the adapter is holding the base of the ducting in place, at which point you should be done.
With this file you will be able to print Makerfarm Magma Hotend Fan Duct w/ Auto-Bed Leveling Servo Mount and LED's with your 3D printer. Click on the button and save the file on your computer to work, edit or customize your design. You can also find more 3D designs for printers on Makerfarm Magma Hotend Fan Duct w/ Auto-Bed Leveling Servo Mount and LED's.