Makerfarm Pegasus X-axis Linear Rail + Bowden Conversion
thingiverse
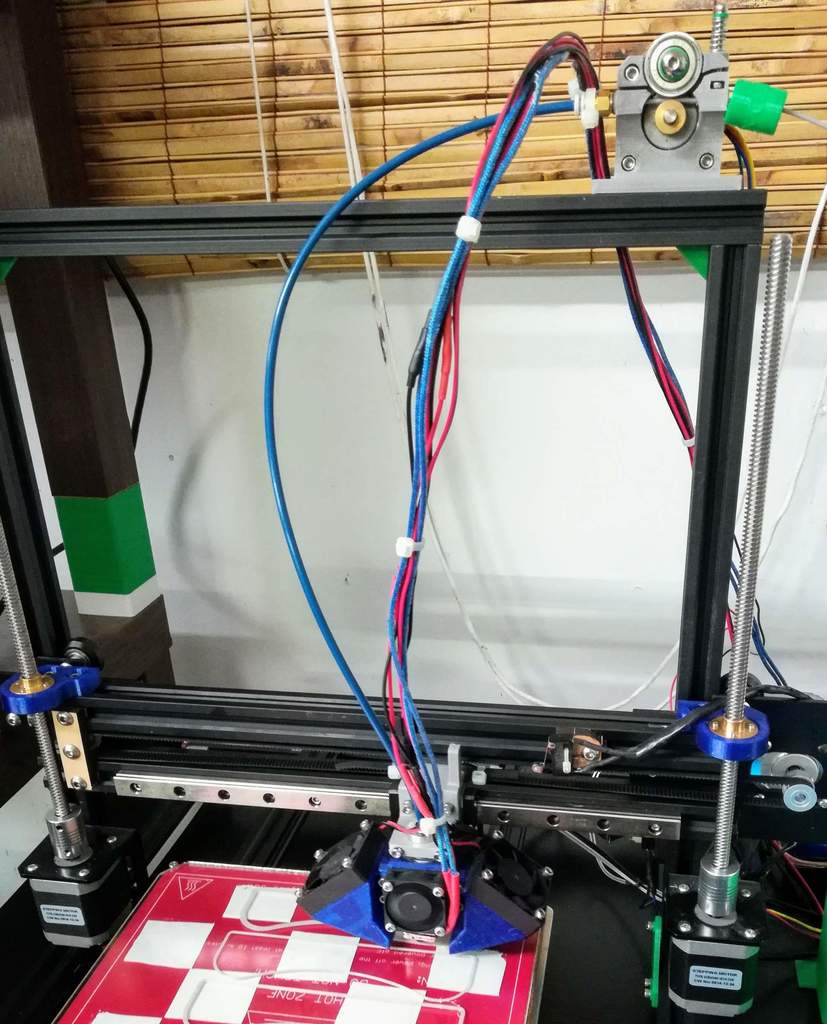
I converted my Makerfarm Pegasus 8 x-axis to a linear rail and swapped to a bowden extruder to lighten the x-carriage. This design requires that you move the x-axis limit switch to the front of the top rail. I recommend attaching the belts prior to fastening the x-carriage to the linear rail cart, then tension the belt with the slotted holes on the x-axis motor mount. The bowden extruder linked below allows for using the same drive gear that is supplied with the makerfarm extruder. However, you will need to drill out the printed extruder part for the bowden tube push fitting that comes with the bowden tube linked below. The printed part is designed for M5 but the fitting that comes with the bowden tube is M6. Linear rail (300mm w/ H-type carriage): https://www.amazon.com/gp/product/B07SN6MT6T/ref=ppx_yo_dt_b_asin_title_o02_s00?ie=UTF8&psc=1 Bowden tube: https://www.amazon.com/gp/product/B086YPDHMF/ref=ppx_yo_dt_b_asin_title_o02_s00?ie=UTF8&psc=1 Bowden extruder: https://www.thingiverse.com/thing:767951
With this file you will be able to print Makerfarm Pegasus X-axis Linear Rail + Bowden Conversion with your 3D printer. Click on the button and save the file on your computer to work, edit or customize your design. You can also find more 3D designs for printers on Makerfarm Pegasus X-axis Linear Rail + Bowden Conversion.