Makergear M3 Cooler to M2 Conversion
thingiverse
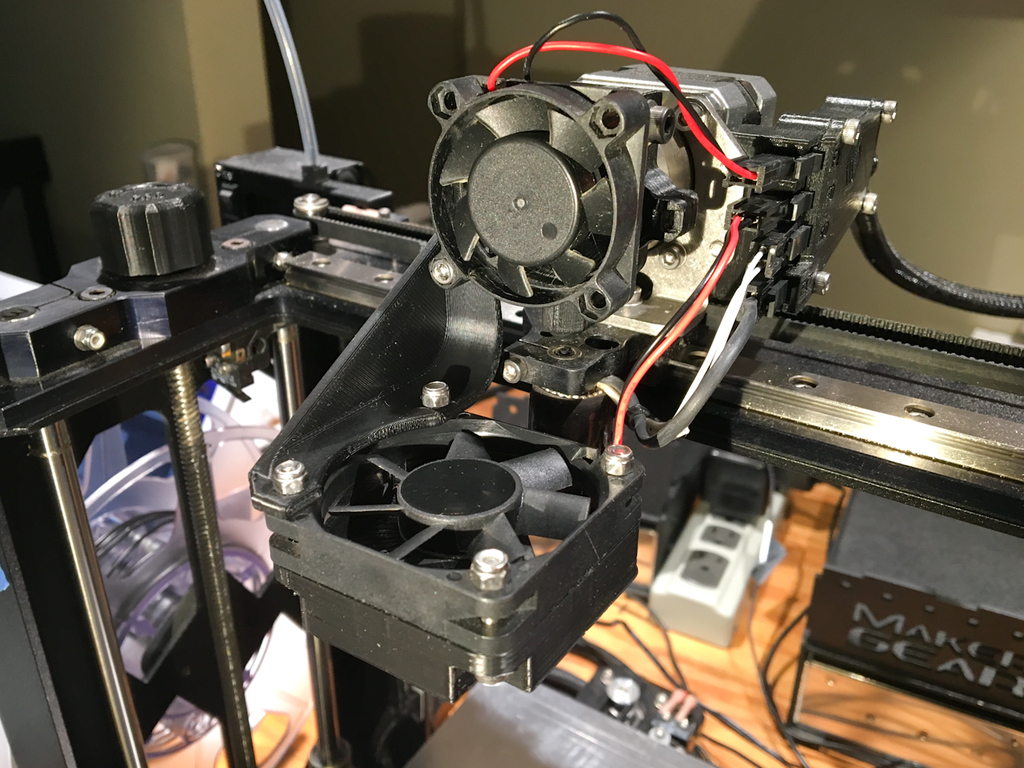
This is a conversion to run the Makergear M3 cooler setup on an M2 with a V4 nozzle. This was designed to use the stock 50mm bed fan of the M2 though so the SE Cooling Duct.STL **has to be enlarged to 126%** in your slicer before printing. Failure to do this step and the cooler will not fit the fan, the bracket, or line up to your nozzle. The 50mm stock fan mounts to the new cooler and bracket with (1) M3x25mm and (3) M3x20mm bolts . The bracket mounts to the extruder drive with a M3 x 40mm bolt. (a longer bolt may be needed if you run fan guards.) The bracket mounts in between the extruder drive and the 40mm extruder fan. The bracket may (or may not) hit the older style octagon z knobs when the head is parked. (I no longer have an older style one so I could not test for this). See the 3rd picture for reference. This bracket was designed to fit printers with the stock extruder but I have not actually printed with it as I used the modified extruder driver with a lightly different bracket shown in the 5th picture. These pictures here are just for mock up but the cooler location is exactly the same so the results should be the same. (Results with the new cooler can be seen below.) **Warning-** there are no fan guards with this setup. I do not use them because they restrict airflow and make the fans noisy. ***SE_Cooling_Duct.STL created by "Makergear", all rights and attributions for the 3D model go to Makergear.***
With this file you will be able to print Makergear M3 Cooler to M2 Conversion with your 3D printer. Click on the button and save the file on your computer to work, edit or customize your design. You can also find more 3D designs for printers on Makergear M3 Cooler to M2 Conversion.