Makey Controller Shell (with or without nuts)
thingiverse
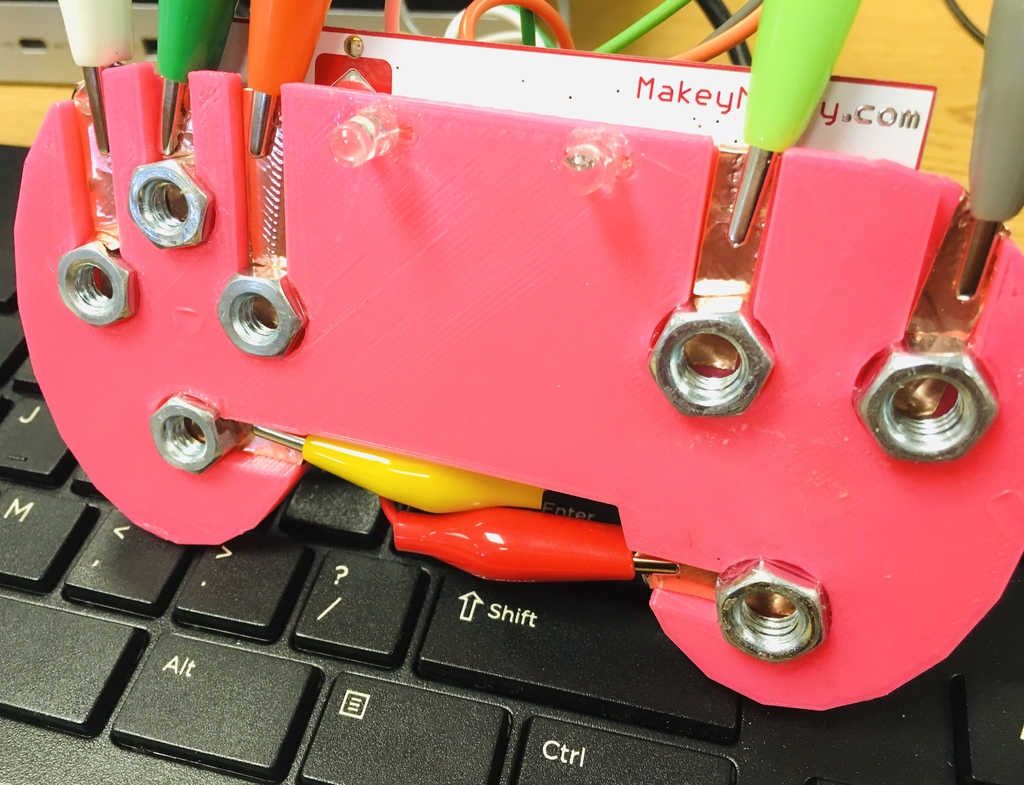
When I ask my students what they want most from a Makey Makey accessory, a common answer is a video game controller. One of the most exciting ways to integrate the Makey Makey, a USB connected multi-ported Invention Tool, is to play games made in Scratch or other platforms using a controller. By using a 3D printed design and conductive material, we set out to make a useful and slightly weird controller. Materials: Makey Makey Conductive materials: copper tape, masking tape, jumper wire, LEDs, Playdough, nuts (1/4'' and 5/16'') and many more to consider! After trying many designs, we finally got a game controller that fits our users perfectly. The first design feature was an embedded path in the layout of a classic video game controller. This path will fit conductive tape or playdough and also has a thin edge along the outside of the shell so that alligator clips can be attached. We started with a rectangular shape, but quickly moved to a more ergonomic design. The latest version has space for six buttons and the ground. The second key feature of the design is a shelf built into the bottom of the board to hold the Makey Makey in place, while still leaving room for wiring. Print one from the link included, and make sure to add scaffolding to your print to support the bracket and keep the top smooth. To make this project easy and student-friendly, connect the Makey Makey with alligator clips on the edges, slide the controller into place behind the 3D printed board, and connect your wires. The four spots on the left side were designed for the directional arrows, then add two buttons on the right side to mirror the Makey Makey's left click and space bar. The final buttons on the bottom left and right were meant for the ground. By keeping the base of a player's thumbs on those pads, she will make all the other buttons work when pressed. (On later designs, we realized that one ground was enough, so the space on the left is gone, and we even added another ground underneath!) Once everything is connected, add enough Playdough to make a path from the alligator clip to the button, making a satisfying squishy button for each path. Be sure not to add too much Playdough; you have to keep your buttons separated. Adding copper tape is an option to make a conductive path from the buttons on your controller to the alligator clips. Cut pieces to fit the spaces, leaving room to wrap the outer edge of the controller. This allows you to have a path from your alligator clip to whatever material you plan to use as your "button". Ideas might include anything metal like using nuts as a conductive button. We had an idea that to fit them tightly into place, we would design the holes in the 3D board slightly smaller and then melt them into place. This is done by placing a heated soldering iron tip on the nut, allowing it to heat up, and then pressing it into the slightly melting 3D material. After looking at the result, we went and reinforced the nuts with a bit of superglue around the outside. Be sure not to get the superglue between the contacts of the copper tape and the nut. These two items need to be pressed together snugly. The end result looks great and has an excellent weighted feel. See full project at: https://www.instructables.com/id/Makey-Controller-Shell-with-or-Without-Nuts
With this file you will be able to print Makey Controller Shell (with or without nuts) with your 3D printer. Click on the button and save the file on your computer to work, edit or customize your design. You can also find more 3D designs for printers on Makey Controller Shell (with or without nuts).