Making History: Recreating Artifacts from History
thingiverse
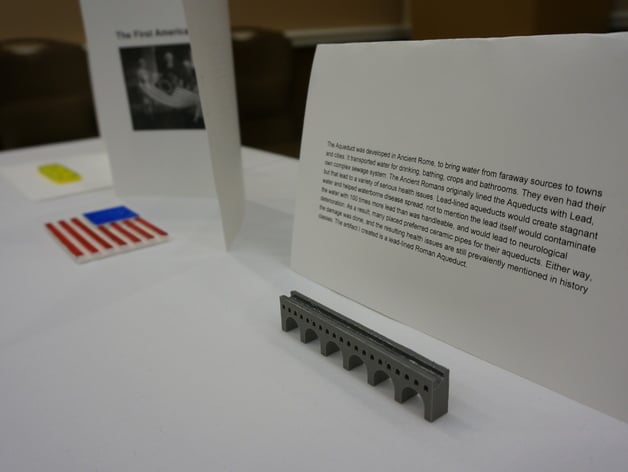
Here is a rewritten version of the text in a more readable format: **Project Overview** Making History: Recreating Artifacts from History **Objective** Students will learn about a culture from any period of history and recreate an artifact as a 3D model. They will also write a paragraph describing the artifact's relation to the culture they researched. **Materials Needed** * 3D printer * Cardstock for paragraphs * Optional: food, prizes, decorations **Step-by-Step Instructions** 1. **Paragraph Writing (1 hour)**: * Students research a culture and write a paragraph about what they learned. * The paragraph should include the culture researched, what was learned, the artifact created, and how it relates to the culture. * Instructors will assist with typing and proofreading if needed. 2. **Model Decoration and Setup (1.5 hours)**: * Students decorate their 3D models using materials such as paint, crafts, or objects from home. * Instructors will assist with decorating advice and artistic techniques. * Students set up their exhibit space with the finished model and paragraph on cardstock. 3. **Exhibition (30 minutes)**: * Students walk around and see what everyone created. * There are two options for exhibition format: a group presentation or a self-guided tour with worksheets to complete. 4. **Goodbye (15 minutes)**: * Thank students for participating and send them off with their projects. * Prizes can be distributed if desired. **Assessment** * Students will deliver their 3D printed artifact and paragraph on cardstock. * Instructors will assess the artifacts and paragraphs based on the rubric provided. **References** * Students will research a culture from any period of history during the event. * Instructors should have familiarity with Tinkercad and 2D digital art software. **Project Details** * Project name: Making History * Project overview: Students choose a culture, research it, and recreate an artifact as a 3D model. * Objectives: + Learn about the culture and artifact researched. + Learn 3D model creation, vector art, and turning vector art into a 3D model. * Recommended age group: 8 and up * Subjects: History, Art and Design * Skills learned: 3D modeling, 2D vector art, brainstorming and planning.
With this file you will be able to print Making History: Recreating Artifacts from History with your 3D printer. Click on the button and save the file on your computer to work, edit or customize your design. You can also find more 3D designs for printers on Making History: Recreating Artifacts from History.