Makita Battery to Ryobi Tool adapter
thingiverse
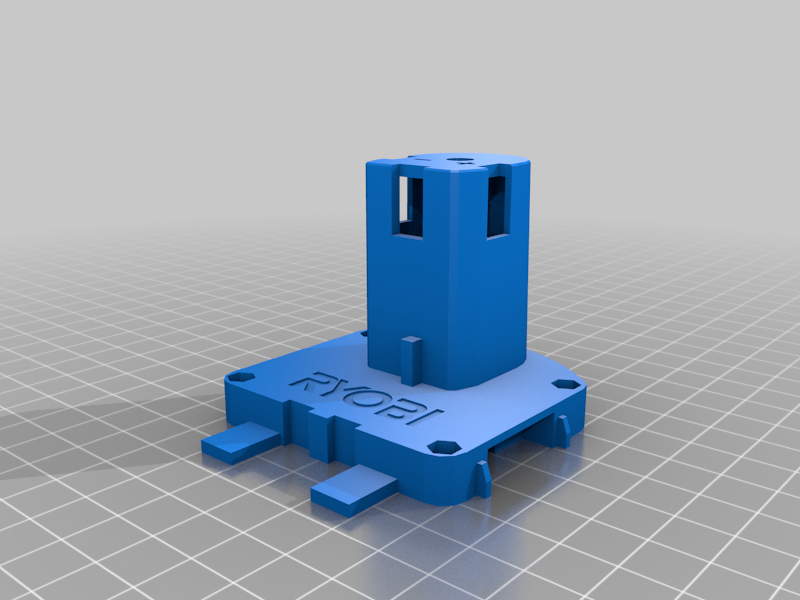
I printed a bunch of these so far, probably close to 10 or so. (thanks Simhopp) Overall they work great, but there were a few things I changed along the way, so I thought I would share, Everything was done in tinkercad, so I wasn't too concerned about being pretty. First, I blocked off the voltage tester part, I wasn't going to install that, so I figured might as well get rid of it. Next, I made a little more room for the locking tabs, so there should be no need to sand and file to get those to work better. On the center section where you attach a piece of metal and solder the wires, I angled the tabs in slightly to give the wire and solder a little more room when you put it all tegether. I'll upload a picture on the next batch I make so it makes more sense. I modified the spots where you bolt the two sections together, where the bolts and nuts go. I recessed the spot where the nut goes a little deeper so they would sit more flush. I also thickened the base a little to gain the space for the nuts. I print them from PETG for strength, heat resistance, UV resistance, etc. On the original model's comments, someone mentioned using drywall corner bead for the metal contact area, I tried this and it works great (thank you), you do have to sand/clean the metal before soldering though, for it to stick. I bent the bead flat and kept it double layer. This made it extremely rigid and strong.
With this file you will be able to print Makita Battery to Ryobi Tool adapter with your 3D printer. Click on the button and save the file on your computer to work, edit or customize your design. You can also find more 3D designs for printers on Makita Battery to Ryobi Tool adapter.