Makita MLT100N Table Saw Insert Zero Clearance
thingiverse
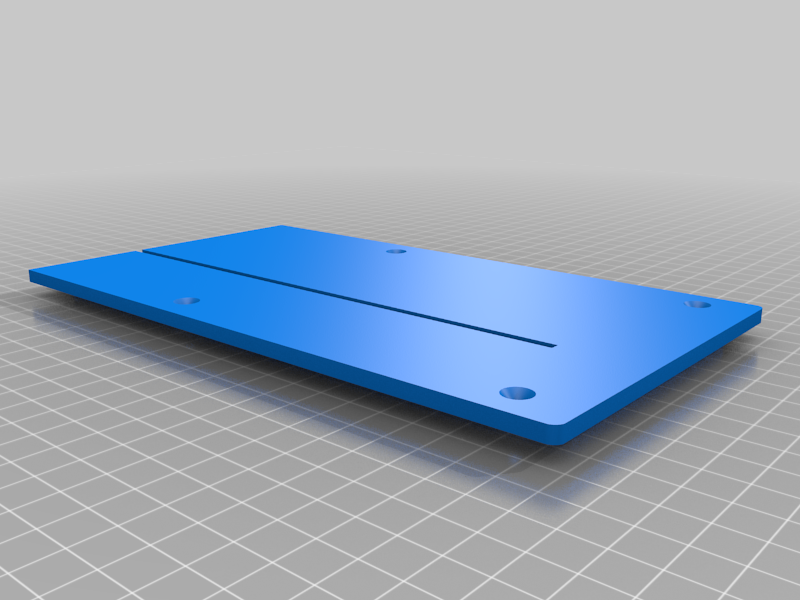
This is a zero clearance insert I designed to replace the flimsy OEM insert on a Makita **MLT100N** table saw. I do not know if this is compatible with the **MLT100** or not, but it might. -You'll notice that the screw holes are counterbored from underneath as well as the usual countersunk top. This is because I stripped out the thread in the aluminium casting of the table and installed M3 Rivnuts which sit proud of the surface. I can't imagine they'll be a problem if you haven't done the same. -I cut my riving knife down to the exact hight of the blade so I can make dados without removing it. -If you're using the riving knife as it is from the factory, you'll need to make an extra cut **(AFTER GLUEING!)** extending the blade slot to the back of the insert, to allow it to be installed under the guard. -The FreeCAD file is included for your convenience. PRINTING IT: It prints in two parts, a long bit and a short bit that join together using 'dowels' (nails, threaded rod, wood, whatever you like) Each part has a corresponding file to use as a body to enforce areas of 100% infill So you'll print 'ZC90 object long.stl' using 'ZC90 infill enforcer long' loaded as a modifier, which ensures that the area around the blade, and the screw holes, are solid. The rest of the model is 20% gyroid infill, with 3 top layers, 5 bottom layers , and 3 perimeters. I printed it at 0.2mm layer hight. You will also want to use a wide brim, glue, and any other anti-curl tactics you employ. You'll be printing it face down, so you don't want the corners curling up. ASSEMBLING IT: Clean up the brim around the exterior and in the countersinks, and clean out the end holes. Cut three 3mm dowels to 35mm in length. Insert them into the end holes of one part with some epoxy. Coat the end of the other part, and the dowels, with epoxy, and push them together. Ideally try to find a way to clamp them flat on a surface. Use wax paper or something else epoxy won't stick to, on the surface. Remove the parts from the surface and scrape off any stray resin so it's flat. Install as with the factory insert. You may find the blade shaves off some material on your first time raising it. If it's not raising smoothly, you may need to take it out and work on the slot with some sandpaper. to allow a little extra room for the riving knife to clear.
With this file you will be able to print Makita MLT100N Table Saw Insert Zero Clearance with your 3D printer. Click on the button and save the file on your computer to work, edit or customize your design. You can also find more 3D designs for printers on Makita MLT100N Table Saw Insert Zero Clearance.