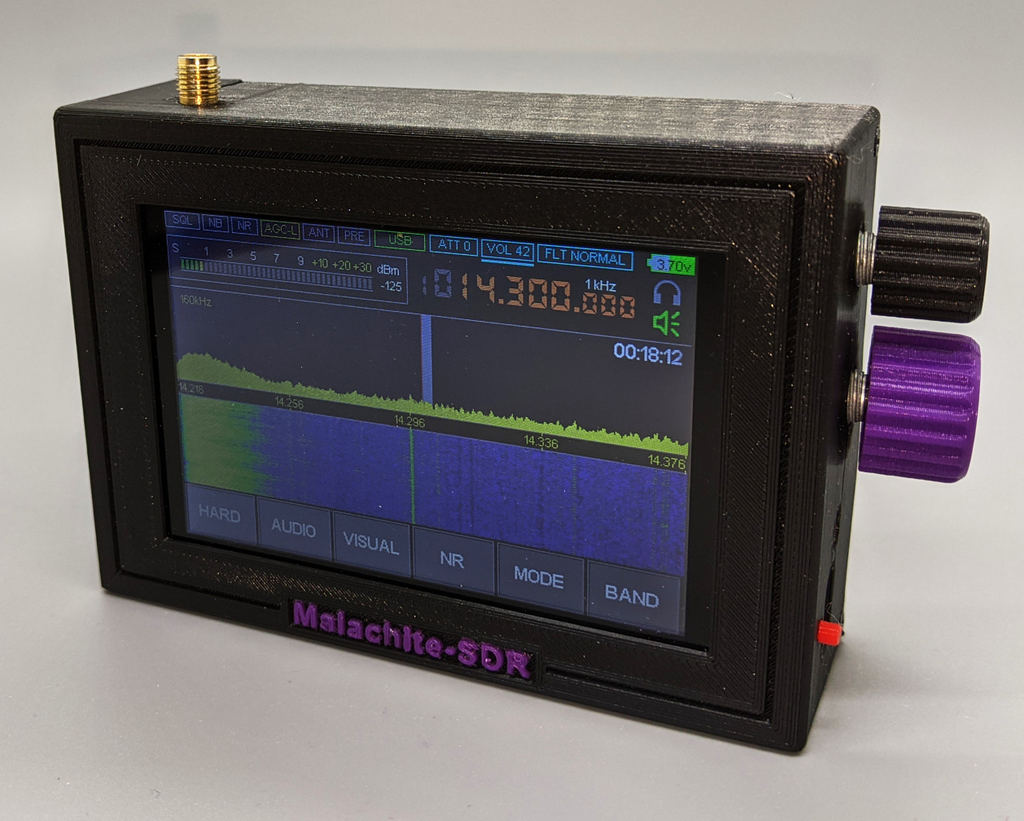
Malachite-SDR case, for "version 3" board
thingiverse
Changelog: Case (top and bottom) v3 - initial release v4 - slight tweeks to the location of the antenna connector hole and board edge stop for better fit. Compatibility: This case was designed around the Malachite (Chinese clone, version 3) SDR receiver. It will NOT fit other versions due to different locations for the antenna connecor and power button. The charge indicator is visible though the engraved line surrounding the display... the bottom of the engraved line is only 0.5mm thick where it passes over the top of the LED. The 0.5mm PLA is transparent enough that the LED is easily visible. There are long and short versions of the knobs... use the short version if your encoders are not straight to prevent the edge of the knob from hitting the case when pressed. Use the long version (sits closer to the case) if your encoder shafts are straight. There are three versions of the button actuator, depending on where the power button sits. The 1mm will work in every case but depending on how far back power button sits on your particular board, the button actuator may not protrude far enough to suit. Required board modifications: I don't know who had the bright idea to lay the board out so the antenna connector base sits below the level of the top of the board. As-is, the barrel is (usually) not long enough to protrude far enough through the case to allow a male SMA to fully screw on. For this reason, the antenna connector MAY need to be moved up so that the base is flush with the upper edge of the circuit board. Since the connector is attached by four legs (two on each side of the board and all four were soldered on my board) plus the center pin, this is not easy and I found it easier and safer to cut the mounting legs, remove the connector, clean off the pads and replace the connector with a new one at the proper height. If you do not want to move the connector, try it as-is..... it might just make it but you might have to open up the hole in the two case halves to clear the threads. The power button posed a similar challenge, but I could not find a SMD button with a long actuator to replace it with. In the end I designed a button actuator that is sandwiched between the case and the board, with an actuator stem that passes through a hole and can be pressed from outside the case. NOTE: I recently obtained a second version 3 board and found that there are some subtle differences that might affect the fit of this case. The most important difference is that the power button is larger and set slightly farther back from the edge of the board (requiring the 1.5mm button actuator). Also, on this board the antenna connector DOES (barely) protrude far enough to allow a male SMA to be attached. Parts: 1. 50mm diameter 8 ohm speaker, ~8mm thick or less. 2. 3AH LiPo battery, 60mm X 40mm X 10mm (from Ebay) 3. 2.4mm JST female connectors with pigtails (available on Amazon or Ebay). BE CAREFUL.... when used with commonly available female connectors with pigtails, the board connector on both my version 3 boards is BACKWARDS with red = negative and black = positive. You can of course wire the battery with black = positive but to avoid any confusion, I removed the power connector and flipped it around so red = positive. 4. Small flat head self tapping screws. I used M2.3 X 8mm from a kit of small screws I found on Amazon. 5. Rubber feet (optional, but helps with audio if the receiver is lying flat). Printing: All parts are printed conventionally, with the obvious flat portion against the build plate. I used standard Inland PLA, printed at 220 degrees with the build plate at 60 degrees for the first layer and 55 degrees for the rest of the print. It helps adhesion to slow the first layers down and enable jerk control. I have provided two versions of the case top. One STL file is the case and "Malachite-SDR" lettering all in one, as well as separate STL files for the case and the letters (if you want to print in two colors like I did). The "volume knob" is smaller than the "tuning knob" but you can also use the "volume knob" as the tuning knob if you prefer. They are push on and sized to fit splined encoder shafts (which might need slight adjustment). Assembly: 1. Place the button actuator through the case hole. It should be oriented so it sits relatively flat against the inside of the case with the bottom of the square portion touching the back side of the front surface of the case. 2. Slide the board into place and check to make sure the button actuator operates the button. Since the encoder shaft holes are printed vertically, they may not be have printed exactly round and you may have to use a ream or a knife to get rid of a small flat area. 3. Lay the battery into place. It is sandwiched between the speaker location tabs and the board itself. The case bottom also has locating tabs to hold the battery in place. If your battery is thinner than the 10mm the case was designed for, use a small piece of foam to keep things from rattling. 4. To aid assembly, secure the speaker in place in the case bottom (you can use a piece of tape or small "O" rings over two speaker guides like I did) and then with the battery in place, drop the case bottom into the case top and secure with four flat head self tapping screws. You could always glue the speaker in place but I like to leave things removable. 5. CAUTION... the two electrolytic capacitors along the top edge of the board are not secured very well and it is very easy to knock them loose while handling the board. If they come loose, they will probably rip the pads off the board and tear the very small foil, breaking one or both channels of the headphone circuit. This is repairable with good micro soldering skills but IT IS NOT EASY. I secured mine with electronics grade RTV after repairing the foil... don't ask. Do NOT use regular acetic acid based RTV, which can form stray conductive paths in the presence of moisture as it cures. Enjoy!
With this file you will be able to print Malachite-SDR case, for "version 3" board with your 3D printer. Click on the button and save the file on your computer to work, edit or customize your design. You can also find more 3D designs for printers on Malachite-SDR case, for "version 3" board.