Malolo's screw-less / snap fit Raspberry Pi 3 Model B+ Case & Stands
cults3d
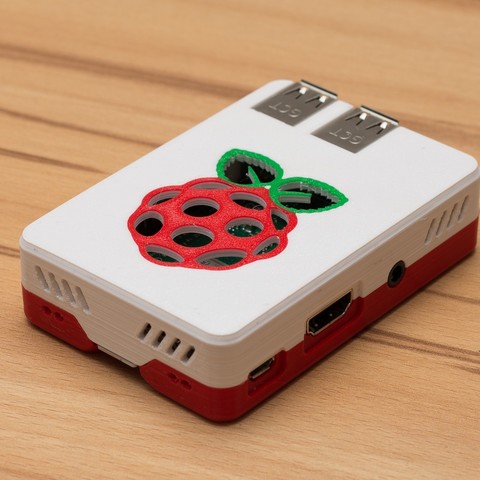
There already is a plethora of raspberry pi cases on the internet, so we don't need another one - but I created one anyway because I wanted to and had a lot of fun doing it. I aimed for several key features: Easy printing without support, top and bottom layers that can be printed on a print surface, no screws or glue needed, a slim design, good ventilation without a fan, and an attractive appearance. I tested this design with 0.2mm and 0.1mm layer heights, both of which worked well. I recommend using PETG for better heat resistance. This case was designed for the Raspberry Pi 3 Model B+, but it may also work for models with similar layouts, although I can only verify its performance on this specific model. I have a companion design for the Raspberry Pi 4 available as well. If you have any questions or suggestions, please don't hesitate to reach out. The case comes in several different designs for the top and bottom layers. For the bottom layer, there are options without ventilation holes, hexagonally shaped ventilation holes, simple slot-shaped ventilation slots, base design without ventilation holes, and hexagonal shaped ventilation holes. The top layer also offers similar design variations including a raspberry logo as ventilation holes. For the stands, I designed three different versions: vertical stand, horizontal stand, and flat stand. The vertical stand has an additional feature that allows you to route the Raspberry Pi status LEDs to the front, which requires printing two separate files with transparent filament and sliding them into the corresponding holes of another file. To achieve a multi-color print without special hardware, I learned that you can easily create a multi-material print by using Prusa Slicer. Here's how it works: First, set up your printer settings in Prusa Slicer by going to the "Printer" tab and selecting your printer model. Then, go to the "Materials" tab and add each material one at a time, assigning them to different extruders. Next, go back to the "Print" tab and select the object you want to print. Finally, click on the "Slice now" button to start the slicing process. When your printer reaches the M600 command, it will pause outside the print area and prompt you to switch filament. This is where things can get a bit tricky - the order in which filaments are changed is not consistent, so I recommend adding the M600 command to your custom tool change code setting as follows: "M600 ; Switch to Extruder [next_extruder]". After exporting and opening the G-code file in a text editor, search for the M600 command and create a checklist for each filament change to keep track of which filament needs to be inserted next. Keep in mind that extruder numbers in the G-code file are zero-based, so "Extruder 0" in the G-code file is actually "Extruder1" in the Prusa Slicer UI. When using the Original Prusa i3 MK3, the printer will extrude a lot of filament right after you confirm completion of the filament change to build up nozzle pressure. To avoid this extruded filament from being dragged over to your print and making a mess, don't remove the filament that is extruded during the filament change, so it will be easier to grab the whole thing. This all might sound complicated, but once you understand how it works, it's actually pretty straightforward. I used the following naming scheme for STL files: Function: Bottom = bottom part Top = top part Designs: Base = base design without ventilation holes Hex = hexagonally shaped ventilation holes Logo = raspberry logo as ventilation holes Slots = simple slot-shaped ventilation slots Multi Material: SM = single material MM = multi-material (X = number of different colors) Accessories: Cam = contains a slot for camera cable Disp = contains a slot for display cable Pins = contains a slot for access to the pins
With this file you will be able to print Malolo's screw-less / snap fit Raspberry Pi 3 Model B+ Case & Stands with your 3D printer. Click on the button and save the file on your computer to work, edit or customize your design. You can also find more 3D designs for printers on Malolo's screw-less / snap fit Raspberry Pi 3 Model B+ Case & Stands.