Manual Multi Color and Transparent Fixation techniques - Cura slicer
thingiverse
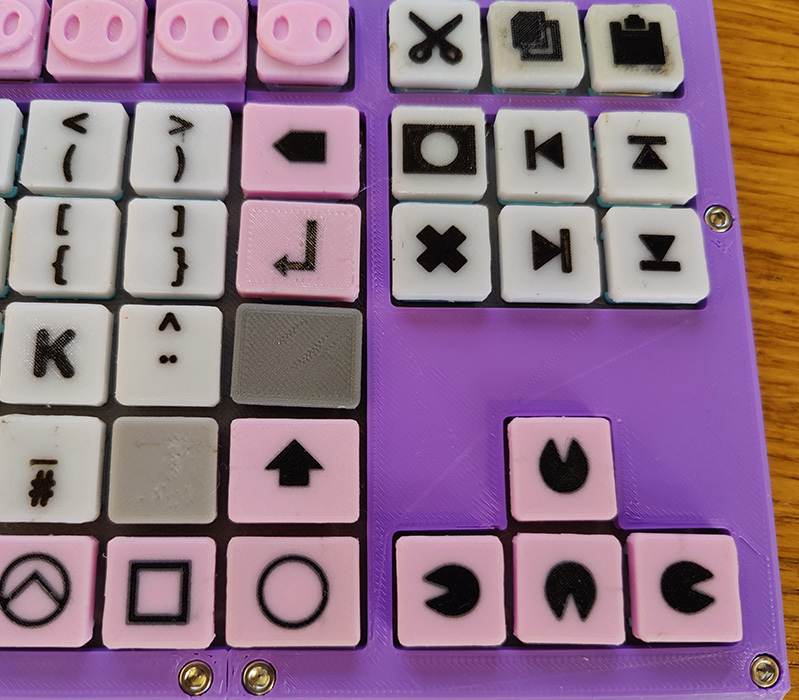
I made these multicolor keycaps by a simple hack in the gcode. I also used transparent plastic to improve the text quality. MULTICOLOR TUTORIAL 1. When creating the model in the 3d editor (like blender), create one .stl export for each color. 2. In Cura slicer: Open all the models, select them all (ctrl + A), Menu bar>Edit>Merge models. Make sure the preview looks good. Save gcode file. 3. With a text editor (like VS Code or Notepad++) open the gcode. Make a search (ctrl + F) for "stl", it should now be easy to find each line where the models change. Add "M600" after each model, except the first, se example below: ### G0 F4800 X125.951 Y111.272 G1 F2100 E31.35931 M600 ; --PAUSE ;MESH:keycaps_lay2a.stl G0 F4800 X126.62 Y111.741 ### -M600 does not work on all printers, look up what yours use. -I recommend to have a cube close to the 0,0,0 coordinate. This removes some blobs that can happen after color change. TRANSPARENT FIXATION It is hard to put detail on the first layer. The trick is simply to print one layer transparent plastic first. Make a slice of your model that is the same height as the print use (like 0.15mm)
With this file you will be able to print Manual Multi Color and Transparent Fixation techniques - Cura slicer with your 3D printer. Click on the button and save the file on your computer to work, edit or customize your design. You can also find more 3D designs for printers on Manual Multi Color and Transparent Fixation techniques - Cura slicer.