Manual Safety Block (EK Archery RX Adder)
prusaprinters
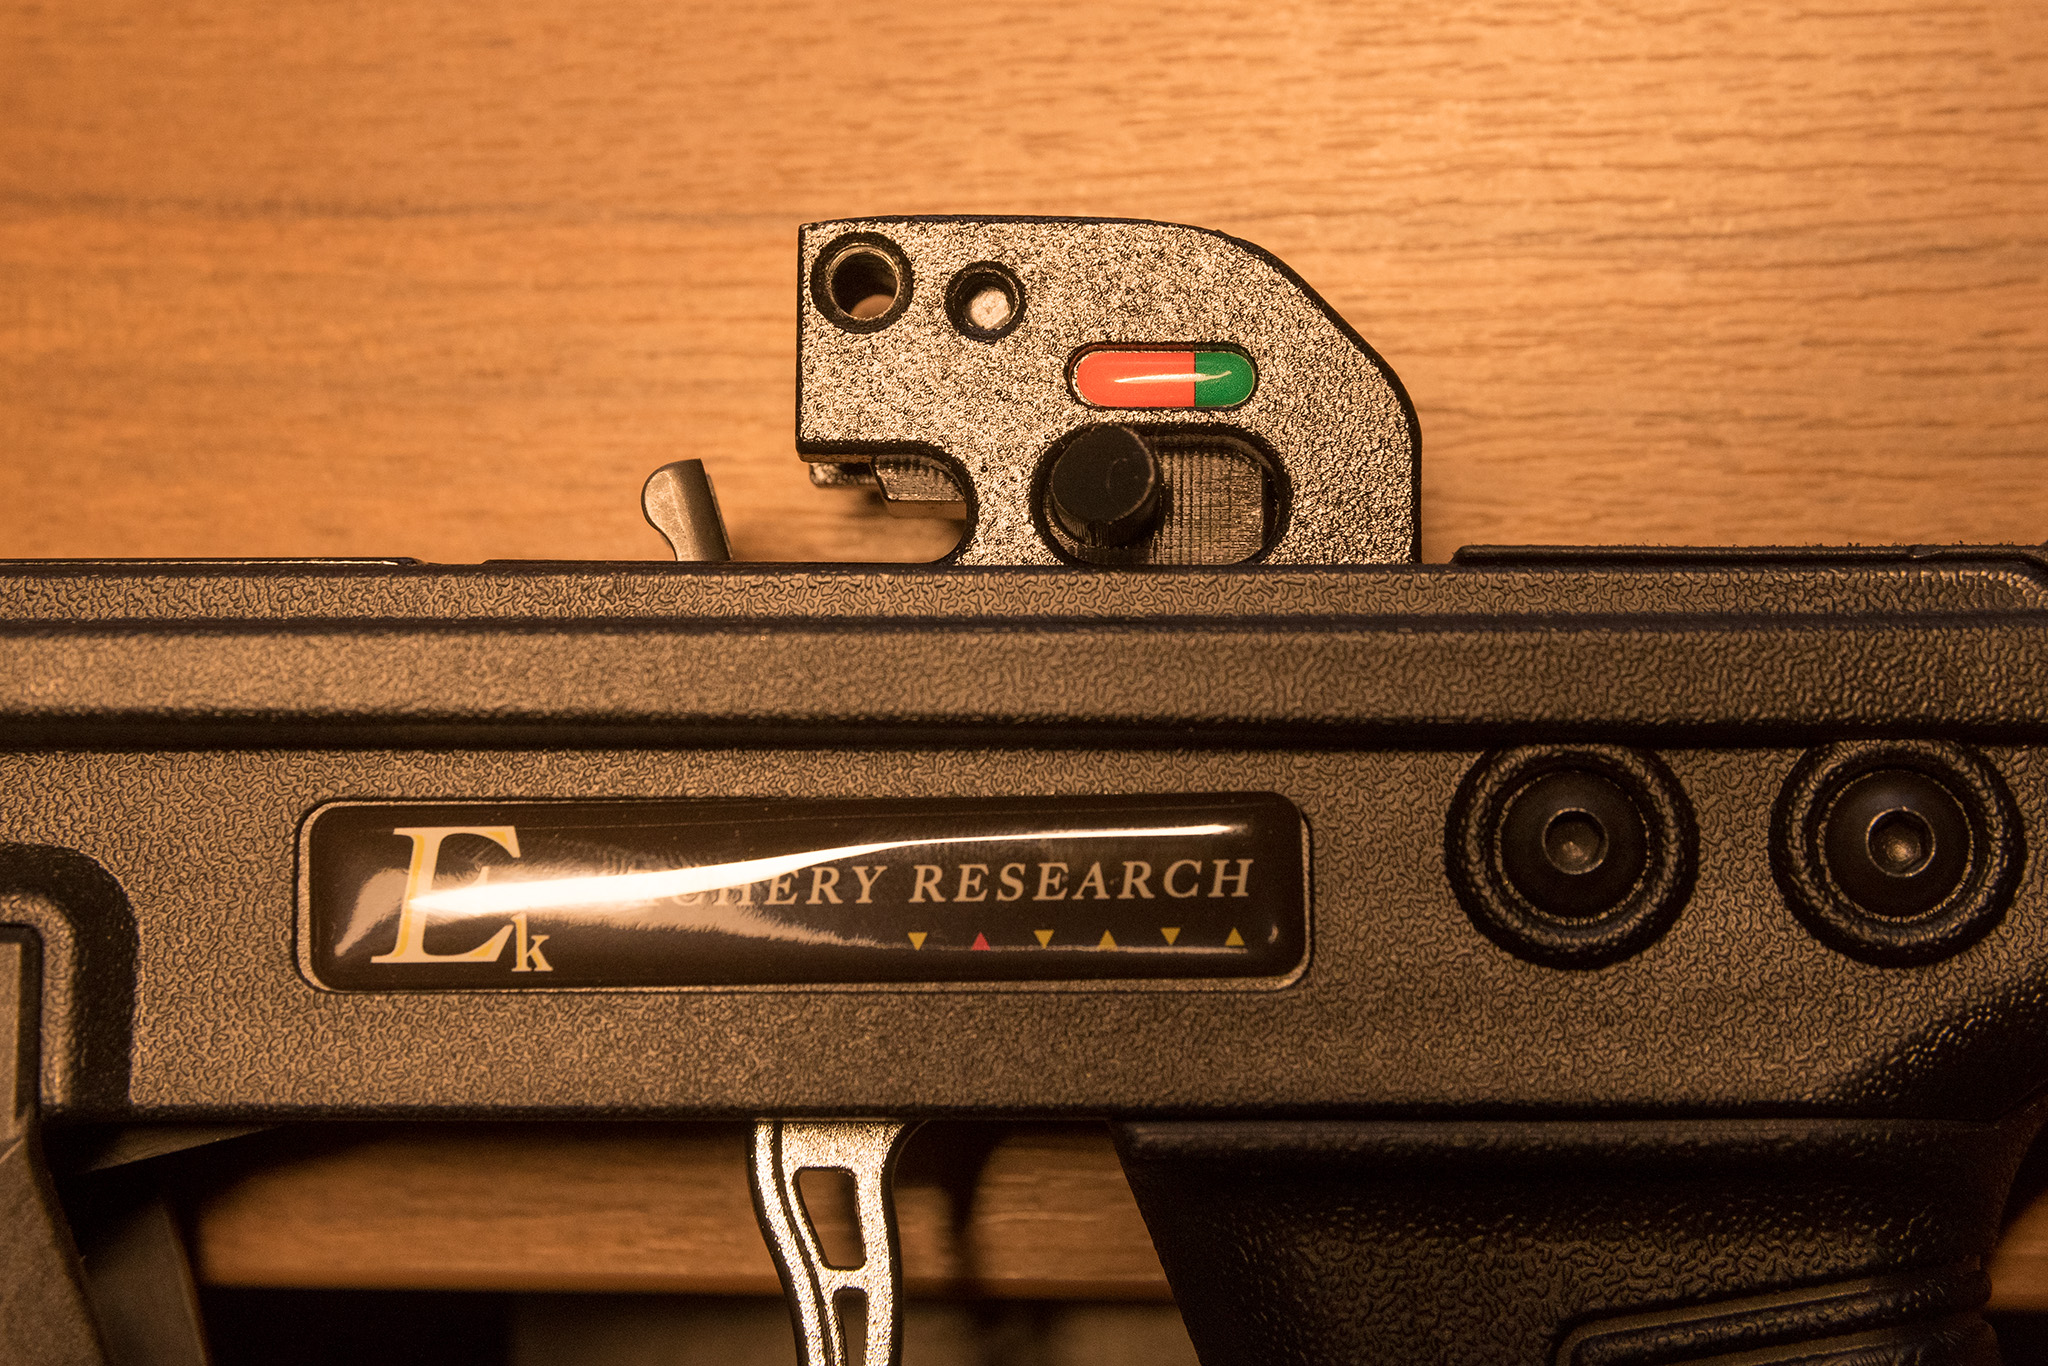
<p>An alternate replacement for the safety block in EK Archery's Cobra RX Adder crossbow.</p><p>The original safety will automatically engage whenever you repeat the crossbow which can really be an annoyance at times, and is a hindrance for high rate of fire.</p><p>Now there of course is the option of completely removing the safety block. But then you cannot even engage the safety when you want it. Fairly dangerous, wouldn't do it.</p><p>The only other option would have been to take a metal saw and file and remove the “nose” of the original safety block. But that of course is a permanent alteration to an original part, which I also wasn't fond of doing.</p><p>So here we go with option number three: Construct an alternate version of the safety block that doesn't auto-engage, and 3D print it! And whenever I feel like it, I can swap in the original safety again.</p><p>Now the safety is 100% manual. If you disengage it, it stays disengaged, even if you repeat. Note: Safety has to be disengaged in order to be able to repeat. After the string is locked in the safety cage, you can engage the safety.</p><p>The safety block has a small protrusion that prevents bolt nocks from being shoved into the lock recess too far, yet it won't interfere with the string.</p><p> </p><h4>Printing instructions</h4><ul><li>Material: Polycarbonate highly recommended for maximum strength (mine is printed with Polymaker PolyMax PC)</li><li>0.4mm nozzle</li><li>0.1mm layer height</li><li>3 perimeters</li><li>Infill: 30% honeycomb</li><li>Supports: support on build plate only</li><li>Ironing: on (all top surfaces)</li><li>Print bed: any will do (mine is printed on the textured PEI sheet)</li></ul><p>Printing time is roughly ¾ hr.</p><p> </p><h4>Assembly instructions</h4><p>You will have to disassemble (not just field strip) your crossbow in order to swap the safety block. It's not hard and doesn't take too long, but it requires very special tools not everyone might have at home (particularly not Europeans).</p><p>You'll need Allen keys (Inbus) in 3/32" and 5/64", and yes you read that right, they need to be denominated in imperial units, not metric ones. There are tiny sizing differences.</p><p>Link to PDF with crossbow disassembly instructions: <a href="https://drive.google.com/file/d/16iqS_CRAKqmyFHDiwjgGgqiA-PqZqzSp/view?fbclid=IwAR0RGCKddsPHyAL0-kw9OSdCxEIgUQx8qu7h6TddrNnt4U8OiNtwz9l-UTQ">Google Drive (not mine)</a></p><p>Simply follow in reverse to reassemble after you've swapped the safety block.</p><p>I want to reiterate one thing from the instructions again because it's so nasty: Be careful when removing the safety block from the housing! There is a tiny spring-loaded steel ball sitting underneath it. Make sure you do this above a blanket or something because the ball <i>will</i> fall out, and you definitely don't want to lose that thing!</p>
With this file you will be able to print Manual Safety Block (EK Archery RX Adder) with your 3D printer. Click on the button and save the file on your computer to work, edit or customize your design. You can also find more 3D designs for printers on Manual Safety Block (EK Archery RX Adder).