Marco Polo - Space Ship
thingiverse
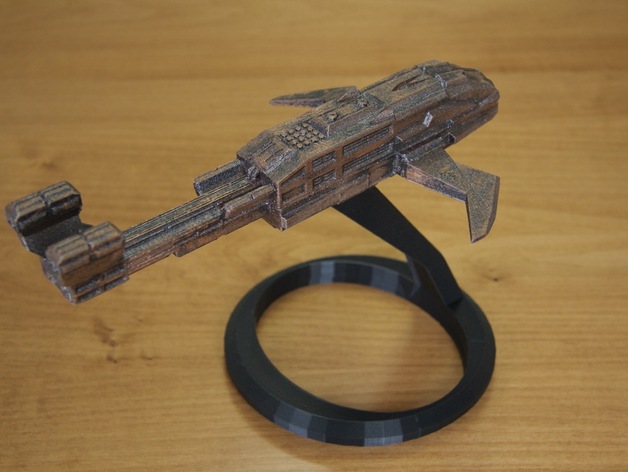
A space ship designed for deep universe exploration. Named after Marco Polo the explorer. It has the copper or bronze look because of all the space debris that has made contact with the hull. It is designed to fit the stand that comes with it. Print Settings Rafts: No Supports: Yes Notes: I suggest printing out the top of the ship at highest resolution to retain the details and the bottom at medium resolution. The wings should be printed out in highest resolution. The stand can be printed at medium resolution. The wings and hull bottom should be printed out with support for the wing connectors but with no rafts. The top and the stand requires no supports or rafts. If you have trouble getting the top and bottom to print without flipping up on the ends, you may want to try rafts. Post-Printing The copper affect was created by spay painting the model with shiny copper color (see photos of spray paint) and letting it set - then spraying with the metal silver and quickly taking a non-shedding rag to the outer edges to give it that worn look, How I Designed This Design and modelled in Modo. Instructions Updated the scale of the model - Jan 2016 The default size should fit a Makerbot Replicator 2 build volume. If you need to resize, resize the parts consistently. Start with the Ship Top and make that the maximum size of your build plate and then make a note of what percentage it was sized. Then use that same percentage on the other parts. I also included one set of wings with propulsion extensions and another without. You only need to print one or the other not both - your choice. You can flip the wings with the propulsion on top or on the bottom of the wings - your choice. Print out the various components and you should glue them together. The wings slide in the wing connectors on the bottom part. I used Lepage's Liquid Steel/metal epoxy and used hobby clamps to hold the bottom and top together. I added a bit of glue to the wing connectors so those would be permanent. I didn't glue the model on the stand, it just slides on or off. When I tried this with the Makebot software, it didn't create proper supports for the wing connectors. If it doesn't printer properly you may have to hold the wings on while the glue sets. I used Simplify3D and manually created supports on the bottom section just for the wing connectors (the rest doesn't need support). In regards to printing out the stand - again Simplify3D comes in handy here because I reduced the speed to 40% once in got to the thin part of the stand. I also used a house fan at that point in the print so it didn't get too hot. My first couple of prints with the Replicator 2 were very rough on the backside of the stand because it was so thin and the plastic gets too hot and doesn't get a chance to cool before the next layer. I have noticed my Rep 2 does not do well with thin structures that protrude above the main print unless I do both strategies (slow down the speed and use an additional fan).
With this file you will be able to print Marco Polo - Space Ship with your 3D printer. Click on the button and save the file on your computer to work, edit or customize your design. You can also find more 3D designs for printers on Marco Polo - Space Ship.