Mars Pro 92mm Fan Upgrade
thingiverse
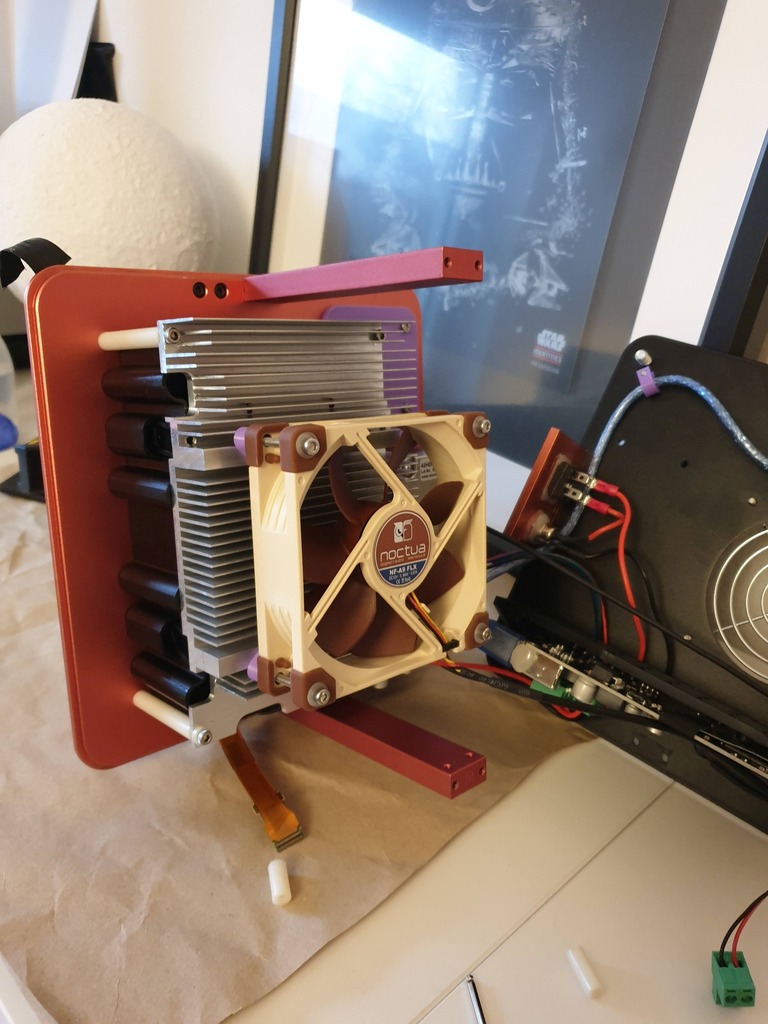
<h1>Silence your Mars Pro</h1> (no soldering required) Being used to classic FDM Printer noises I had high hopes when receiving my MarsP not long ago. Just to be disappointed by the unnecessary loud fan noise. Right away I tested the temperature of the heatsink and that stayed at a comfy 30-35 °C, also there clearly was enough room for a thicker and bigger fan, so there was room to improve. The original Fan, sized 80x15mm, has the Modelnumber CC8015H12S, draws about 0,25A max. at 12V and supplies a flow rate of 53m³/h while producing a noise level of 35dB(A). Therefore expecting it to fit I ordered a Noctua NF-A9 FLX. It draws 0,07A at 12V with a higher flow rate of 64,6m³/h and a noise level of only 17,1dB(A), it also comes with two low noise adapters where the "small" one would half the rpm to a similar flow rate of 51,1m³/h at 11,6dB(A). <b>What you need</b> - 4 printed fan feet - 4 screws M3x5mm (or 6mm) - (optional) 4 washers for M3 <b>Instructions</b> This is a fairly easy mod compared to its impact on usability, still you <b>can damage your printer</b>. So do this at your own risk. The printer uses 12V so the risk of electrocution is very low, but please <b>UNPLUG YOUR PRINTER</b> first! - Remove the front and back cover (make sure to unplug the Touchscreen https://www.youtube.com/watch?v=45wycTFA9E0) - Tilt the printer to the side and remove the bottom cover, you can fold it away but be careful there are still cables attached - Unplug the fan (most right, green plug on the PCB) and mark the polarity on the plug. - Remove the 4 screws from the cooling fan (keep the screws, discard the spacers) - Screw the printed feet into the heatsink with the short screws (M3x5), positioning them to face outwards - With the removed original screws mount the Noctua to the printed feet (I put washers under the screw heads to get a bit more vibration reduction). The original fan was facing AWAY from the heatsink and I kept it that way. Holes in the Feet are nominal 2,9mm so together with FDM printers tolerance it makes a great fit for the screws to self tap (I'll add another version soon for SLA/DLP or real tapped thrads). - Take the Molex to 3-Pin adapter from the noctua kit and cut off the 3-Pin Male (only 2 pins/wires are used) - Insert the two wires into the fan Plug (mind the polarity) - Connect the fan cable to this adapter Optional: You can easily install the NA-RC13 Low noise adapter in between the fan connection -> that way the printer is barely noticeable even when right beside you. <b>BUT:</b> even though the flow rate is the same with the LNA and old fan, higher temperatures reduce the lifespan of electronics and therefore I decided to use it at full speed. Still almost silent and for me, having the printer 3m behind me I can't notice that its running. <br> <H3>Happy silent printing</H3>
With this file you will be able to print Mars Pro 92mm Fan Upgrade with your 3D printer. Click on the button and save the file on your computer to work, edit or customize your design. You can also find more 3D designs for printers on Mars Pro 92mm Fan Upgrade.