MASSIVE VISUAL UPGRADE FOR ENDER 3 PRINTERS - POWERSUPPLY RELOCATION UNDER THE BED
thingiverse
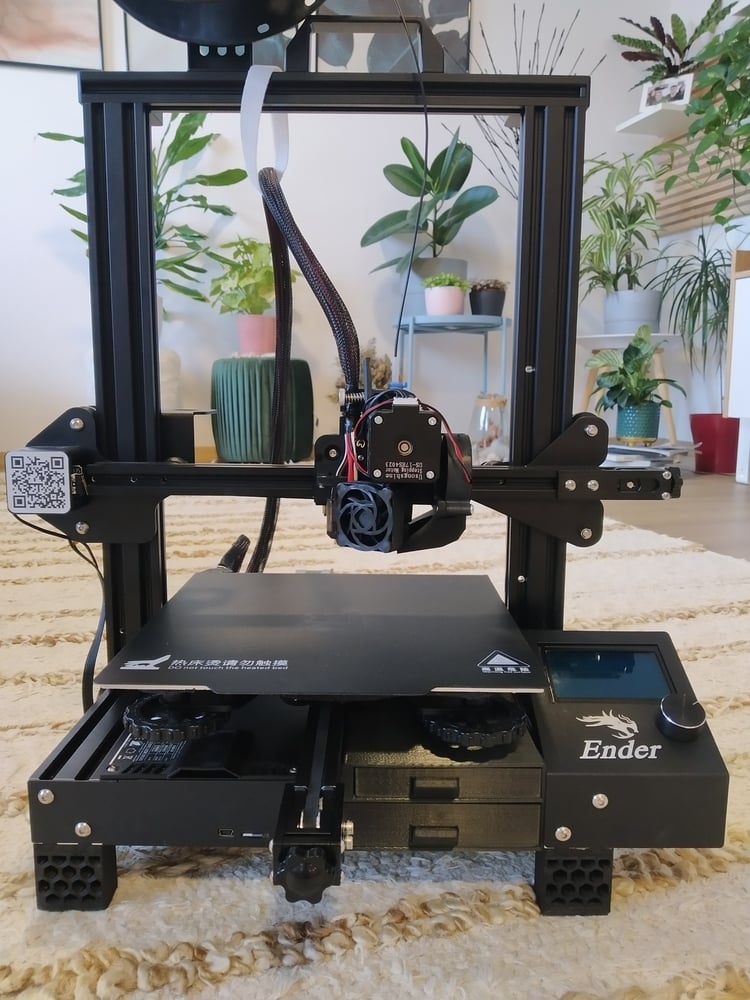
MASSIVE VISUAL UPGRADE FOR ENDER 3 PRINTERS - POWERSUPPLY RELOCATION UNDER THE BED (IN TESTING) (Is not usable for PRO and V2) SUPPORT ME BY PAYPAL!!!: https://paypal.me/zltncsk If you woul like to see new upgrades for 3D printers, and updates for this design. I need only to buy a coffe and continue in work. SUMMARY: A couple of some parts to move the thick stock PSU from the side to the rear of Ender 3 under the hotbed. Does not fit Pro or V2. This mod works only together with high legs that rises printer up to make enough space to fit thick PSU. Front riser feets source: https://www.thingiverse.com/thing:4851027 (I modify it lilbit). Big thanks to autor. INSTRUCTIONS: • Disconnect PSU, unscrew PSU from Z-axis profile and take off plastic cover. • Unscrew power switch casing and disconnect three wires that connect PSU. • Turn Y axis motor so that its connector faces front of the printer (only if it's not in this position already). • Turn Z axis motor or motors (if you have dual-Z), so that connectors faces opposite each other. • PSU correct position for install is fan on down, with contacts facing up and on left side of printed (front view). • Screw v-slot mount to PSU with original screws on side. Care about orientation up or down • Screw two rear brackets with M4 screws. • Put PSU wires through the hole for power switch casing in bigger bracket. • Place all cables into the slot on bigger bracket (see the photos!). • Slide the PSU with mouted brackets under the hotbed from read into v-slots. • Mount the PSU by brackets to the printer by using four M5 screws. • Connect wires to power switch. • Screw power switch with original screws into their place. • Install two frong feets with using two M4 screws and two T-nuts. • Shorten the original rubber pads for 2-3mm, by using the scissors, or knife. • Stick the shortened rubber pads to all four feets. • Connect PSU cable and enjoy. Countersunk screw list: 4x M5x10(or12, or16) 6xM4x8 2xM4x10 2xT-nut M4 WARNINGS: I AM NOT RESPONSIBLE FOR DAMAGES ON THE MACHINE. DISCONNECT THE MACHINE FROM THE ELECTRICITY SOURCE BEFORE STARTING. I AM NOT RESPONSIBLE FOR INJURY BY ELECTRIC SHOCK.
With this file you will be able to print MASSIVE VISUAL UPGRADE FOR ENDER 3 PRINTERS - POWERSUPPLY RELOCATION UNDER THE BED with your 3D printer. Click on the button and save the file on your computer to work, edit or customize your design. You can also find more 3D designs for printers on MASSIVE VISUAL UPGRADE FOR ENDER 3 PRINTERS - POWERSUPPLY RELOCATION UNDER THE BED.