Master Ball, with magnetic clasp (Fixed Lid)
thingiverse
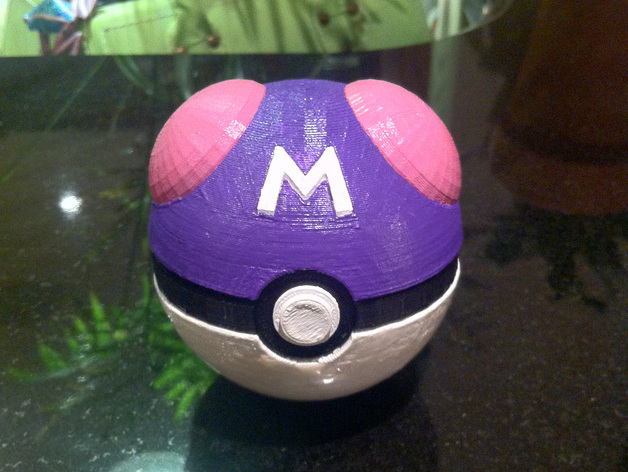
I finally managed to get my hands on a printer and now I've got everything I need. It turns out that I made one big mistake, the "M" was too small to fit perfectly in place - I just learned that myself. Thankfully, it was easy to correct. The only change I made from the original idea of printing a Pokeball with a magnetic clasp was swapping out the lid. I printed the new lid and two other important parts, M and BumpTopLeft/Right (left/right based on how the button looks when you hold it up). Just in case, I added both right and left bump files - even though they should be exactly alike, better safe than sorry. With all of your printing done, assembling the new lid should be a breeze. Then comes attaching the button to its holder, followed by sticking that unit and a ring down onto the base with glue, using the hinge in place as you fix it there. Next, pop the snap-on top into place. To complete it, take two tiny magnets (1/4 inch x 1/16 inch) and attach them securely too. Here's some expert advice: try printing your bottom piece at a much higher infill percentage, something like 40-50% to get the weight of the object centered perfectly in the middle. That way it won't tip over easily whenever you set it down.
With this file you will be able to print Master Ball, with magnetic clasp (Fixed Lid) with your 3D printer. Click on the button and save the file on your computer to work, edit or customize your design. You can also find more 3D designs for printers on Master Ball, with magnetic clasp (Fixed Lid).