Mavic Air Lens Removal Tool
thingiverse
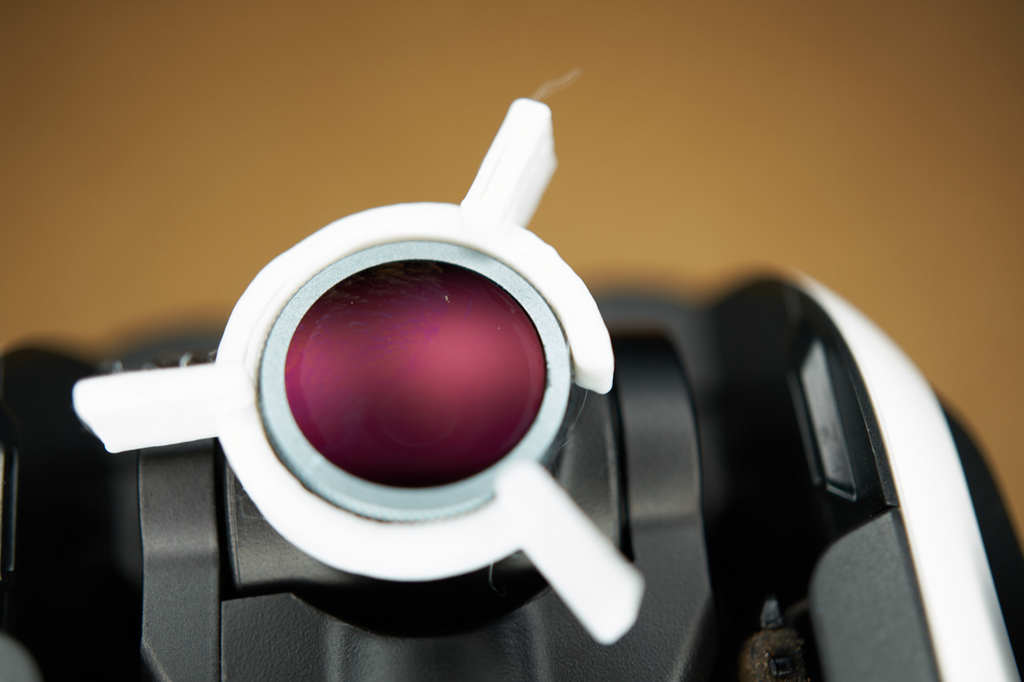
This is a simple tool for removing the factory Mavic Air lens so an ND or other filter can be installed. The factory lens is very difficult to remove without some mechanical advantage. When printed, the inside diameter of the tool should be just larger than the Mavic Air lens, which is 15mm. I've found scaling so the part prints to around 15.35mm or so to work well. The inside diameter in the STL file is roughly 16mm. The goal is for the tool to fit snugly around nearly the entire circumference of the lens so it contacts evenly. See the pictures for examples of the intended way to hold the tool in relation to the drone and proper orientation of the tool on the lens. With the drone powered off, turn it upside down and place the tool over the lens oriented as in the photos. Hold the gimble in place with your left thumb and use your thumb and two fingers from your right hand against the tool's nubs. While holding the gimble in place, gently (but firmly - it's a balance), unscrew the lens with your right hand while keeping the tool clamped evenly around the entire circumference of the lens. Once you get the factory lens off, you won't need this tool again - there's no need to tighten the lenses down that tightly! No support structures are needed. The examples in the photos were printed with PLA at .2mm. No infill is required, just a gap fill as the body is only 2mm thick. Did this help get your lens off? Did it not work for you? Have improvements for the design? Your comments are appreciated!
With this file you will be able to print Mavic Air Lens Removal Tool with your 3D printer. Click on the button and save the file on your computer to work, edit or customize your design. You can also find more 3D designs for printers on Mavic Air Lens Removal Tool.