Maze Cube for money gifting
thingiverse
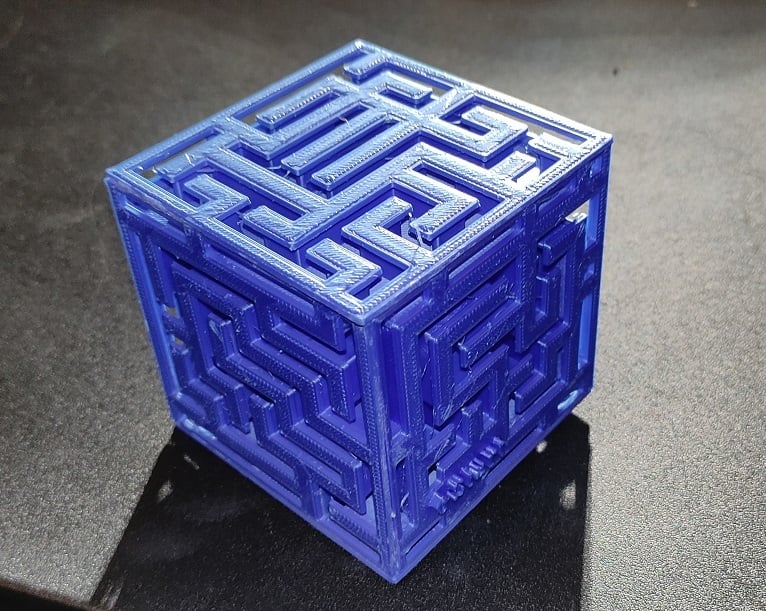
I was wanting to make a maze cube for money gift giving. So here it is. The idea is that you put money inside, close the door and then it can't be opened until the maze is worked and the ball put in the right place to unlock the door. I mean, something like a hammer or a non-to-be-fat-shamed elephant could probably open it, but I mean it can't be opened the fair not cheating way. The inner panels should be glued together with superglue (CA glue) then the ram, ball, and switch inserted then the outer panels glued in place. Here's hoping you don't forget to insert those before gluing it shut! ;-) Hopefully you can figure out the orientation that things need to be glued in and where things go from the pictures. I know, I'm not much help with that am I? Think of it as the gauntlet is laid down and a super fun challenge in 3d spatial orientation! Oh and don't superglue your fingers, eyelids, or other body parts to various things, it's not as fun as it sounds. You may want to try using sticky tape to help hold parts while the ca glue works it's fusion magic. I imagine you're wondering right about now and trying to figure it all out and just how you'll glue things in the exact right place? It's almost a cruel joke when you think about it. Awe you can do it, just keep telling yourself that! Have you prayed today? This is still a work in progress. I haven't actually printed it yet so it may not even work so there's that. Also, the tolerances may be sort of tight so you may need to use sandpaper. I added a little stand for the ball so you'll need to carve that off or else substitute a suitably sized marble. You may also wish to scale it larger since the ball is sort of tiny for printing. I'm slowly printing this work of art so I hope to eventually show a working model. If you print it and find something doesn't work, please report that and I'll try to fix it. Also, if I goofed up the maze and there's no way to solve it, that would be embarrassing so report that if I missed up. If there's a crime in your area (not in regards to this perfect sculpture) you may want to report that to your local authorities. Anyway, I hope everyone likes this aMazing work of art. Update: I finally printed it, and glued it together with gel CA glue and well, IT WORKS! Yay! I figure the little spring arms are a little weak so I beefed them up a little. I resized the marble a little bigger to 7mm. The ram piece may fall out, and if it does, the marble could fall out too. If they do, just put them back in before closing the door. Anyway, when activating the switch the door should pop up giving access to the inside. It's a little hatchway so it still may be a little challenge digging your finger inside to get the bill so be careful not to break the springs. For all that matters, after all the work of printing and glueing and gifting, after the money is retrieved, the maze cube will likely get thrown away by your giftee so don't cry if they break the springs but if they are careful they can reuse the maze cube. Anyway, tested and working, yay! To put it together - of course always be aware of orientation or else you'll glue it in place wrong! 1. Glue the inner left wall to the inner bottom wall making sure it's to the back and left as much as possible. 2. Glue the inner back wall to the inner bottom wall and inner left making sure it's as far back and left as possible. 3. Glue the inner right wall to the inner bottom wall and inner back wall making sure it's a right and back as possible. 4. Glue the inner front wall tot the inner bottom and inner right wall making sure it's as far forward and hits left and right sides. 5. Glue the inner top wall to the four side walls making sure it's completely centered all the way around. 6. Glue the left outer wall to the left inner - try to glue the tops of every divider wall. I sit the cube on it's bottom face and the left outer should sit on the table. It should be even with the back wall. 7. Glue the back outer wall to the back inner - it should touch the left outer wall. 8. Glue the right outer wall to the right inner - it should touch the back outer wall. 9. Glue the front outer wall to the front inner - it should touch left and right. 10. Glue the top outer wall to the top inner - it should touch all outer walls. 11. IMPORTANT: insert the ram, marble, and switch pieces in place and do not get glue on them! Make sure they move freely. You may want to also place the outer bottom wall on but not glue it yet and also make sure it still moves freely - if not sand them down or something until they do. 12. Glue the bottom outer wall to the bottom inner encapsulating the three pieces. 13. Insert the door until it snaps. 14. Try the switch to see if the door popups up! Hopefully it will! 15. With an evil grin, navigate the marble to its starting position and imagine the frustration they will having working the maze cube. 16. With a happy grin insert some gifting money and imagine how much joy they will have when they extract your generous present and forgets the frustration and remember it as fun. If you like this thing, please leave a nice comment to help with my slightly lacking self-esteem. ;-) John 3:16 shares God's love which is also a wonderful gift.
With this file you will be able to print Maze Cube for money gifting with your 3D printer. Click on the button and save the file on your computer to work, edit or customize your design. You can also find more 3D designs for printers on Maze Cube for money gifting.