McDonnell Douglas MD-11
prusaprinters
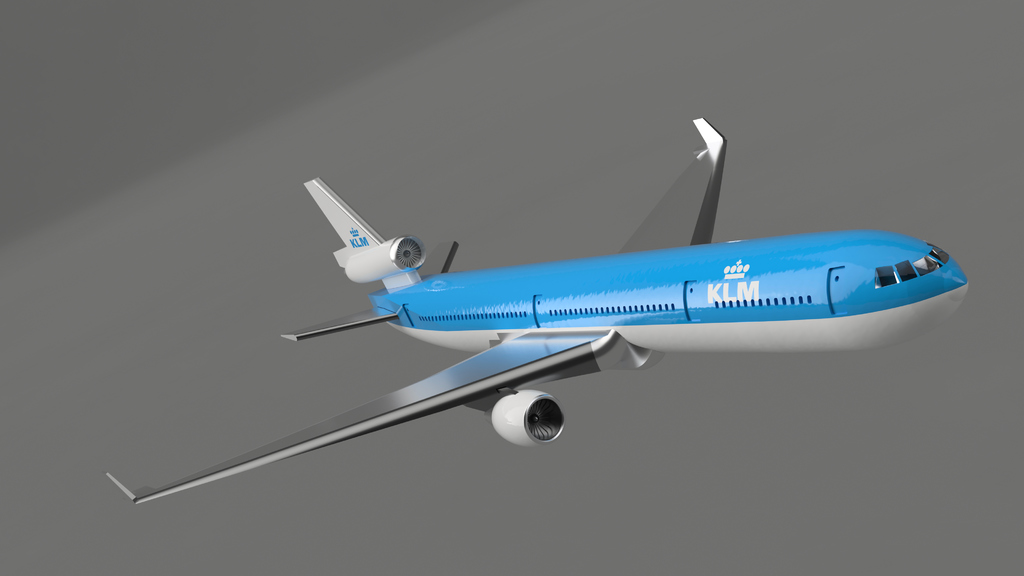
<p>"The McDonnell Douglas MD-11 is an American three-engine medium- to long-range wide-body jet airliner, manufactured by McDonnell Douglas and, later, by Boeing Commercial Airplanes. Based on the DC-10, it features a stretched fuselage, increased wingspan with winglets, refined airfoils on the wing and smaller tailplane, new engines and increased use of composite materials. Two of its engines are mounted on underwing pylons and a third engine at the base of the vertical stabilizer. It also features a glass cockpit that decreases the flight deck crew to two from the three required on the DC-10 by eliminating the need for a flight engineer."<br/> Wikipedia</p> <p>UPDATE 12/26/2018:<br/> I have now added a cargo version of this model. For the cargo version, you must print all the normal parts, with the exception of the cockpit, top body (forward), top body (aft), and tail body. Then print the cargo versions of these parts, labeled with a "(Cargo)" at the end of the name.</p> <p>I personally love airplanes, especially this one. While it doesn't fly passengers anymore, you can still see it carrying cargo around the world, taking advantage of the long ranges that it was built for. This model is made of many individual parts, intended to be printed alone and then assembled later. Note there is a fully assembled file, but I would not recommend printing it, as it would have to be a lot smaller and use a lot of support material. I'm not going to stop you, but I'm just sayin'.</p> <p>For anyone interested in modifying this, please, go right ahead. I have included the STEP file for the project, and have linked the Fusion 360 cloud file here: <a href="http://a360.co/2kTjMAZ">http://a360.co/2kTjMAZ</a></p> <h3> Print Settings</h3> <p><strong>Printer Brand:</strong></p> <p>PrintrBot</p> <p><p class="detail-setting rafts"><strong>Rafts: </strong> <div><p>Doesn't Matter</p></div><strong>Supports:</strong></p> <p>Yes</p> <p><p class="detail-setting resolution"><strong>Resolution: </strong> <div><p>0.1-0.25</p></div><strong>Infill:</strong></p> <p>10-20%</p> <p><br/> <p class="detail-setting notes"><strong>Notes: </strong> </p><div><p>Many parts require support, including the Vertical Stabilizer Assembly, Engines 1 & 3, the Inner & Outer Wings, and the Wing Supporting Structures. Orientations should be correct from the STL's, but in the event they are not, use the following:<br/> Engines 1 and 3 with the intake facing up (Yes, this results in the side with the tiny contact area touching the bed. I know, trust me)</p> <p>Vertical Stabilizer: Vertically, as if it where on the plane.</p> <p>Outer Wings: Inner side down, so the support tower holds up the winglet</p> <p>Inner wings: Inner side down. This doesn't need much, but the mating surface is NOT flat.</p> <p>Wing Supporting Structures: Same as on the airplane. Will require support all along bottom.</p> <p>All other pieces: Any other pieces should NOT require support, as they all have a flat bottom. To make assembly easier, I would recommend printing the models vertically, so the parts will sit closer to each other once put together. Vertical= 1/2 Circle part on bed.</p> <p>Just another quick note. The windows for the cockpit are quite small, and I would recommend printing them at as high a resolution as possible, just so the layer lines aren't too obvious, as they are right on the front of the plane here.</p> <h3> Post-Printing</h3> <p><strong>Assembly</strong></p> <p><div><p>All smaller pieces that slot into the main frame are undersized by .3mm, for a friction fit on most 3d printers. If this is too loose, I would recommend gluing it in, which is a good idea for the whole frame in general. This goes for parts like the engines, the wings, and the vertical and horizontal stabilizers, where they sit into another part. The cockpit windows have a slightly smaller clearance, but should still fit, as they are only held on 2 or 3 sides.<br/> Before you slot any of the smaller parts together, I would assemble the main pieces, such as the fuselage and wings. Once that is all together, you can attach the other pieces.</p> <h3> How I Designed This</h3> <p>This was designed using Fusion 360, working off original drawings of the MD-11. One was set up for each plane, allowing me to get reference measurements for all axes.</p> </div></p></div></p></p></p> Category: Vehicles
With this file you will be able to print McDonnell Douglas MD-11 with your 3D printer. Click on the button and save the file on your computer to work, edit or customize your design. You can also find more 3D designs for printers on McDonnell Douglas MD-11.