Meade DS-90 Tripod Clamp Lever and Friction Pad Replacement Parts
prusaprinters
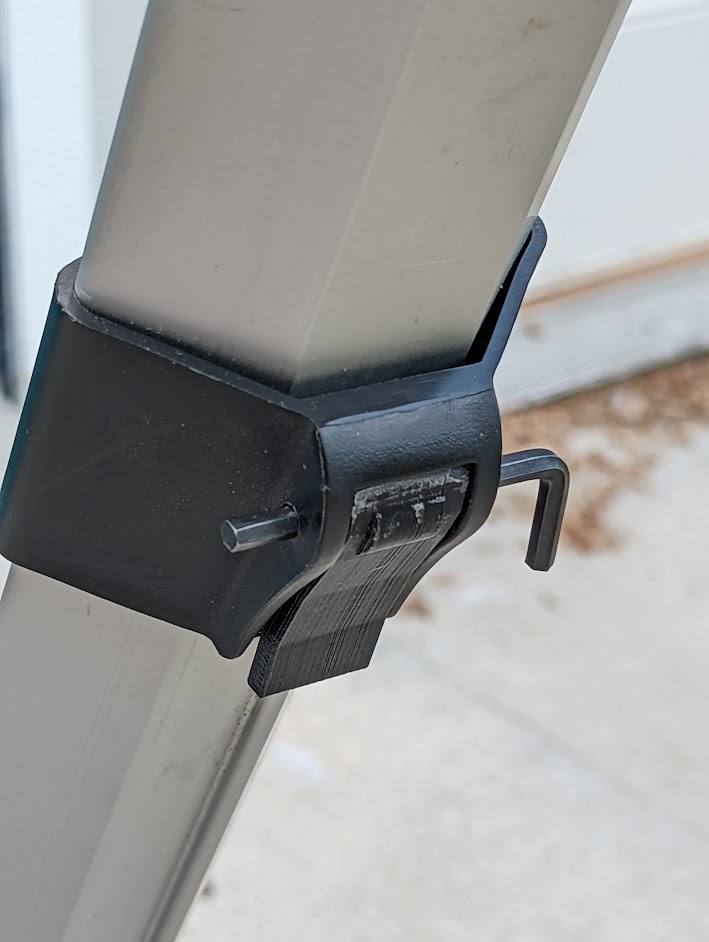
<p>These were some parts I needed to replace while fixing up an old Meade DS-90 EC reflector telescope. The tripod for these scopes were notorious for having bad clamps that don't hold their extension at all. I've seen various ways of repairing these, but I've found that replacing the rubber on the clamp's push plate using stronger glue and a thicker, higher friction rubber pad really does the trick. However, the tripod I'm working on was missing the push plate and the clamp lever for one of its legs.</p><p><strong>The Lever</strong></p><p>The reference model for the lever has more smooth curves and has better accuracy in some of its angles, but after a little bit of sanding, my model fit nicely. Your mileage may vary. I've been trying to learn how to use CAD Sketcher in Blender, but I haven't really figured out how to constrain bevels in the sketch without messing up the whole model. I only had limited time to finish servicing this scope, though, so I left the model in Good Enough™ status. There's usually enough wiggle room in the fit of these parts anyway (part of the problem), so the design as is might give you enough pressure on the push plate that you don't need to replace the rubber friction pad.</p><p><strong>The Push Plate</strong></p><p>The lever has a triangular point that squeezes the push plate between the lever and the sliding tripod leg. It's a pretty straightforward part. The rectangular inset is where you need to put the rubber friction pad. Depending on the thickness of pad you can find, you may want to scale the thickness of the plate to get your fit tight enough to keep the legs from sliding when locked.</p><p><strong>Print Settings</strong></p><p>Printer brand: XYZprinting<br>Printer: da Vinci Jr. 1.0 Pro<br>Resolution: 0.20<br>Infill: 100%<br>Filament material: PLA</p><p> </p><p><strong>Post-Printing</strong></p><p><i>Push Plate</i></p><p>You'll need to use some thick, dense rubber to glue into the rectangular inset of the push plate. It should fill the entire inset. The reference piece from the manufacturer measures 13.5mm x 7.7mm with thickness 3.3mm. You should find something thicker than 3.3mm.</p><p>I used a rubber Toyota keychain (red & white) with thickness 3.7mm, cut to size, and glue in with superglue.</p><p>When installing, make sure the push plate has the rubber side in toward the sliding leg.</p><p> </p><p><i>The Lever</i></p><p>The lever is a tricky one, and if you look at the source model, you can see their own mold was likely filed and filled manually to get the fit exactly right. Same goes for this one. You'll likely need to sand the triangular "beak" a couple mm down, but don't overdo it. You'll also need to file down the "ears", and file down the "cheeks" on either side of the beak to be a little flatter instead of a circular arc.</p><p>I would recommend trying to get it to fit and filing down those areas until you can get it to fit with the pin through the "eye" hole.</p><p> </p><p><i>The Pin</i></p><p>The pin or axle on the reference model is a rod about 4mm wide. I was able to use an extra 4mm hex wrench as a replacement. I would not recommend printing this part, as you'll want something metal here.</p><p> </p>
With this file you will be able to print Meade DS-90 Tripod Clamp Lever and Friction Pad Replacement Parts with your 3D printer. Click on the button and save the file on your computer to work, edit or customize your design. You can also find more 3D designs for printers on Meade DS-90 Tripod Clamp Lever and Friction Pad Replacement Parts.