Mean Well LRS-350-24 Silent PSU - Bottom Power Switch
thingiverse
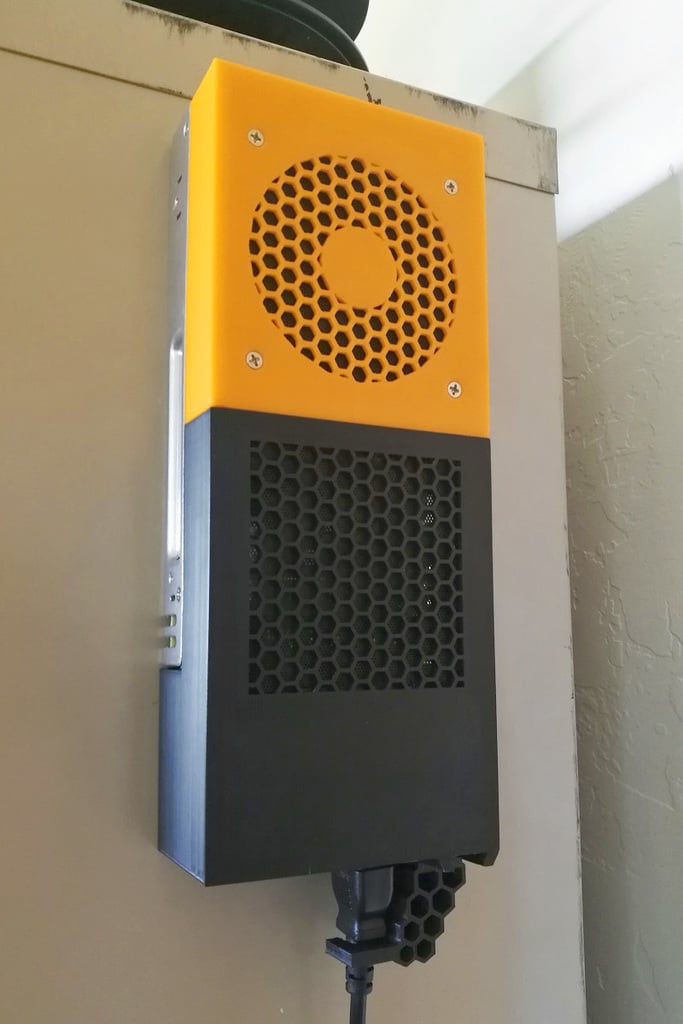
This is my remix of a remix of the silent PSU mod for the Mean Well LRS-350-24 power supply. This PSU is a common component for Ender 3 Pros, and an upgrade for standard Ender 3 models. I wanted to move my power supply to the side of a cabinet for easy access outside of the enclosure. However, most (if not all) PSU covers that accommodate 92mm fans usually still have the switch and plug on the side of the unit. This puts extra strain on the cord, bending it downward. By relocating the power to the bottom of the unit, the cord hangs straight down, putting almost no stress on it. The large area of open honeycomb also means the PSU cools more efficiently. I honestly don't even know if the fan kicked on during my last print. I expect that cooling will become a non-issue once I attach the PSU up against my metal cabinet. I did a few things to this mod that differ from the original remix: - The obvious, I moved the switch cutout to the bottom end of the unit. - I extended the cover a bit longer to make more room for the wires. - The honeycomb was recreated, as I couldn't find a way to modify it. I matched the original size and density of the pattern from the upper half of the cover. - The back cover was lengthened to cover the new, larger opening. - The back cover has a hole in it to let the power wires through and into the enclosure. I made this hole large enough to accommodate a rubber grommet about 25mm in diameter, letting the PSU sit flat against the enclosure. - To prevent the power cord from falling out of the socket via gravity, I added a cable restraint component with similar honeycomb patterning to it. I've added a cover version without this, as well. I did run into a few issues, which you may see in the photos. The slot for the cable restraint was too tight, so I had to shave some material off for it to fit. And the slots for the alignment tabs between the two cover components were also too tight. I've adjusted clearance in the model for a better fit, but haven't printed another copy of everything to test the fit again. Let me know if everything fits or still needs more/less clearance and I'll update the model accordingly. The cable restraint should clip around the cord, so it won't just slip out of the restraint. I measured the original Ender 3 power cord for this size. The Noctua fan I used is the [92mm NF-B9 Redux-1600 3-pin fan](https://www.amazon.com/Noctua-Bearing-Cooling-NF-B9-redux-1600/dp/B00KF7OMTI/). Note that this fan does NOT come with a 2-pin adapter, like some of the tan premium Noctua fans do. But, I had one laying around and used it to connect to the PSU board. If you don't have one, you'll need to modify the connector, splice in the connector from the original fan, or buy an adapter. I added mesh as a filter to keep pet hair and dust out of the power supply. I just picked up some mesh meant for 92mm fans on Amazon. I sandwiched one sheet between the cover and the fan. The other sheet I super-glued along the edges to the inside of the second part. Otherwise, the original cover screws were reused, as were the switch and switch screws. The fan came with screws to attach it to the PSU cover. I didn't rebuild the original model for the upper half of the cover. I would recommend adding a countersink to the screw holes, as I did, so the screws sit flush with the top. If you relocate your PSU to the side of a cabinet, the unit has mounting holes that match the socket head cap screws that originally mount the PSU to the Ender 3 frame. These are M4 x 0.7mm screws, and are commonly available at hardware stores. I got some shorter ones, as my metal cabinet doesn't require such long screws. #BIG NOTE: **I had issues getting the lower half (the black cover part in the images) to slice in Fusion 360. If you try Fusion and it won't slice or it crashes, know that I also had that issue. I've reported this issue to Autodesk for review. But, Cura will slice that part just fine. If you're using Cura for everything, you should be good to go. No idea about other slicers, though.** EDIT: 10/27/2020 I added STL and STEP files for the back cover portion on the PSU. This should just snap into place with a fairly loose fit. It has a hole to accommodate a fairly large grommet so it'll lay flat against the side of the cabinet or enclosure.
With this file you will be able to print Mean Well LRS-350-24 Silent PSU - Bottom Power Switch with your 3D printer. Click on the button and save the file on your computer to work, edit or customize your design. You can also find more 3D designs for printers on Mean Well LRS-350-24 Silent PSU - Bottom Power Switch.