Mechanical butterfly
prusaprinters
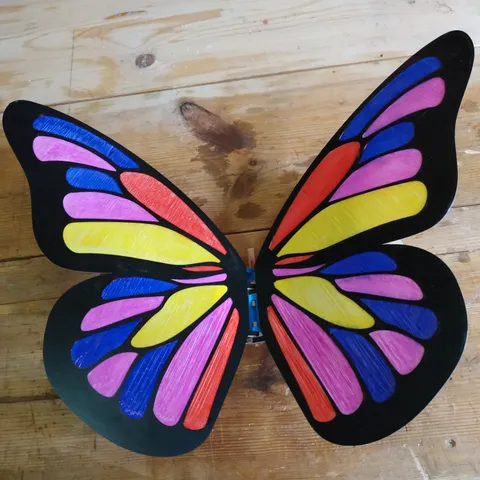
It doesn't really fly much, because the spring can only power it for few flaps of the wings, but technically it has lift.Printing0.2mm layer height, 4 perimeters, no infill, no supports - for all parts.You need to print 2 arms, 2 pins, and 4 planet gears. You only need one locking “washer”, but consider printing 2 in case you lose one.All the parts are in the optimal orientation for printing.Clean the bed carefully before printing the wings. Let the bed cool before removing the wing, otherwise you risk bending it.I printed first 2 layers of wings in black and the rest in white, and then colored the white parts with markers.AssemblyI recommend putting some grease on the gears and the long part of the crank. Vaseline will do.Attach back cap to the body (on the spring side).Put 4 planet gears on their axles in the body (see photo).Put the long side of the crank through the front cap, then through the sun gear.Carefully put the sun gear between planet gears, then close the front cap (see photo).Push the crank all the way though the body.Put the locking “washer” on the end of the crank protruding through the back cap (see photo). Tweezers might help.Put 2 arms on the short end of the crank. The pins on the arms should be facing each other (see photo).Put the wings on a flat surface (like a table) and align them so that they're symmetric.Put the assembled body between wing hinges and attach it with 2 pins, inserting them from the ends towards the middle (see photo for the correct orientation of parts).Attach the arms to the hinges on the wings. The whole assembly is flexible enough to do that.Wind up the crank counter-clockwise (looking from the front). Release to let the butterfly flap its wings.
With this file you will be able to print Mechanical butterfly with your 3D printer. Click on the button and save the file on your computer to work, edit or customize your design. You can also find more 3D designs for printers on Mechanical butterfly.