Mechanical Clock
thingiverse
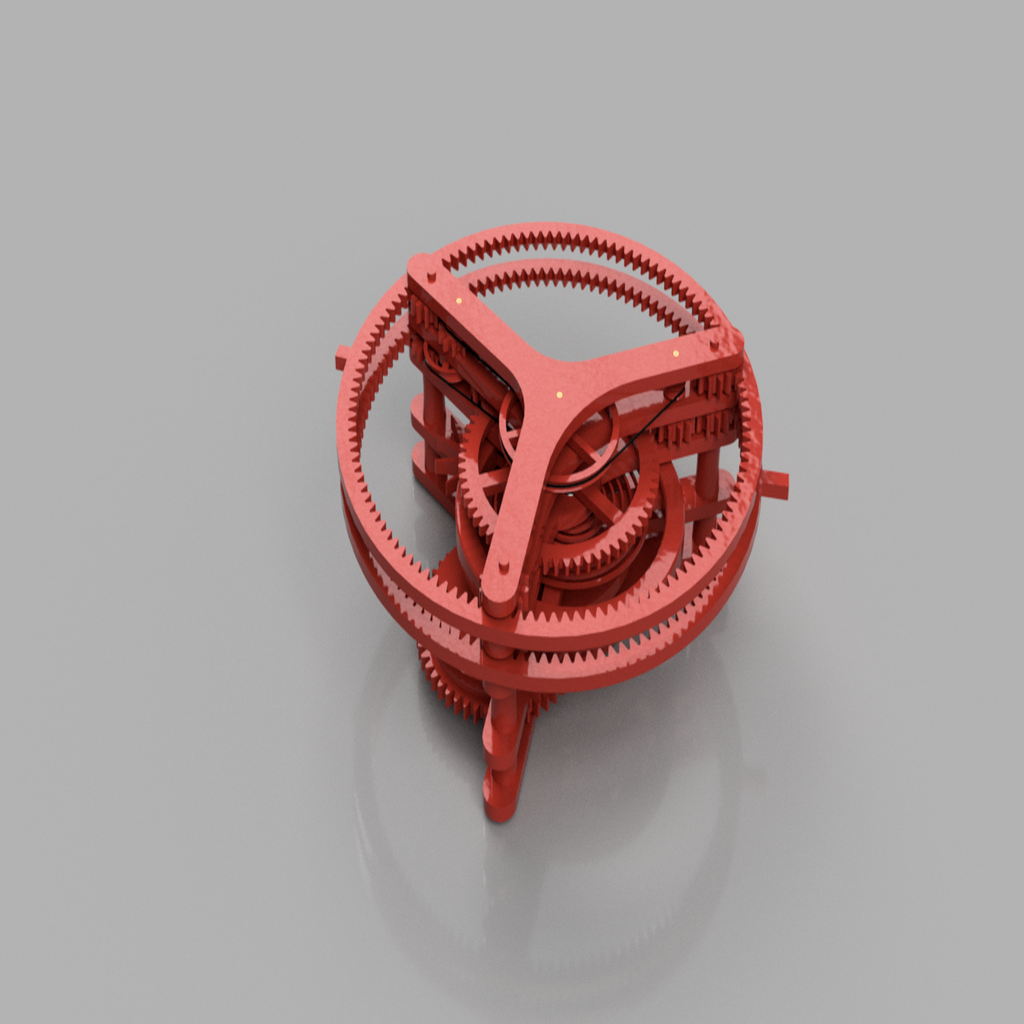
UPDATE 2 - I finished updating a few parts, the changes are as follows. The pulley ratios on minute_gear_2.stl and hour_pulley_2.stl have been corrected. The escapement has been changed and is now secured to the frame with one M3 X 6 button head machine screw from the top side of the escapement. frame_2.stl and escapement.stl have been modified to accommodate this change and the required hardware has been added to the list. balance_wheel.stl has also been modified to incorporate M3 X 4 mm set screws to use as tuning weights. The weights need to be added in even numbers in a symmetric pattern around the wheel to maintain balance. These weights are less than 1 gram each, so it is necessary to get close to the correct weight by adjusting the infill of the balance wheel. I have found that around 70 percent infill is a good starting point. It is better to start with the balance wheel on the lighter side so the clock runs slightly fast, but a slow running clock can be adjusted by adding a few tuning weights to the bottom of the balance wheel. This will cause an unbalance and the balance wheel will be affected by the force of gravity acting on the tuning weights at the bottom causing the clock to run faster. Doing this is not recommended as it causes the clock to be more sensitive to the amount of weight used to power the clock. Without going into too much detail, a heavier power weight will exert more force on the escapement, causing the balance wheel to deflect more. This will cause the clock to run slower when the balance wheel has been tuned in this way because the force that gravity exerts does not increase with an increase in deflection, unlike a purely spring driven system. UPDATE - testing has shown that the hour and minute pulley ratios are off, I will be releasing a few new parts to fix the issue as soon as I verify that the new ratios are correct. It will be a simple fix, with only two pulleys to switch out. This clock has been a work in progress for the past year or so. I will not be needing to make any major changes to the design so It is ready for the initial release. It is mostly printed, however parts such as the shafts, bearings, bushings, and belts are purchased. It will require a five pound weight to power the clock. The final version will use fishing line for the string to hold the weight. The weight hangs off of a pulley that incorporates a one way bearing. The one way bearing is based off of a design shown on the makers muse youtube channel. This setup allows the clock to be wound by turning the pulley backwards. It has been designed to last for twelve hours with the string wound twenty four times around the pulley. This is not the most practical design, but I did not want the weight to exceed five pounds. One improvement that will be made in the future is the incorporation of grub screws in the balance wheel to adjust the period of the clock. currently there is a slot in the bottom of the balance wheel where solder wire can be placed to fine-tune the weight. This solution works but it is not the most elegant. Bearings and bushings are press fit, as are the smaller shafts. The larger drive shafts require that the gears be carefully drilled out to three millimeters. I recommend that this be done by hand as the walls on the six tooth portion of the gears become very thin. The larger shafts are bonded to the gears with super glue. The end tab of the balance spring will also be secured with super glue. It should be secured to the back of the third frame piece in a location that allows the balance spring to be unloaded when the balance wheel is centered. This build is not for the faint of heart, but it is very rewarding when complete. Part quantities are all one except for parts listed below. Shaft lengths and quantities are listed below as well as links to purchase materials. NOTE - pay close attention to part orientation when setting up the prints. Some parts have a very slight offset on one side around where the shaft attaches. bottom_spacers - 3 one_way_rollers - 3 spacer - 5 rear_top_post - 2 rear_minute_idler_gear - 2 hour_idler_gear - 3 3mm x 14mm drive shaft - 4 3mm x 29mm drive shaft - 1 3mm x 17mm balance wheel shaft - 1 .025 music wire, 11 mm long - 2 .025 music wire, 9.5 mm long - 2 .025 music wire, 15.5 mm long - 1 .025 music wire, right angle bend with two 6 mm lengths (to secure escapement) - 1 bushing, 3 mm long - 9 3 x 7 x 3 mm bearings - 12 M3 x 20 mm bolts - 3 M3 X 6 mm bolt - 1 M3 X 4 mm set screws - as many as needed Drive shaft material - https://www.amazon.com/Sutemribor-100mm-Straight-Helicopter-Airplane/dp/B076XY82K3/ref=sr_1_3?keywords=3mm+steel+shaft&qid=1577680772&sr=8-3 Shaft material - https://www.amazon.com/PRECISION-METALS-500-0-025-Music/dp/B0006MZNAY/ref=sr_1_1?keywords=.025+music+wire&qid=1577678400&sr=8-1 Bushing material - https://www.amazon.com/uxcell-Length-Thickness-Seamless-Straight/dp/B07Z99CJRL/ref=sr_1_1?keywords=1.5+mm+brass+tube&qid=1577678194&sr=8-1 Bearings - https://www.amazon.com/uxcell-Bearing-Double-Shielded-Bearings/dp/B07FW18RQY/ref=sr_1_1_sspa?keywords=uxcell+3mm+bearing&qid=1577678137&sr=8-1-spons&psc=1&spLa=ZW5jcnlwdGVkUXVhbGlmaWVyPUExUDM4NUtSWEJKVERSJmVuY3J5cHRlZElkPUEwMjc3MTUxMkRFUzc5TE84RDhLNiZlbmNyeXB0ZWRBZElkPUExMDE5MzY4MVNCOUk4SVFKRlpXTiZ3aWRnZXROYW1lPXNwX2F0ZiZhY3Rpb249Y2xpY2tSZWRpcmVjdCZkb05vdExvZ0NsaWNrPXRydWU= Belts (kids hair ties) - https://www.amazon.com/Hicarer-Rubber-Elastic-Wedding-Hairstyle/dp/B0791BYJWG/ref=sr_1_4?keywords=tiny+rubber+hair+ties&qid=1577677909&sr=8-4 Bolts - https://www.amazon.com/FullerKreg-M3-0-5-Button-Socket-Finish/dp/B07B2QLMXB/ref=sr_1_15?keywords=m3+x+20mm+button+head+socket+cap&qid=1577680828&sr=8-15 Bolt (to secure the escapement) - https://www.amazon.com/uxcell-M3x6mm-Thread-Button-Socket/dp/B01B1OD0IC/ref=sr_1_3?keywords=m3x6+button+head+screw&qid=1580583429&sr=8-3 tuning weights - https://www.amazon.com/Cyful-60pcs-M3x4mm-Socket-Headless/dp/B07JZ9MR86/ref=sr_1_2?keywords=m3x4+set+screw&qid=1580581962&sr=8-2
With this file you will be able to print Mechanical Clock with your 3D printer. Click on the button and save the file on your computer to work, edit or customize your design. You can also find more 3D designs for printers on Mechanical Clock.