Mechanical Tally Counter 2.0
myminifactory
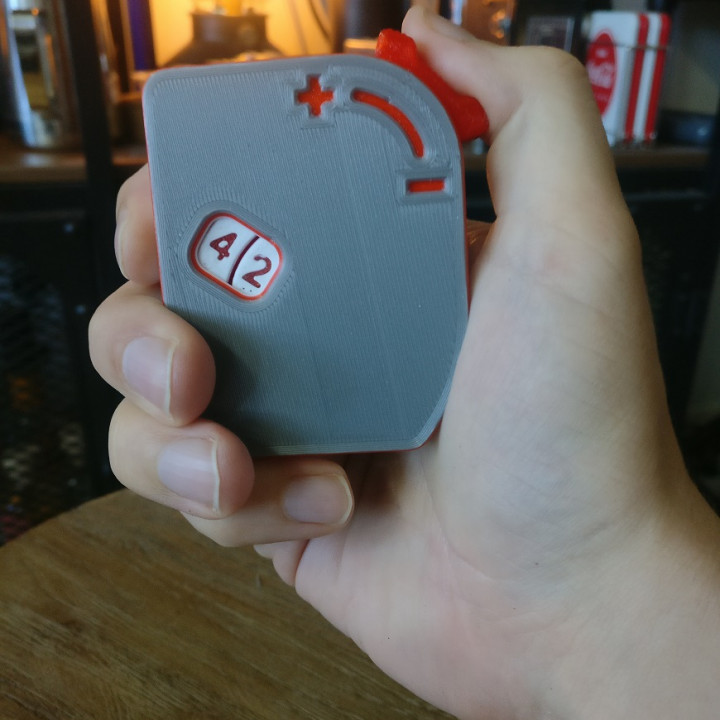
This is my second attempt on creating a mechanical tally counter. Maybe not the most ergonomic counter in the world, but it's quite satisfying to use. It also solved a lot of issues v1.0 suffered from.The latest version of the tally counter is 5.0:https://www.myminifactory.com/object/3d-print-mechanical-tally-counter-5-0-174640This version should be easier to print because it only uses non-printable parts (almost) everyone has available at home. To find the 1.0 version, follow this link: https://www.thingiverse.co/thing:4283231 Here is a video of the counter in use!https://youtu.be/Bdvuev1315Y ------------------------------------------------------------------------------------------------------------------------ READ BEFORE PRINTING! First of all, this is a non-commercial print, this means you are not allowed to sell files or prints of this model. Not that I neccearily would have anything against it, but it would be nice not to find this for sale on etsy... ------------------------------------------------------------------------------------------------------------------------ ALSO IMPORTANT! This project will have some (accessable) non-printable parts, This is because I've noticed PLA springs work fine because of its stiffness, but they break quickly due to fatigue. ------------------------------------------------------------------------------------------------------------------------ PRINT SETTINGS Print all components in the default orientation to minimize support and maximize part strength. All components are designed to be printed in PLA. It isn't required, but if you print eg. the pins in ABS or PETG, the counter might not work as intended due to the difference in material properties. Support materals are only required on: Front_Casing Back_Casing Second_Digit_Dial Ratchet_Lever "First_Digit_Dial" and "Second_Digit_Dial" are desined to be layered with two different filament colors, it isn't required but it makes the digits "pop" a lot more. The same goes for the "Front_Casing", see the pictures for an example of this.I wouldn't use rafts due to the fact that it can mess up the tolerances, which will/can make the mechanism "sticky". Brims can be used to help the gear teeth and casing corners from warping. A warped part in this case could have the same "sticky" effect. The same goes for parts with massive "elephant's foot". I use Brims on everything except the two pins and ratchet lever, just make sure to remove the brim thoroughly. ------------------------------------------------------------------------------------------------------------------------ BOM PRINTED PARTS: 1x Lock_Ring.stl 1x Crank_Lock_Pin 1x Ratchet_Lever 1x Back_Casing.stl 1x Mounting_Plate 1x Second_Digit_Gear 1x Second_Digit_Dial 1x Dial_Gear 1x Ratchet_Wheel 1x First_Digit_Dial 1x Crank 1x(I'd print spares on this one) Ratchet_Pin_1 1x Front_Casing 2x (optional) Screw_Cap NON-PRINTED PARTS: 2x The springs of two pens (the ones in the tip of the pen). Perferably from two identical pens. Check the assembly chapter for a clarity. 2x (highly recommended) m3 screws (the length that should work are 12 - 20mm long) 2x (highly recommended) m3 nuts(optional) Super glue. ------------------------------------------------------------------------------------------------------------------------ ASSEMBLY First of all, It's important that you make a test assembly of the entire project before gluing anything in place. The dials are easy to misalign if you're not careful enough. Assembling it once before gluing will help you to correct any mistakes.You can find pictures of the assembly process in among the photos of this project. Mounting plate assembly: Make sure the first digit isn't placed at an angle. The base of the number should be parallell to the bottom edge, it doesn't matter what number the digit is. (picture 1) (tip: you can use the front casing to make sure the first digit is aligned correctly.) The two dots on the "Second_Digit_Dial" and "Second_Digit_Gear" should align. The second digit dial will be able to move freely, but you should be able to align the digits as shown in the picture. (picture 1). The "Ratchet_Wheel" are mounted from behind (picture 2).Note the orientation of the "Dial_Gear". 4 of the 8 teeth are offset somewhat and the gap created should face the "Mounting_Plate" (picture 2). Ratchet assembly Assemble all pieces as shown in the picture. (picture 3)Note the orientation of the "Ratchet_Lever". The springs are "Hooked" into place at both ends.If your ratchet lever gets stuck on it's way back to neutral, you can adjust the springs by hooking them further in on the spring. Just remember that the neutral position should be in between the two end-stops. You could also use stronger springs from other pens, if your springs still doesn't work as intended. (picture 4) Final assembly Press m3-nuts in the slots as shown in the picture, the flat side of the nuts should face outward. (picture 5)Hook one of the sides of the casing as shown in the picture (Note that the picture only shows the two casing halves), and close. (picture 6) Finish the project by screwing the casing together with two m3 screws, 12-18mm long. (picture 7) If you don't want to use screws, you could skip this step and cover up the holes with the "Screw_Cover". I haven't tried yet, but they should have a nice press fit (let me know otherwise). Glue It isn't really neccecary to glue anything, I like to keep it un- glued since it's easier to change broken components. The "Ratchet_Pin" for example will likely break because of the brittle nature of PLA and the repeated fatigue, that's why I made the casing easy to open and close (And printed more ratchet pins :P). The dials on the mounting plate assembly could need some glue to hold together nicely. again, it doesn't actually need any glue, but if you like to live dangerously, go for it! ------------------------------------------------------------------------------------------------------------------------ FEEDBACK! I do appriciate any feedback you may have. I've only printed this on my printer with the springs that I have available, so if you have printed this project, feel free to post a "make" and let me know how it turned out. I currently can't print the "pins" in anything but PLA, so if anyone could print them in a less brittle material, I'd really love to know if it works and if the durability increased!The same goes for the assembly instructions, if there is something that you found unclear, I'd really like to know what, so I can make it clearer.
With this file you will be able to print Mechanical Tally Counter 2.0 with your 3D printer. Click on the button and save the file on your computer to work, edit or customize your design. You can also find more 3D designs for printers on Mechanical Tally Counter 2.0.