meepo remote toggle -for V2 remote only.
thingiverse
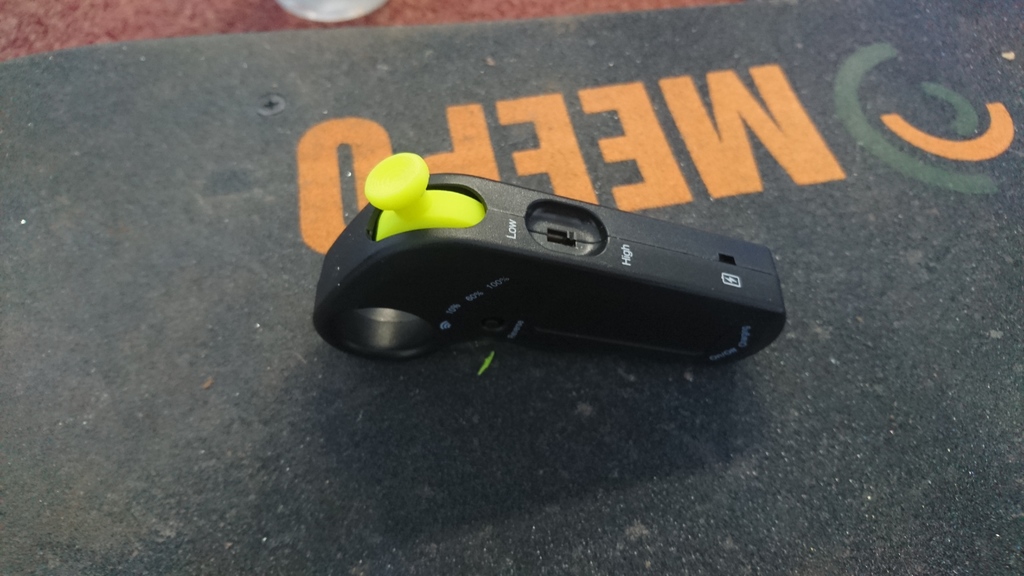
IMPORTANT PLEASE READ BEFORE PRINTING! This upgrade part is designed specifically for version 2 meepo remotes only. It will not fit V1 remotes. To determine which remote you have: V1 remote - features a 2-position speed switch (fast and slow) with the reverse button protruding from the housing. V2 remote - boasts a 3-position speed switch (low, medium, and high) with the reverse button flush against the casing. This design was created to be printed in ABS but PLA should also work well. The dowel is slightly oversized on purpose for a snug fit after acetone welding. For PLA prints, you'll need to use cyno or another adhesive of your choice. During the design phase, I attempted multiple times to achieve a smooth finish and successful print in one piece. Unfortunately, these attempts failed, so I opted to print this part in three separate sections. This compromise resulted in a perfect fit (albeit requiring welding/glueing parts together). Print Instructions: * Print at 0.1-0.2mm layer height with supports and 100% infill. * For ABS prints, consider adding 1-2% scale increase to account for shrinkage, depending on your print temperature and filament. Fitment Instructions: * Sand/file the dowel and mating holes until they fit together tightly without any gaps between toggle and knob. * For PLA prints: glue parts together and allow sufficient time for curing. * For ABS prints: use an earbud to apply a small amount of acetone in one mating hole and half of the dowel. Quickly press them together before it evaporates, then do the same for the other side and twist while still wet (this will remove air gaps and ensure even spreading of melted plastic). Leave to cure. * Remove the 3 screws on the remote, flip it over, and carefully take out the top cover. * Gently pry the original toggle from the potentiometer arm and slide in the new one (don't use excessive force; if it doesn't fit, reprint with a slightly increased scale). * Ensure the potentiometer is seated correctly in the housing, replace the top cover without screwing it down yet, and test the toggle to guarantee smooth movement. File and adjust as needed before replacing the three screws and taking your ride!
With this file you will be able to print meepo remote toggle -for V2 remote only. with your 3D printer. Click on the button and save the file on your computer to work, edit or customize your design. You can also find more 3D designs for printers on meepo remote toggle -for V2 remote only..