melitta mill and brew grinder lock paddle
prusaprinters
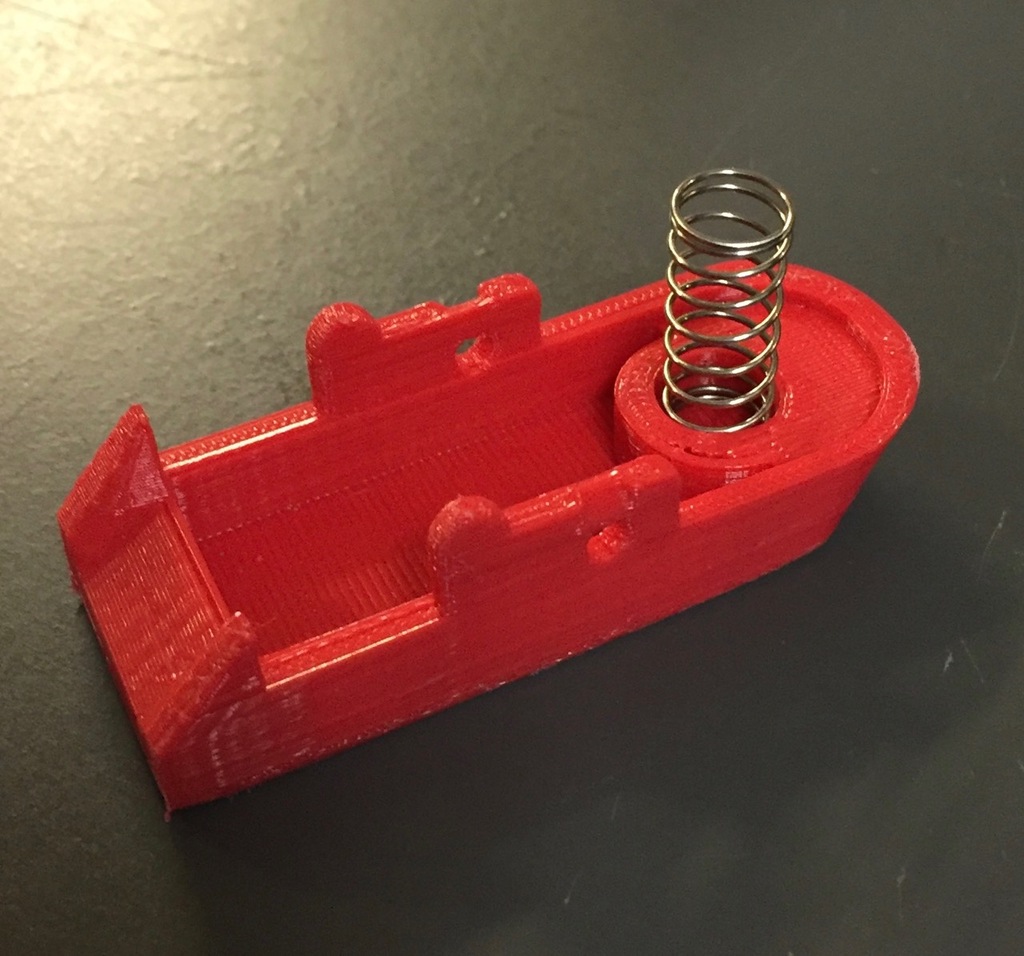
<p>This is a replacement grinder lock for the Melita Mill and Brew coffee maker. I've had this coffee maker since 2003 (over 14 years), and really like the flavor of coffee it makes. Everyone that tries it says "wow, that's good coffee". However, the built-in grinder body has two locking levers that broke with years of use. You can get spare parts on ebay, but why not print them?!</p> <p>The basket has two of these locks, so print one, and make sure it works for you before printing a second. To remove the old locks, use a flathead screwdriver to pry the old lock out, being careful not to break the axel nubs that let the part pivot to lock in place.</p> <p><strong>Update 11/17/2017</strong><br/> The first design could warp if printed with PLA, from the heat of brewing the coffee. I've improved the design, so that the heat from brewing doesn't deform the parts. It's now a two part, and should be printed at 100% infill. The plug fits into the paddle, after being installed in the grinder basket, to keep it from warping.</p> <p><strong>Instructions</strong></p> <ol> <li>Print the paddle at 100% infill</li> <li>Print the plug at 100% infill</li> <li>Clean up the hole to fit the basket's pivots with a drill bit</li> <li>Mount the paddle in the basket, with the spring in place</li> <li>Push the plug into the paddle, to lock the two parts in</li> <li><p>Brew coffee Download from Thingiverse, or find the files here:<br/> <a href="https://github.com/thrasher/melitta_mill_and_brew">https://github.com/thrasher/melitta\_mill\_and\_brew</a></p> <h3>Print Settings</h3> </li> </ol> <p><strong>Printer Brand:</strong></p> <p>MakerBot</p> <p><p class="detail-setting printer"><strong>Printer: </strong> <div><p>MakerBot Replicator Mini</p></div><strong>Infill:</strong></p> <p>100%</p> <h3> <br/> <p class="detail-setting notes"><strong>Notes: </strong> </p><div><p>My prints were done with all of the default MakerBot Mini settings, except infill which must be 100%</p></div> Post-Printing</h3> <p><strong>Final Cleanup</strong></p> <h3> <div><p>I used a 1/8 drill bit to expand the holes on either side of the part, to match the axel nubs on the grinder body. On the MakerBot Mini, since it prints rafts, I used a metal file to cut down the outside surface raft and make it smooth. The hole size for the spring is a little loose, but it works fine. It required too much trial/error to get it exact, so I avoided that by making it slightly large.rnrnGently wedge the part on the axel nubs on the grinder body, and don't forget the spring! Work it back and forth a few times if it's a tight fit. Remove and use a file to cut down the shape further if it's binding. It shouldn't bind at all.</p></div> How I Designed This</h3> <p>I just copied the existing broken part with a caliper, sketching it into Sketchup.</p> </p> Category: Kitchen & Dining
With this file you will be able to print melitta mill and brew grinder lock paddle with your 3D printer. Click on the button and save the file on your computer to work, edit or customize your design. You can also find more 3D designs for printers on melitta mill and brew grinder lock paddle.