MGN12H for Predator
thingiverse
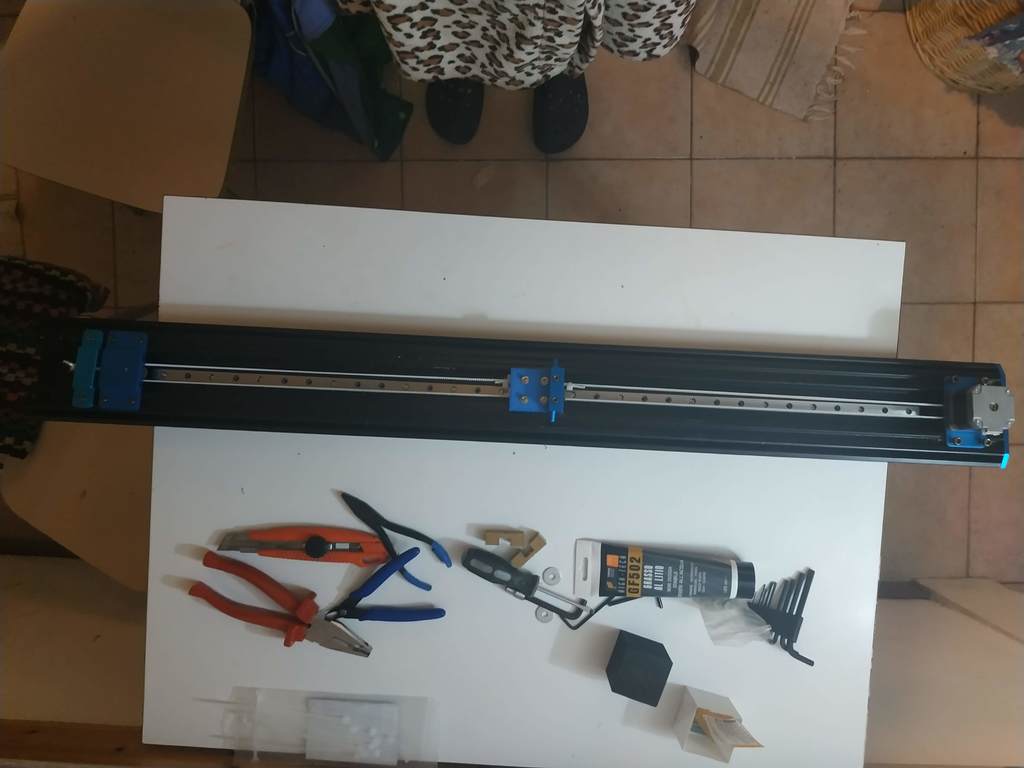
MGN12H for Predator necessary material: 3x 800mm MGN12H to attach the adapter to the linear guide carriage: 12x M3x25mm 12x 15mm spacers 12x M3 washers (optional) to fix the rod holder on the adapter: 3x 2 nuts M4 original M4 screws to fix the linear guide to the upright: TOT M3x20mm (in picture M3x25) TOT M3 nuts (self-locking nuts in the picture) 3x 2 meters of GT2 6mm (optional. reinforced type, in the picture) drill with 3.25mm bit procedure - remove the uprights (pay attention to the motor wiring cable) - remove the motor plate and bottom plate - mount the adapter on the trolley and make sure it is at the same distance from the upright as the original plate (photo 1) - remove the original carriage and remove the support for the rods - mount the rod support on the adapter - position the linear guide using the appropriate spacers (4 pieces recommended). as a reference take the holes - motor side - on the upright (photo2) - drill the uprights and fix the MGN12H with M3 screws and nuts - fasten the belts with zipper on the spacers (ATTENTION: fix them on the same side as on the original plate. this avoids reversing the direction of rotation of the motors) - pay VERY attention to the belt. it must remain as parallel as possible to the upright. it is advisable to turn the bottom plate 180 degrees (see photo 3) and, if necessary, shim with washers. turn the crankshaft toothed pulley 180 degrees and fix it at a suitable distance (photo 4) - reassemble. be very careful that the metal L activates the endstop Italiano: MGN12H per Predator materiale necessario: 3x MGN12H da 800mm per fissare l adattatore al carrello della guida lineare: 12x M3x25mm 12x distanziatori da 15mm 12x rondelleM3 (opzionale) per fissare il supporto rod sull adattatore: 3x 2 dadi M4 viti M4 originali per fissare la guida lineare al montante: TOT M3x20mm (in foto M3x25) TOT M3 dadi (in foto dadi autobloccanti) 3x 2 metri di cinghia (opzionale. in foto cinghia rinforzata) trapano con punta da 3,25mm procedura - smontare i montanti (fare attenzione al cavo di cablaggio del motore) - smontare piastra motore e piastra inferiore - montare l adattatore sul carrello e assicurarsi che sia alla stessa distanza dal montante della piastra originale(foto1) - sfilare il carrello originale e smontare il supporto per le rod - montare il supporto rod sull adattatore - posizionare la guida lineare utilizzando gli appositi spaziatori (consigliato 4 pezzi). come riferimento prendere i fori - lato motore - sul montante (foto2) - forare i montanti e fissare le MGN12H con viti e dadi M3 - fissare le cinghie con fascette elettriche sui distanziatori (ATTENZIONE: fissarli sullo stesso lato come da piastra originale. questo evita di invertire il senso di rotazione dei motori) - prestare MOLTA attenzione alla cinghia. essa deve restare il più possibile parallela al montante. si consiglia di girare di 180 gradi la piastra inferiore (vedi foto3) e se necessario spessore con rondelle. girare di 180 gradi la puleggia dentata dell albero motore e fissarla a una distanza opportuna (foto4) - rimontare. fare molta attenzione che la L metallica attivi l endstop
With this file you will be able to print MGN12H for Predator with your 3D printer. Click on the button and save the file on your computer to work, edit or customize your design. You can also find more 3D designs for printers on MGN12H for Predator.