Micro:Bit Dominoes
myminifactory
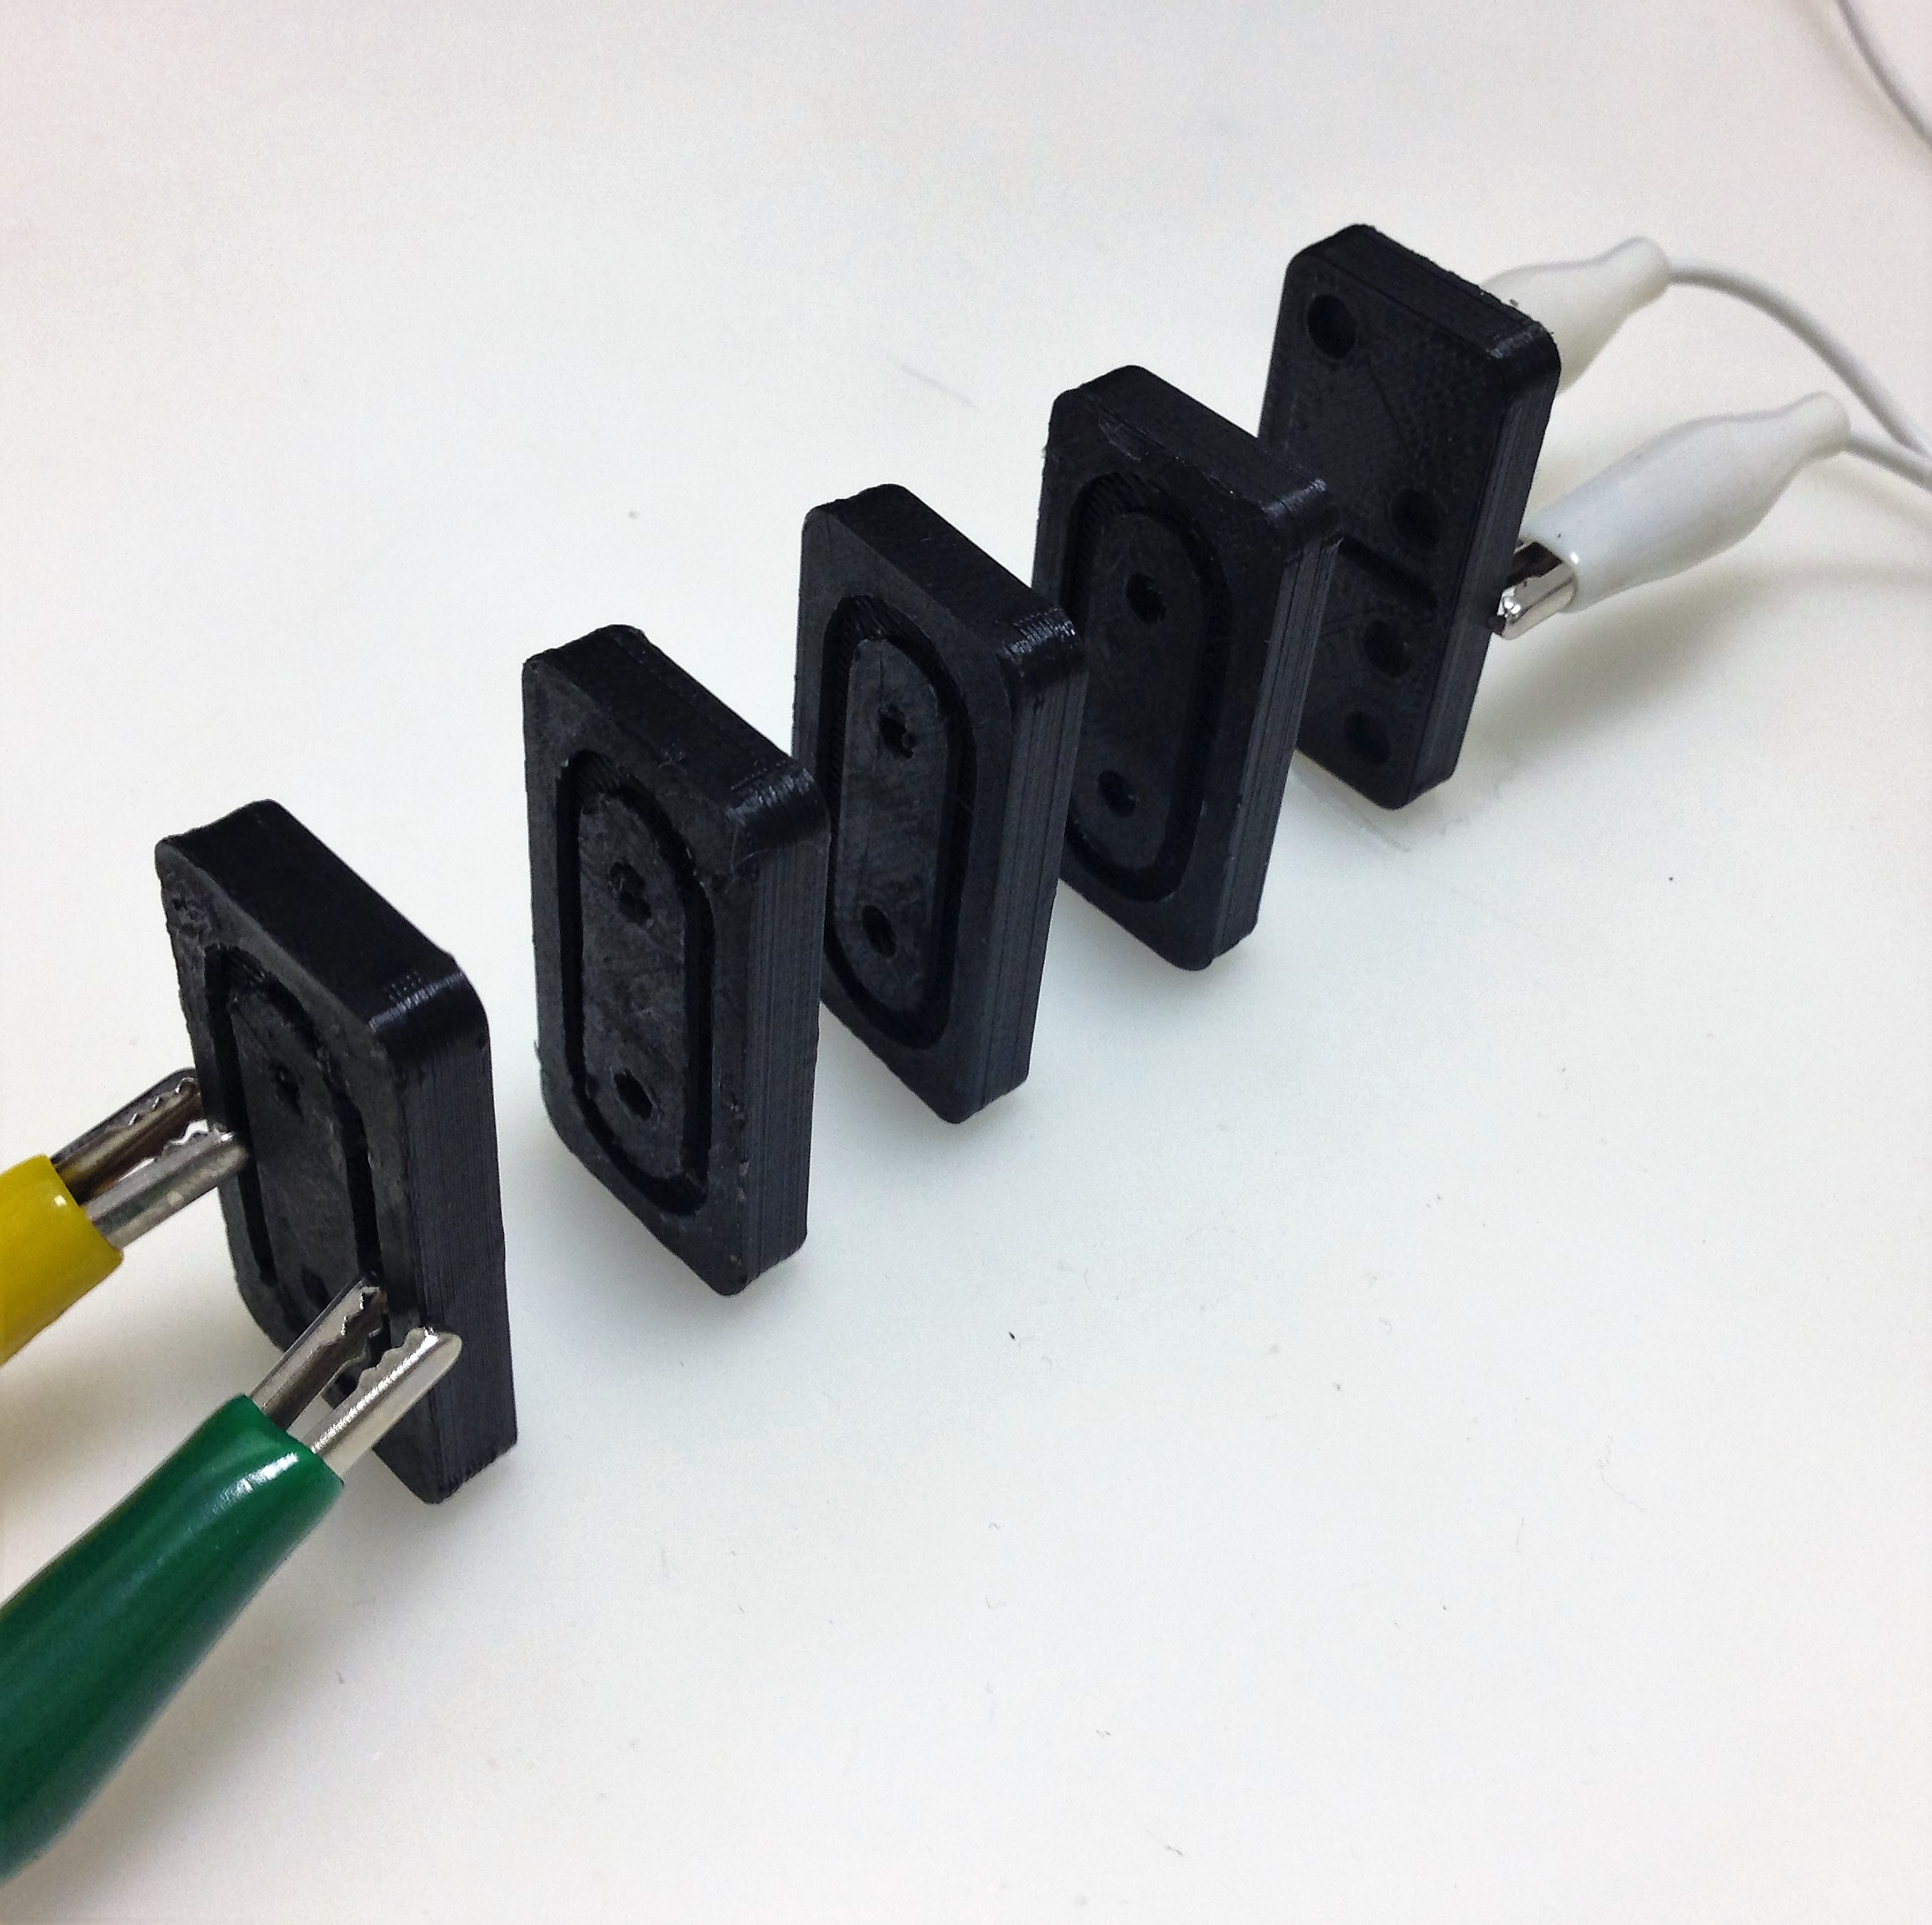
As a child, I used to have a large dominoes set. I would line up all the dominoes standing vertically and create all kinds of curves and paths for them to follow. I would stand at one end and have hours of fun watched them all fall one after another and if all the dominoes didn’t fall over I’d spend time relining them all. Although I’m much older know, I still see children having endless amounts of fun with dominoes, and so I have come up with Micro:bit dominoes. Micro:bit dominoes uses conductive filament. I will warn you that this is more difficult to get hold of than regular filament and it’s also more expensive. Imakr currently sell 1.75 metres for £59.00. https://www.imakr.com/en/78-functionalize-filaments You will need: 1 x 3D printer + Conductive Filament 1 x BBC Micro:bit 1 x AAA battery pack with black and red wires 2 x AAA batteries 1 x pair of wire pliers 1 x Sellotape or Blue Tack 4 x Crocodile wires If you have a Micro:bit case or holder, you could also include this, but it’s not essential Micro:bit code: (Customise image as you wish) https://www.microbit.co.uk/bisdql Block Editor Use the following instructions to set up Micro:bit dominoes: Download the STL file and 3D print the dominoes. You can duplicate the prints for as many as you want. Place the 2 AAA batteries into their case Look at the black and red wires that are attached to the battery case. You will need to use pliers to cut away some of the plastic, exposing between 10mm-15mm of the metal wires. Use 2 crocodile wires, and connect 1 end of each to the exposed wires on the battery pack, and the other 2 ends to the first dominoes piece in line. Line up all your dominoes as you wish, and then focus on the end of the line. You will need the other 2 crocodile wires. Connect 1 end of each to the last dominoes piece in line, and the other ends to pins 0 and GND on the Micro:bit. If necessary, use Blue Tack or Sellotape to secure the wires in a position. The Micro:bit will now power on when the conductive dominoes touch to complete the circuit. You now have the circuit ready. Now follow the link above for the Micro:bit code. Compile the code onto your Micro:bit and you’re ready to go! You have created a circuit that breaks when the Dominoes are not touching, therefore the aim of the game is to make a path that is simple, and if all the dominoes are knocked down the Micro:bit will display an image. Make the path of dominoes more complex as you go and see how far you can get. You could play with others to see who can build the most complex path and can still power the circuit. You can also take advantage of the 3D printed dominoes and create more of your own to make your own set. Happy playing! Additonal information - It maybe that there are issues getting the circuit to work initially, it took me a while to get all the dominoes to connect and conduct. If you have any suggestions for improvement please comment! The printing time varies depending on how many dominoes are printed. It’s 49 minutes for the 4 that I’ve printed, but for a full set of 28 dominoes if you want the game as well, it’s 338 minutes.
With this file you will be able to print Micro:Bit Dominoes with your 3D printer. Click on the button and save the file on your computer to work, edit or customize your design. You can also find more 3D designs for printers on Micro:Bit Dominoes.