Micro switch
thingiverse
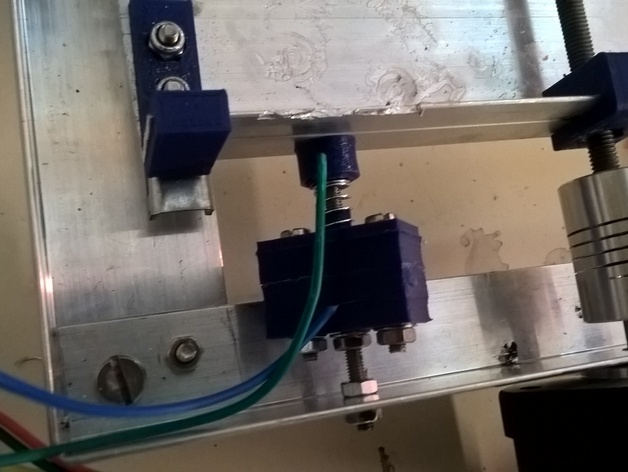
Human: Needed some end-stop switches for my DIY dremel-cnc and couldn't find any that worked for me. So I made this :)\nIf there is interest, I might add a body part to make it be "always on" by default like a normal micro-switch. Comment if you want me to...\nParts needed:\nSpring: 6x12mm (1x)\nScrews: M3x20mm (4x)\nNuts: M3 (5x)\nWashers: M3 (7x)\nTwo wires\nPrinted parts:\nOne of every part, except two of box_body.stl\nPrint Settings\nPrinter:\n Wanhao Duplicator i3\n \n Rafts:\n No\n \n Supports:\n No\n \n Resolution:\n 0.1\n \n Infill:\n 100%\n \n Notes:\n PLA\nNozzle: 200C\nBed: 70C\nPost-Printing\nStep one: filing\n Used a round file and a flat file to make all holes smooth, so that screws didn't bind. Especially important on box_lid\n Step two: assembling box_bottom\n Press fit one of three washers into the recess in the part.\nTake one of your wires, take off some insulation and twist the end (5mm)\n\n \n Thread end of wire down into hole and press it into slot (slot has been widened since photo)\n \n Put another washer on a screw, and thread into hole, capturing end of wire.\n \n Add washer and nut on the other side and tighten.\n Step 3: Assembling box_lid and cap\n Thread a nut onto screw (this is for adding adjustment and because my screws are a bit long)\nPut screw through hole in box_lid\nPut spring onto screw/box_lid\nPut cap_plate onto screw, so that the knobby part holds the spring.\nPut a washer on the screw\nThread second wire through hole in cap_hood (widen if required)\nFasten wire end to a washer, and put it on the screw as well\nAdd nut and tighten till screw is flush\nPush cap_hood onto cap_plate, while pulling on wire so it goes on with no wire left inside (might want to use pliers for this)\n \n Step 3: Assemble body\n This is the easy part.\nThread two screws through lid, both body parts, and through bottom.\nAdd washers and nuts\nDone!\n\n Step 4: mount\n I mounted mine using the long screw that goes through the bottom. You can also mount using the other two screws, glue, or make a custom mount with your printer\n \n Using the screw makes it easy to adjust the trigger spot.
With this file you will be able to print Micro switch with your 3D printer. Click on the button and save the file on your computer to work, edit or customize your design. You can also find more 3D designs for printers on Micro switch.