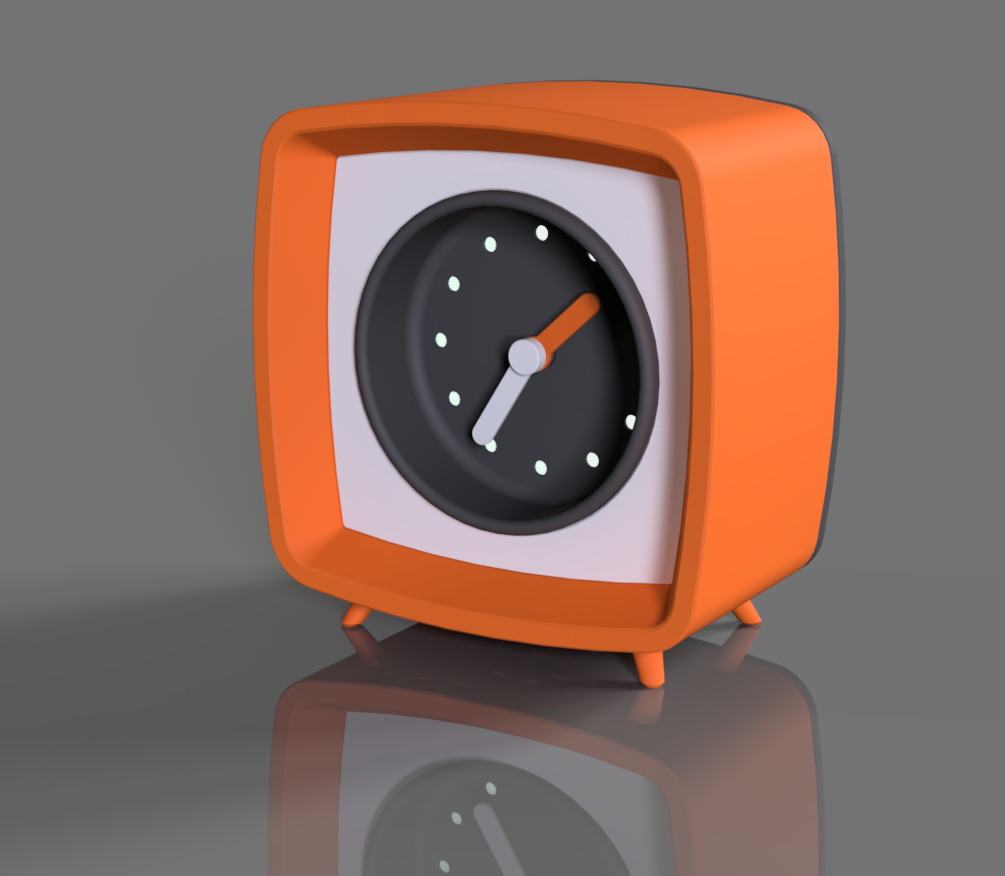
Mid-Century Modern Desk Clock
prusaprinters
<p>I designed this clock in Fusion360 using inspiration from classic Mid-Century Modern furniture pieces. This is an easy print, features many customizable elements, looks great in any space, makes a great gift, doesn't need any hardware and doesn't require any supports. The movement is from Amazon but almost any battery operated movement with a post smaller than 8mm and about 20mm in length should do the trick. I have included a screenshot of the item so you can find the same thing or similar. I typically print everything in 3D Fuel Pro PLA with stock PrusaSlicer settings for .3mm layer height. The included .gcode files print very well for Prusa MK3S printers so I'd recommend using them if possible. </p><p>With the supplied .gcode files, I have indicated where color changes happen with the Face component. This color change gives the face a different color for the hour indicators so I feel it is a necessary part of the process. </p><p>The Trim Plate component is easily customized, I would encourage you to experiment with different fill patterns for top/bottom layers or trying different infill patterns with no top/bottom layers. I have included some that I thought would look neat but get creative with it! I have also included a .dxf cut file if you have access to a laser cutter or CNC router to make Trim Plates out of different .25" thick materials. If your material is thinner, you may have to print a spacer using the supplied .stl for the Trim Plate and scaling the Z height to make up the difference in material thickness. I have tried cut/etched plywood and it really pops and stands out against the printed parts!</p><p>If you find that the Minute and Hour Hands are too tight or loose, simply adjust scale in slicer to make up for differences.</p><p>I typically design in imperial measurements. If a part comes in and it is too small, adjust the scale of that part to 2540% and it will be correct.</p><p>For assembly, start with the Housing face down and insert the Trim Plate and Face. Next, attach the movement to the Movement Holder as indicated in the photos. Insert the assembled Movement Holder into the Housing. Install the Minute and Hour Hands so you can push against the movement with one hand and install the hands with the other. The instructions recommend setting both hands to 12 o'clock and setting the time from there. Now install the Back Spacer as indicated in the photos and Base into the Housing. The Back slips over the dovetail parts on the Housing and slides down to lock into place. When time needs to be adjusted or battery needs to be replaced, simply slip the back off and perform the maintenance. </p><p>The clock in the photos was printed using 3D Fuel Autumn Orange, Charcoal Grey and Bone White Pro PLA. I also used Duramic Glow In The Dark PLA for the first color on the Face. </p><p>If you Would like to send a tip:</p><p>Venmo: @Dave-Sauvageau</p><p>Paypal: davesauvageau@yahoo.com</p>
With this file you will be able to print Mid-Century Modern Desk Clock with your 3D printer. Click on the button and save the file on your computer to work, edit or customize your design. You can also find more 3D designs for printers on Mid-Century Modern Desk Clock.
