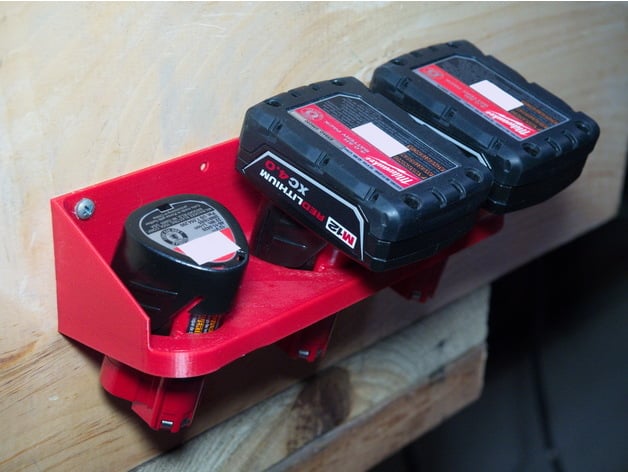
Milwaukee M12 battery holder and wall mount
thingiverse
This is a battery holder and wall mount for the Milwaukee M12 battery system. Available for download are several STLs - the one and three battery versions can hold extended capacity batteries in all slots while the four battery version can hold extended batteries only in every other slot. Note that the three battery version is 218mm wide and the four battery version is 224mm wide. On request, I can provide other STLs for 1-3 batteries with narrow or wide spacing (which accommodates the XC battery), or 4 batteries with narrow spacing only. Print Settings Printer: FlashForge Creator Pro (2016) Rafts: No Supports: No Resolution: 0.2mm Infill: 15% Notes: The sides and back walls are 2mm thick and are meant to be solid, so set print width and number of perimeters for optimal results for your print head. For example, with a .4mm print head set print width to .5mm and use at least two perimeters. How I Designed This Designed in FreeCAD 0.16 I designed a rough model of the battery to use for the cutouts. From there, it was just the matter of tweaking and printing out tests to get the spacing and battery rotation right. The CAD file has multiple cutout templates that I experimented with before deciding to upload just two versions to Thingiverse. If you want to make use of these other layouts, you can do the following in FreeCAD (or just ask and I'll upload an STL for you): Switch to part workbench If not visible already, open the Combo View panel (View --> Panels --> Combo View). Select the Model tab Delete last three steps (Chamfer, Fillet##, Cut). After deleting the cut, select the Battery object in the Combo view and hit the space bar to hide the cutout template (you don't need it anymore) Double click BasePad and edit the length to whatever number is noted on the particular battery cutout you want. This will change the length of the object to fit whatever number of batteries you want. For example, if you wanted a 2-bay narrow holder, then type in 114mm. In the Combo View, select TopEdgeFillet_LastBeforeCut, then CTRL-click on whatever battery cutout you decided (to continue the example in the last step, you would select "Battery_2_narrow (BasePad 114)") Apply a boolean cut. You should have a usable model now with the proper cutouts. Switch to Part Design workbench Select the top face of the object (where the holes are) and apply a fillet of 1.5mm. This will smooth out the edges on top. Select any edge on the bottom lip of the battery holder hole(s) and apply a chamfer of 1mm (for multiple batteries, CTRL-click to select one edge from each hole). This helps smooth out the bottom edge of the hole. To export your object as an STL, select your final object in the Combo View, then go to File --> Export The bottom chamfer isn't strictly necessary, but it might help out if your bottom layers get squished outward or expanded.
With this file you will be able to print Milwaukee M12 battery holder and wall mount with your 3D printer. Click on the button and save the file on your computer to work, edit or customize your design. You can also find more 3D designs for printers on Milwaukee M12 battery holder and wall mount.
