Milwaukee Packout Rail bracket
prusaprinters
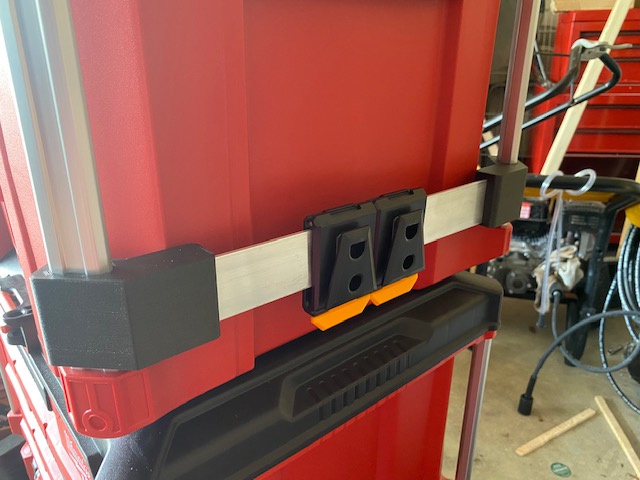
<p>This is a clean and simple Milwaukee Packout Rail bracket. It is probably the most cost affordable design out there as there are no addition screws, nuts, or extras to purchase. </p><p><strong>Print Instructions:</strong></p><p>Please print 1 at regular orientation AND 1 Rotated 180 Degrees so that when installed, the top pattern and bottom patterns are visually the same. </p><p><strong>Materials List: </strong></p><p>Lowes Item Number: (Model # 11317) 2in X 3Ft Interior/Exterior Mill Finished Aluminum Solid. Approx $15.00</p><p><strong>Assembly Instructions: (Measuring for cut)</strong></p><p>Since everyone's settings are slightly different, here is what I did to achieve the perfect cut for the aluminum bar</p><ol><li>Remove Milwaukee guide rod screw, and pull rods down, (no need to remove fully)</li><li>Each 3D printed bracket (aluminum bar slot is 30MM) when measuring for the cut. </li><li>Install 1 bracket </li><li>slide aluminum bar into the other bracket (that's not yet installed)</li><li>The Aluminum bar will extend past your other bracket, when you install make a mark on the aluminum bar where the bar meets the front part of the 3D part.</li><li>Measure approx 25MM PAST your mark. (the 5mm difference is a buffer)</li><li>Square a straight line, and cut the bar. </li><li>Remove your installed bracket, install aluminum between both brackets, and reinstall into your Milwaukee Packout kit.</li></ol><p>Sketch was done using Fusion360, Please remix to your preference. Please send / post pics of remix when finished. </p><p> </p><p> </p>
With this file you will be able to print Milwaukee Packout Rail bracket with your 3D printer. Click on the button and save the file on your computer to work, edit or customize your design. You can also find more 3D designs for printers on Milwaukee Packout Rail bracket.