Mini Battery Tester
thingiverse
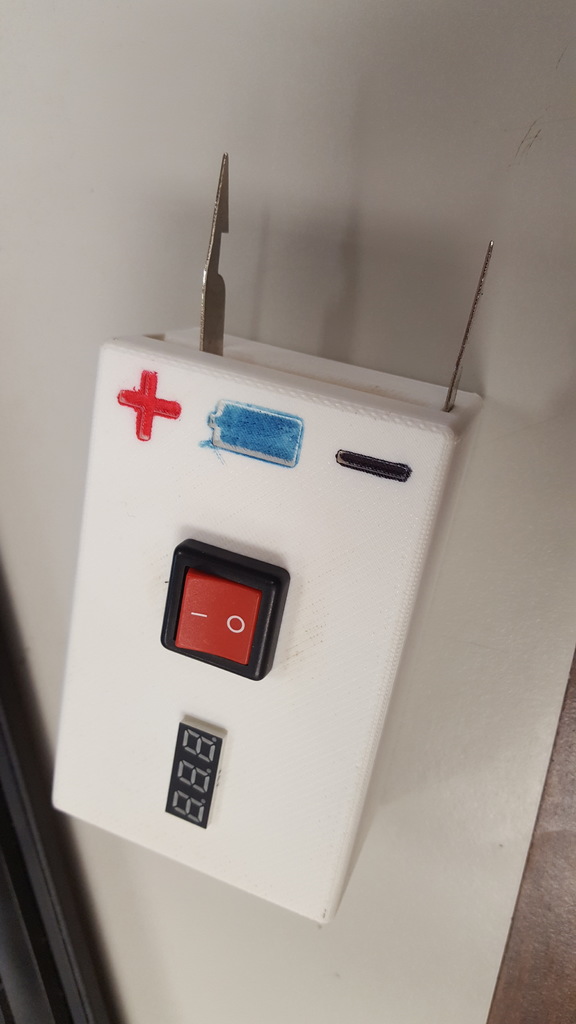
Easy to make, DIY battery tester. Printed parts are ABS on Stratasys 200mc. Sparse high density infill setting. Used rafts and support, especially for the bottom panel. Other than the printed parts, you will need: - a power switch. I used a SPST rocker switch from Radioshack https://www.radioshack.com/products/spst-red-rocker-switch The box is designed to fit this switch, but any switch can be used. You will probably have to modify the box to fit a different switch. - x2 Soldering heat clips https://www.radioshack.com/products/soldering-heat-sink-clip-tool Any piece of thin metal will work. I used these because they were cheap, on sale, and easy to work with. - a mini volt meter. There are lots that can be found on Amazon pretty cheap. https://www.amazon.com/SMAKN%C2%AE-Voltmeter-Digital-Display-Detector/dp/B00N71QLCK/ref=sr_1_33?ie=UTF8&qid=1529679939&sr=8-33&keywords=mini+volt+meter I made sure to get one that had 3 wires already attached so I wouldn't have to worry about adding to it later. - a 9v battery snap connector. Already had one but I know Radioshack has them. https://www.radioshack.com/products/radioshack-fully-insulated-9v-battery-snap-connectors - some heat shrink, a ring tongue, a small screw (got one from old computer I had disassembled), and x4 M3 20mm capscrew bolts with matching locknuts. (you could probably go shorter with the bolts, it's what I had lying around.) - a 9v battery Tools: Soldering iron, Glue gun, Phillips head screwdriver, pliers, drill, wire cutters, hammer, vise/anvil, markers (optional) Assembly: If you are using the heat clips from Radioshack as the leads, first remove the rubber covering then straighten them with pliers. To fully straighten them, use a hammer and anvil to get them nice and flat. I cut one end of the clip off and rounded the edge with a grinder. On one lead, I drilled a small hole for my wire to attach to. On the second, I drilled two holes for the bolts and ring tongue. The volt meter display should fit nice and snug in the hole. I did not need glue or anything to make it stay. After attaching the display and power switch, I wired everything up (just follow the diagram and pics), and glued the negative lead into it's little slot. attached the hinge and second lead, then hooked up the battery which fits nicely in the box on the bottom panel. Add the screw to attach the bottom panel and it was done. UPDATE: First version of hinge did not work. It was too small for the printer to print correctly. I changed the design to a "stiff hinge" which is not a hinge at all really, but it works. I printed it with Nylon Bridge with 50% rectilinear infill.
With this file you will be able to print Mini Battery Tester with your 3D printer. Click on the button and save the file on your computer to work, edit or customize your design. You can also find more 3D designs for printers on Mini Battery Tester.