
Mini clock for radio-controlled quartz analogue clock movement
prusaprinters
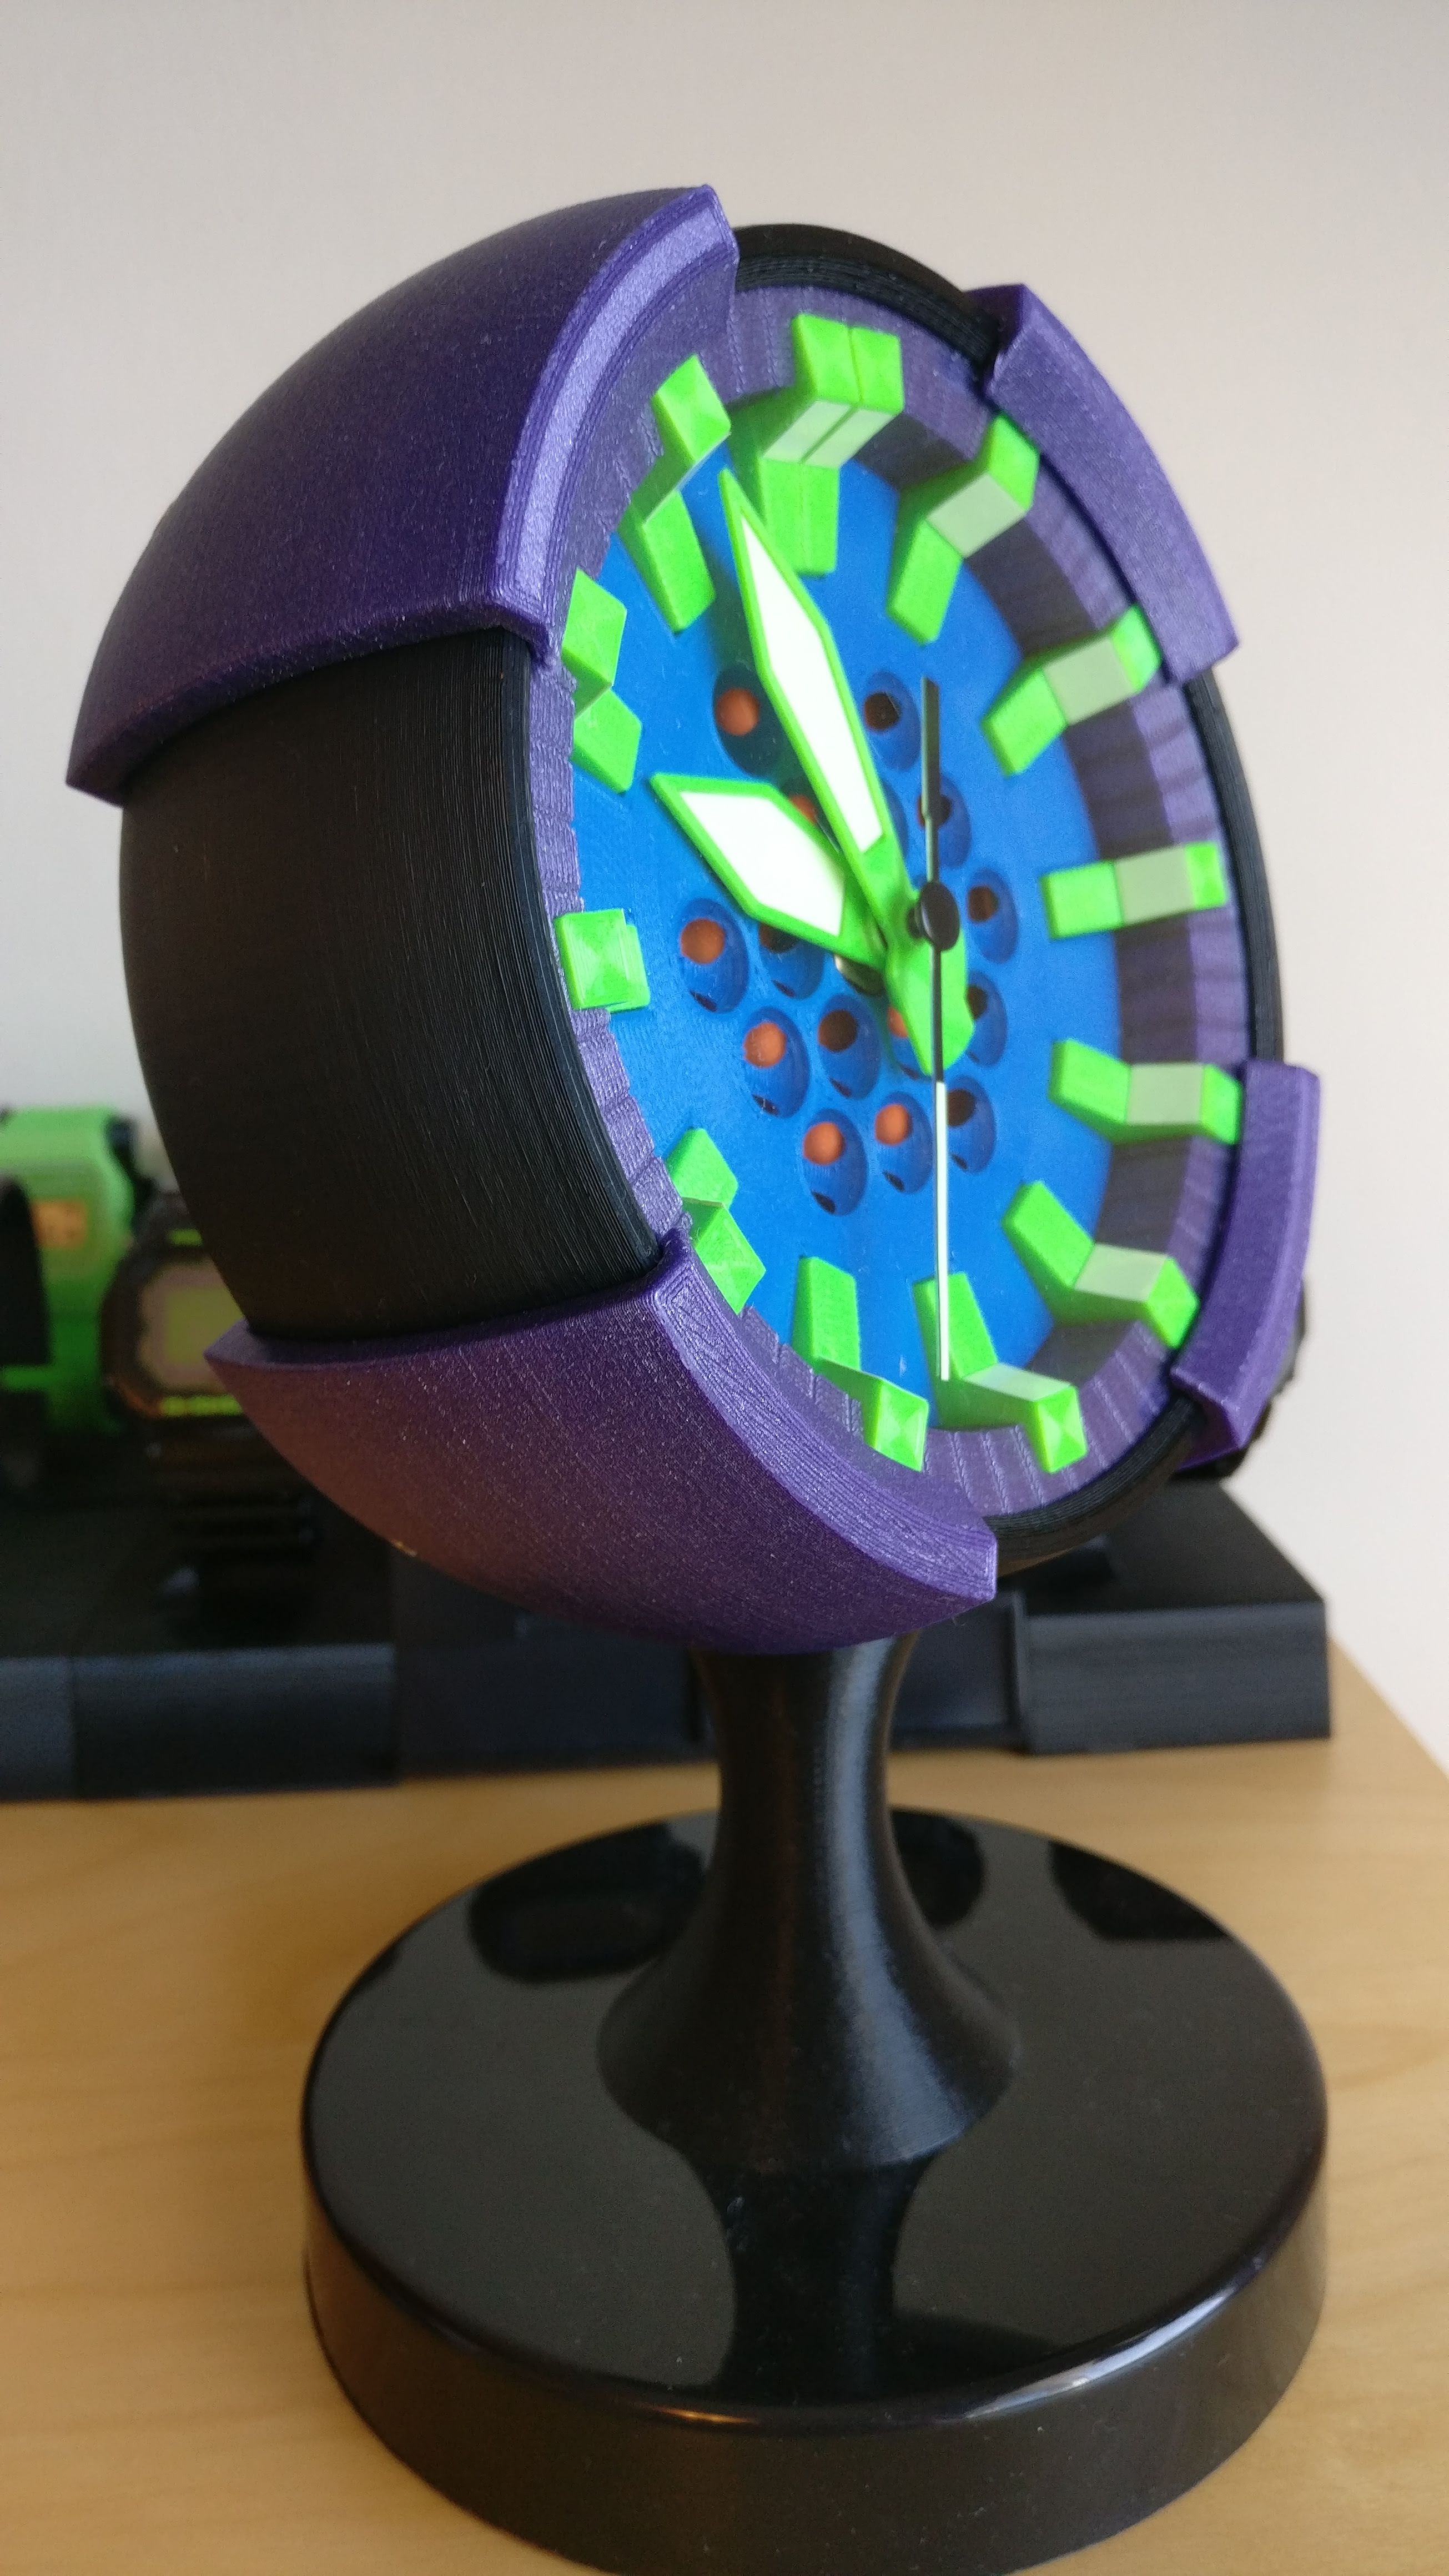
<p>This clock is designed for the WWVB movement linked below. Standard quartz movements should work as well, as long as they can fit inside the following bounding box: 66.1mm x 56.3mm x 19.2mm.</p><p>It has been designed from scratch by myself for FDM printing, inspired by the design aesthetic of Casio G-Shock watches.</p><p>All except one of the files can be rotated to print without any supports. Non-printed components and tools will need to be prepared ahead of time. Tolerances will need to be fairly tight as the assembly is somewhat complex, so ensure your printer is tuned to print accurately. Please review the filenames, model file comments, and pictures before starting.</p><p>Non-printable parts and necessary tools:</p><ul><li>The clock movement and clock second hand<ul><li><a href="https://www.aliexpress.com/item/32928015438.html?spm=a2g0o.productlist.0.0.52ad5744O57egS&algo_pvid=6a7c6e23-f76b-4489-956c-c9972c876529&algo_exp_id=6a7c6e23-f76b-4489-956c-c9972c876529-27">https://www.aliexpress.com/item/32928015438.html?spm=a2g0o.productlist.0.0.52ad5744O57egS&algo_pvid=6a7c6e23-f76b-4489-956c-c9972c876529&algo_exp_id=6a7c6e23-f76b-4489-956c-c9972c876529-27</a></li><li>The hole/ shaft gripper of the second hand is too small to 3D print, so the original second hand included with the movement must be used.</li></ul></li><li>(OPTIONAL) Weighted base from an Ikea JANSJO lamp and the following for attaching it to ikea_stalk:<ul><li>2x M3 bolts of 11mm+(thickness of jansjo base)</li><li>2x M3 hex nut</li></ul></li><li>For the joint between the stalk_and_base or ikea_stalk and the outershell:<ul><li>M3 hex key</li><li>M3 spring (like the one used in the prusa extruder-idler, maybe even the spare)</li><li>M3 Bolt (like the one used in the extruder-idler, minimum length = length of spring + 11mm)</li><li>M3 Nylock nut</li><li>2x M3 Washer</li><li>M3 socket hex nut driver with head diameter smaller than 8.6mm<ul><li>5.5mm option of <a href="https://www.aliexpress.com/item/32837843724.html?spm=a2g0s.9042311.0.0.27424c4d9LUmVj">https://www.aliexpress.com/item/32837843724.html?spm=a2g0s.9042311.0.0.27424c4d9LUmVj</a></li><li>This must reach into the stalk to tighten the nylock nut.</li></ul></li></ul></li><li>For holding the internals of the clock (dial, dial sublayer, mech case) together<ul><li>4x M2x5.8mm countersunk screws</li></ul></li><li>For holding the 4x shellguard onto the outershell<ul><li>4x M2x 10mm countersunk screws</li></ul></li><li>The round clock crystal<ul><li>Acrylic from Ikea RIBBA picture frame, or any clear material less than 1.4mm thick, cut to diameter of 120mm<ul><li>Can be laser cut or home cut using a rotary tool with a router bit and the included holdercam.stl and cutterdisk.stl system.</li></ul></li></ul></li><li>(Optional) Phosphorescent (glow in the dark) material:<ul><li>Luminous tape or sticker cut into desired size and shape<ul><li><a href="https://www.aliexpress.com/item/1005002076563374.html?spm=a2g0o.productlist.0.0.1a07154cMtLytQ&aem_p4p_detail=202106082151112764357906400090011197926">https://www.aliexpress.com/item/1005002076563374.html?spm=a2g0o.productlist.0.0.1a07154cMtLytQ&aem_p4p_detail=202106082151112764357906400090011197926</a></li></ul></li></ul></li><li>For electric illuminator:<ul><li>Battery operated “Fairy" string lights or Battery operated EL wire or self-wired LEDs</li><li>Momentary pushbutton, normally open, 7mm<ul><li><a href="https://www.aliexpress.com/item/1005001710533707.html?spm=a2g0o.productlist.0.0.796c4766yGaH2b&algo_pvid=899ae893-a2c8-43b6-9390-2d3bedb9e313&algo_expid=899ae893-a2c8-43b6-9390-2d3bedb9e313-1&btsid=0b0a556116232144278655306e9416&ws_ab_test=searchweb0_0,searchweb201602_,searchweb201603_">https://www.aliexpress.com/item/1005001710533707.html?spm=a2g0o.productlist.0.0.796c4766yGaH2b&algo_pvid=899ae893-a2c8-43b6-9390-2d3bedb9e313&algo_expid=899ae893-a2c8-43b6-9390-2d3bedb9e313-1&btsid=0b0a556116232144278655306e9416&ws_ab_test=searchweb0_0,searchweb201602_,searchweb201603_</a></li></ul></li></ul></li></ul><p>Assembly:</p><ul><li>For the joint between the stalk_and_base or ikea_stalk and the outershell:<ul><li>Check that the M3 Bolt is long enough to fit your spring, but not too long that the spring will not have the desired tension before the hex driver bottoms out. Ideally the spring is ½ compressed.</li><li>insert M3 bolt from outshell side, through the slit in outershell, into the stalk</li><li>place washer onto the m3 bolt inside the stalk (check with flashlight that washer is properly seated</li><li>place spring onto m3 bolt</li><li>Place another washer</li><li>place nylock nut and use the socket driver to tighten until desired tightness. prevent the M3 bolt from turning with a hex key from the outershell side.</li></ul></li><li>(optional) For jansjo lamp base:<ul><li>Insert two hex nuts into pockets in the ikea_stalk.</li><li>Place oval plate under the jansjo base, install M3 screws, place the round spacer plate above jansjo base, and turn the two M3 screws into the pocketed hex nuts in the ikea_stalk.</li></ul></li><li>Prepare the clock crystal (the transparent window that keeps dust out of the clock)<ul><li>Laser or machine cut something transparent, or buy pre-cut, 1.4mm thick, diameter of 120mm</li><li>The cuttercam and holderdisk system:<ul><li>stick the holderdisk onto the RIBBA acrylic sheet using non-permanent adhesive. leave the protective film on the acrylic until it is ready to be installed in the clock.</li><li>put the cuttercam onto the rod on holderdisk</li><li>attach a rotary tool with a router cutter into the large hole on cuttercam. This may require a custom fitted adapter on your rotary tool.</li><li>perform the cut by using cuttercam as a guide as it swings around on the holderdisk shaft. clean up the edge so no flakes of material remain at the edge and interfere with the installation later.</li></ul></li></ul></li><li>Install the clock crystal<ul><li>remove the inside protective film.</li></ul></li><li>Assemble the clock internals<ul><li>Snip the support structures from the chapter_ring.</li><li>Install the movement into mech_case</li><li>Install dial_sublayer, dial, hour markers, and chapter ring<ul><li>Install the electronics for the illuminator<ul><li>pull the loose ends of the illuminator wire out of the movement assembly through the round hole in mech_case</li></ul></li></ul></li><li>Rotate to align the screw holes and install 4x M2x5.8mm (or shorter) screws through the above structures.</li><li>Install the nut onto the shaft of the clock movement and tighten</li><li>Prepare the clock hands<ul><li>luminous material inlays should be installed in the hands now</li><li>the hands can be printed with a z-cut to make them hollow so they can be used to trace the inlay shape for cutting the luminous material.</li><li>Snip the second hand to desired length as they will be too long for the clock by default.</li></ul></li><li>Install the clock hands<ul><li>Install the clock hands, including second hand, in the 12:00 position</li><li>remove the lock rod from the back of the movement</li><li>install the battery to test the hands rotate freely without touching. Observe the position of the second hand while the clock is in the upright position. If the second hand does not hit the indices properly, note the angular error, reset the clock (battery and out and back in so it resets to 12:00), quickly reinstall the lock rod and immediately remove batteries again, and gently twist the second hand to compensate for the angular error. this way you can get the second hand to hit the markers exactly. Once the second hand position is properly adjusted, push it down once more to make sure it does not come loose and free-spin.</li></ul></li><li>Install luminous material on the dial if desired.</li></ul></li><li>slide clock internals into the outershell<ul><li>ensure the M3 bolt connecting the stalk is in the middle of the slit so it does not prevent the clock internals from sliding in.</li><li>ensure the crystal is in place and the internal protective film has been removed</li><li>ensure the clock face and crystal does not have dust, you can use sticky tack or tape to lift any dust and debris.</li></ul></li><li>Install the momentary switch on the back cover (if desired)<ul><li>punch out the hole for the momentary switch</li><li>wire the battery pack and switch to the illuminator wires. tuck the battery pack into the space in mech_case so the back cover can still be closed.</li></ul></li><li>Install the back cover</li><li>remove the front crystal protective film</li><li>Install the 4 shellguards and attach them by M2 screws.</li></ul>
With this file you will be able to print Mini clock for radio-controlled quartz analogue clock movement with your 3D printer. Click on the button and save the file on your computer to work, edit or customize your design. You can also find more 3D designs for printers on Mini clock for radio-controlled quartz analogue clock movement.