Mini Guitar Hero / Rock Band Controller
prusaprinters
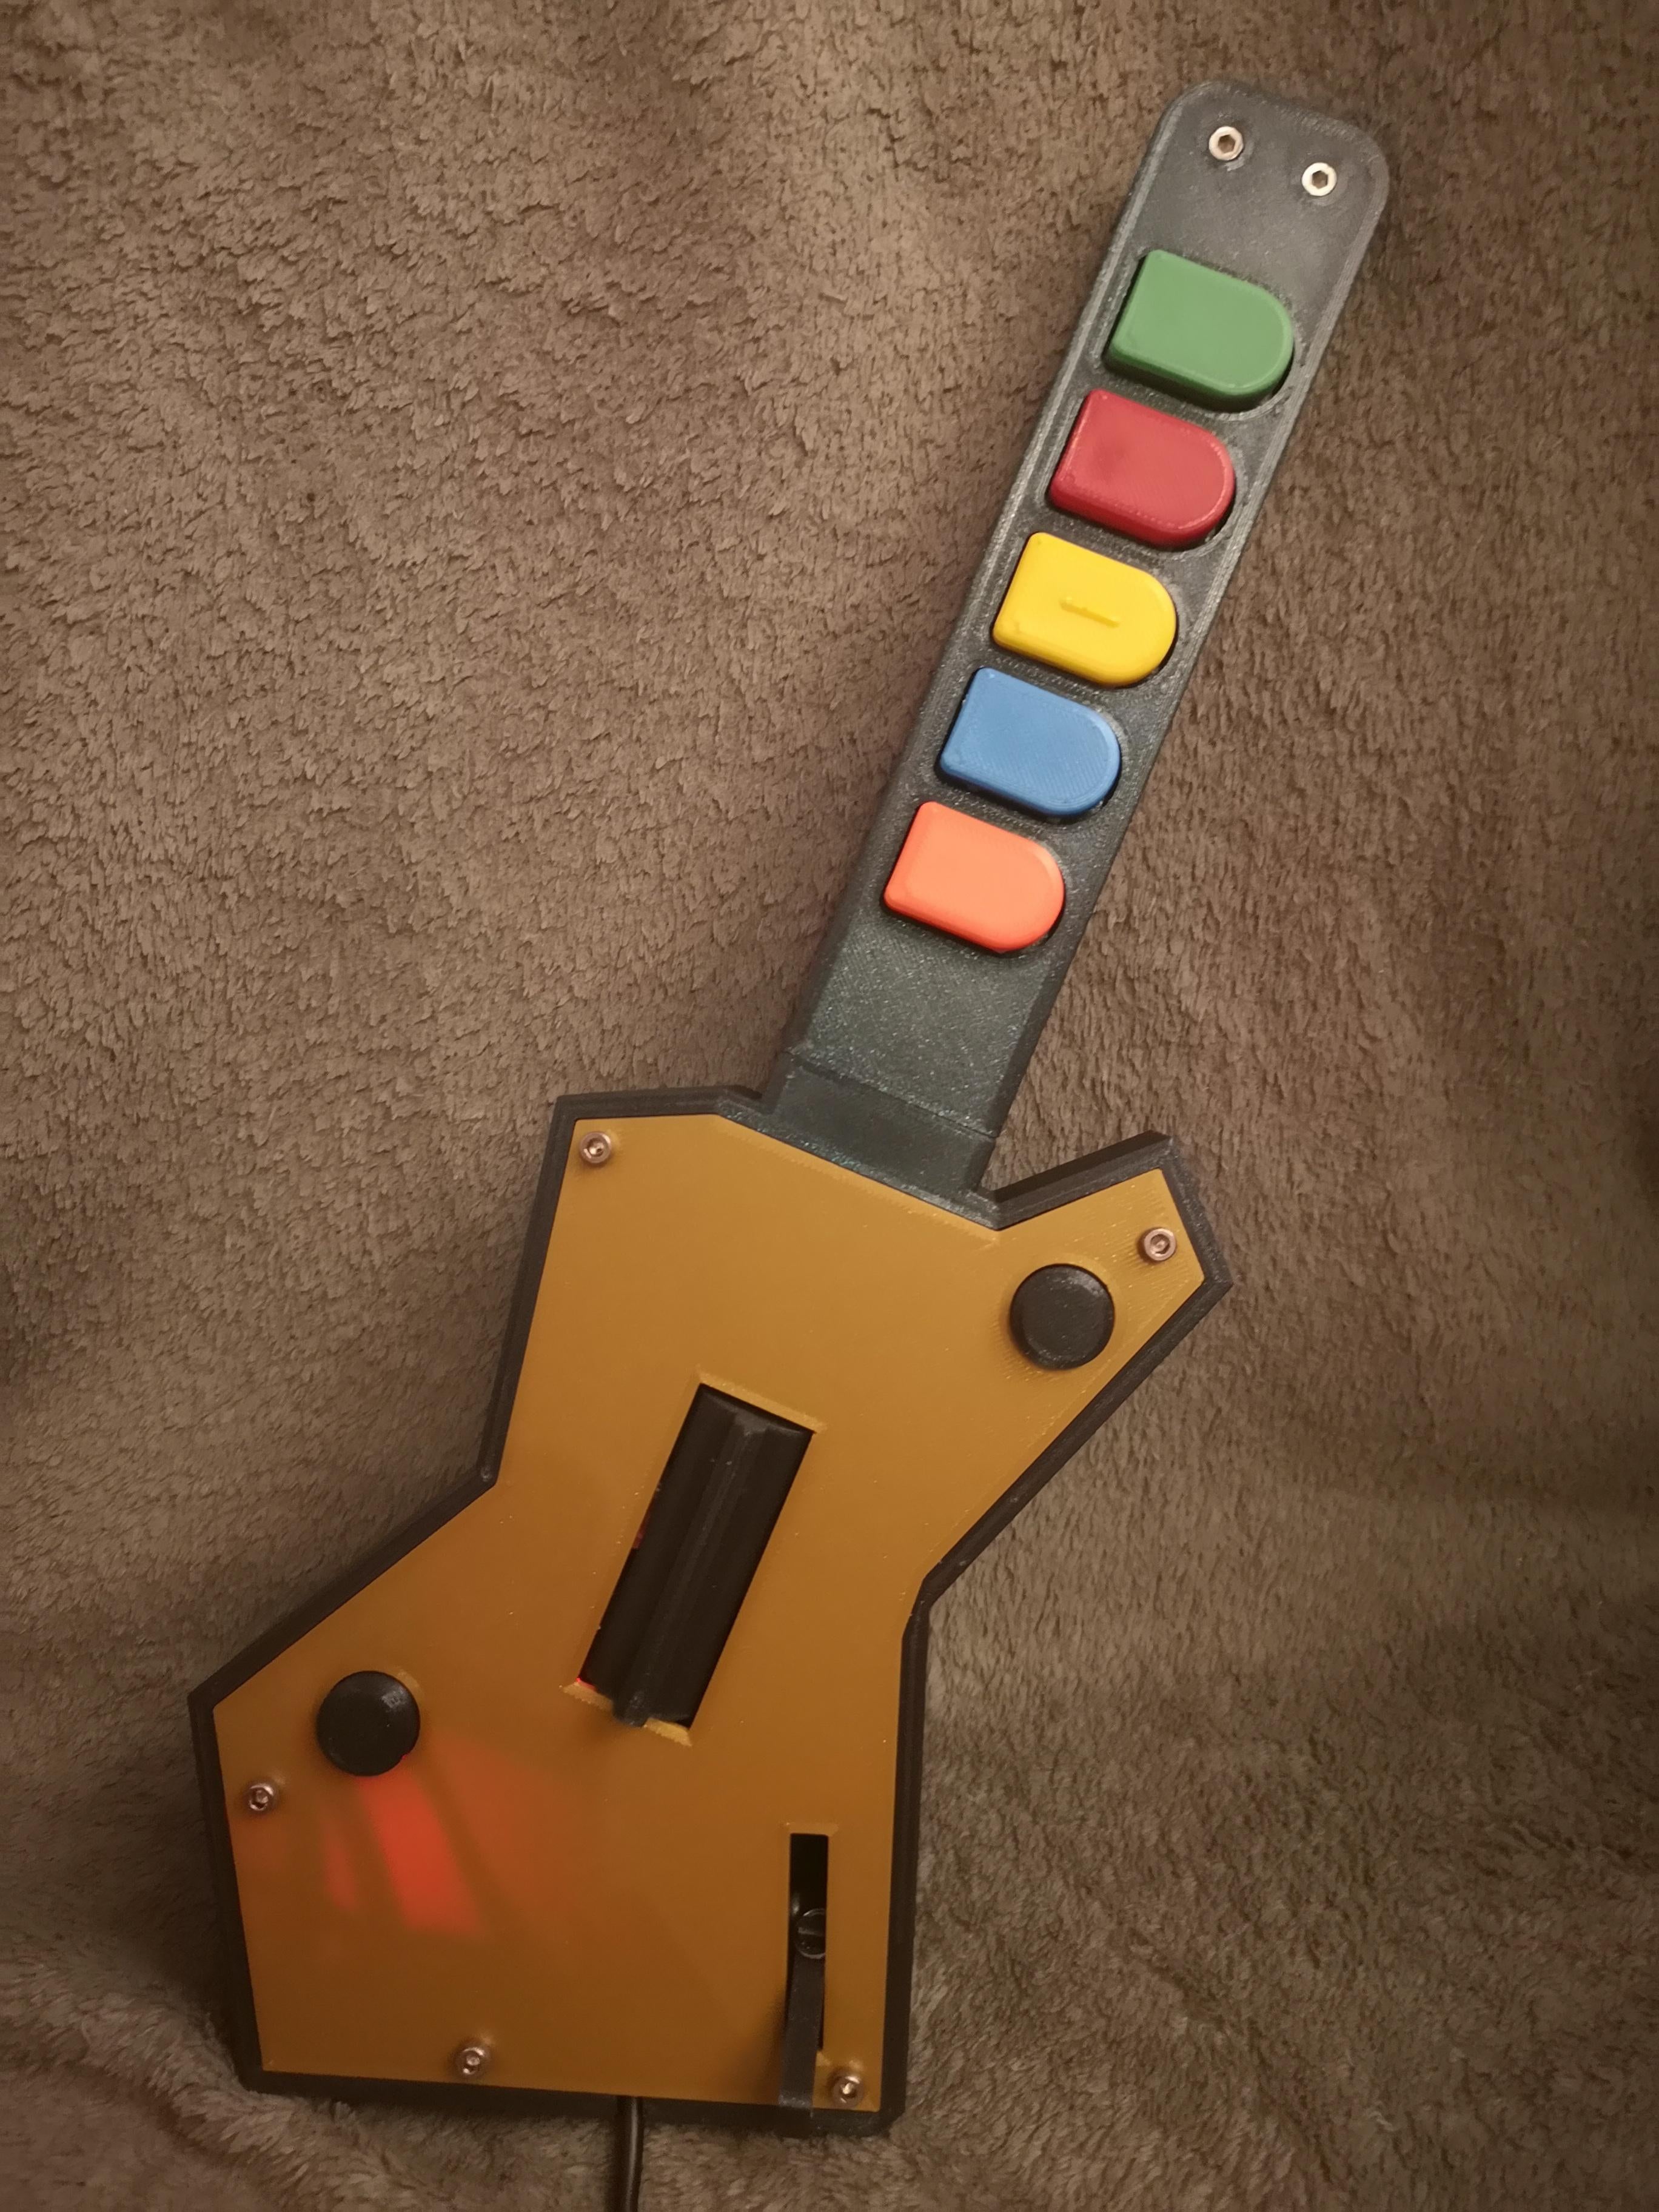
<p>Modified every model part from <a href="https://old.reddit.com/u/isrussell">/u/isrussell</a><a href="javascript:void 0"> </a> to make it more convenient. Thanks for the original models/concept!</p><p>The body and fret board now use M3 screws for everything.</p><p>I recreated all the buttons from zero, you can now slide over them. Also they don't need any glue on the switches anymore, they fit very tight on the switches now.<br><br>You can also print them upside down, with this sliding over them should work better.</p><p>The strum and whammy bar now use springs to reset its position. Just took 5 prototypes to get it perfect.</p><p>The body only needs support on the build plate (for the hex nut holes at the bottom), no inner support necessary. The other stuff doesn't need any support during printing, everything can be bridged.</p><p>Took me around 100 hours of work (without printing time) to get to this point. I'm very satisfied with the result so far.</p><p><strong>Part List:</strong><br>- 1x Arduino Pro Micro (5V)<br>- 1x USB Micro 2m or 3m<br>- 9x MX Cherry Switches (I used red for strum bar + frets and black for start and select)<br>- 1x 10k OHM Potentiometer<br>- 2x 7.14mm x 19.05mm springs (for the strum bar)<br>- 1x 8.73mm x 36.5mm spring (for whammy bar)<br>- 11x M3 nuts<br>- 2x M3x16 (fret board top)<br>- 4x M3x20 (fret board to body, whammy bar)<br>- 5x M3x25 (top plate)<br>- multiple zip ties (for some cable management)</p><p><strong>Printing Parts:</strong><br>- 1x Body<br>- 1x Body_Top<br>- 2x Body_Button<br>- 1x Fret_Top<br>- 1x Fret_Bottom<br>- 5x Fret_Button (or 4x Fret_Button + 1x Fret_Button_Nipple)<br>- 1x Strummer<br>- 1x Strummer_Dip<br>- 1x WhammyBar<br><br><strong>Assembly:</strong><br>All the buttons use ground and a digital pin from the Arduino Nano Pro. For the body, I soldered the cables first, before putting in the switches (afterwards its not possible for start/select). For the fret bar I soldered a single ground wire for all buttons, so first I put in the buttons and soldered the cables afterwards. I soldered the cables to random digital pins on the Arduino Pro Micro. You don't need to remember which buttons goes into which digital pin, we can configure it later with the Guitar Configurator, the software detects the input itself. </p><p>If you want to use a digital gyroscope (e.g. MPU6050 ) don't use the digital pins 2 and 3 for the buttons, these are the SDA, SCL pins the gyroscope uses.</p><p>Insert the nuts into the strum bar and afterwards insert the dip as far as you can. You have to put in the cherry switches and springs (2x 7.14mm x 19.05mm) first before screwing in the strum bar with 2x M3x20 screws.<br><br>The spring (1x 8.73mm x 36.5mm) for the whammy bar is mounted to the screw pillar near the Potentiometer (see last photo). The Potentiometer needs to be soldered to VCC, GND and a random analog pin.</p><p>Use the M3x16 screws for the top part of the fret bar, use M3x20 to mount the fret bar to the body.</p><p>The front plate is mounted with 5x M3x25 screws on the front and hex screws at the bottom, don't forget to remove the support first. I used the screws to press the support outside of the holes.</p><p><strong>Printer Settings:</strong><br>- PLA (I used <a href="https://www.dasfilament.de/filament-spulen/pla-1-75-mm/405/pla-filament-1-75-mm-blue-pearl?c=11"><strong>Blue Pearl</strong></a><strong> </strong>for the body and <a href="https://www.dasfilament.de/filament-spulen/pla-1-75-mm/496/pla-filament-1-75-mm-gold-v2?c=11"><strong>Gold V2</strong></a><strong> </strong>for the frontplate from <a href="https://www.dasfilament.de/">DasFilament</a>)<br>- 15% infill<br>- 2 perimeter<br>- 0.2mm layer height</p><p><strong>Support:</strong><br>- Body.stl - Support on build plate only (used for screw holes)<br>- No other part needs support</p><p><strong>Controller Configuration:</strong><br><a href="https://sanjay900.github.io/guitar-configurator/">https://sanjay900.github.io/guitar-configurator/</a></p><p><strong>Original Author:</strong><br><a href="https://www.thingiverse.com/isrussell">isrussell - </a><a href="https://www.thingiverse.com/thing:4946180">https://www.thingiverse.com/thing:4946180</a></p>
With this file you will be able to print Mini Guitar Hero / Rock Band Controller with your 3D printer. Click on the button and save the file on your computer to work, edit or customize your design. You can also find more 3D designs for printers on Mini Guitar Hero / Rock Band Controller.