Mini H Quad - 300 size for FPV and Mobius Camera Platform
thingiverse
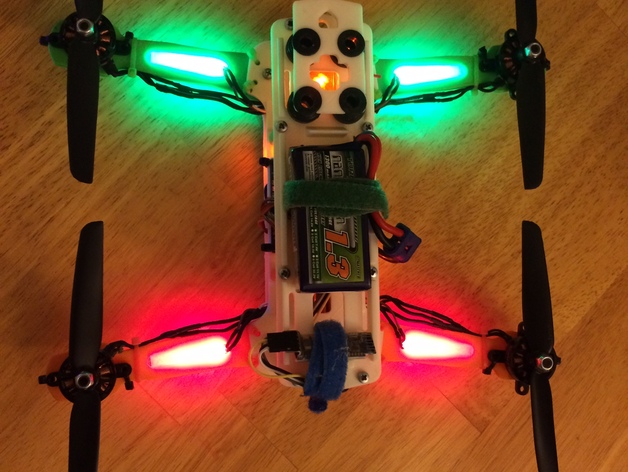
This is an updated version of the Mini H Quad Platform with added features to accommodate various prop sizes. The key difference here is that there's room for props up to 6 inches. I've also included a note about updating one of my previous posts: 3/31/2015 - I printed out a new arm designed to house the LED. This allows me to run Bridge Nylon as material for its manufacture and, with it being translucent by nature, this provides for a much easier LED installation. Bridge Nylon can also be dyed using fabric dye if one prefers to match the arms front to back. Additionally, Bridge nylon is both stiff yet still pliable so as not to alter its form over time. It does however exhibit great resilience in crashes; a point I am still experimenting with as well due to my ongoing fine-tuning of PID settings. Still much to learn there but for now at least we're running 15 min tests with no problems, that's impressive! 10/16/2014 - Now playing around with finalizing the optimal value settings in my system for these larger propellers. Ideal battery choice appears to be a setup on three S-1300mah units providing ample weight to capacity performance at approximately 560g of lift and allowing a flight time minimum expected of around 8 minutes upwards possibly towards 10. Overall build strength has been more than satisfying as is evident with some experiments; I had attempted an initial toss while it was facing downwards from a high altitude with almost no structural impact on its performance so much that I chose to pull it out and complete the mission!
With this file you will be able to print Mini H Quad - 300 size for FPV and Mobius Camera Platform with your 3D printer. Click on the button and save the file on your computer to work, edit or customize your design. You can also find more 3D designs for printers on Mini H Quad - 300 size for FPV and Mobius Camera Platform.