Mini ITX Computer Case
thingiverse
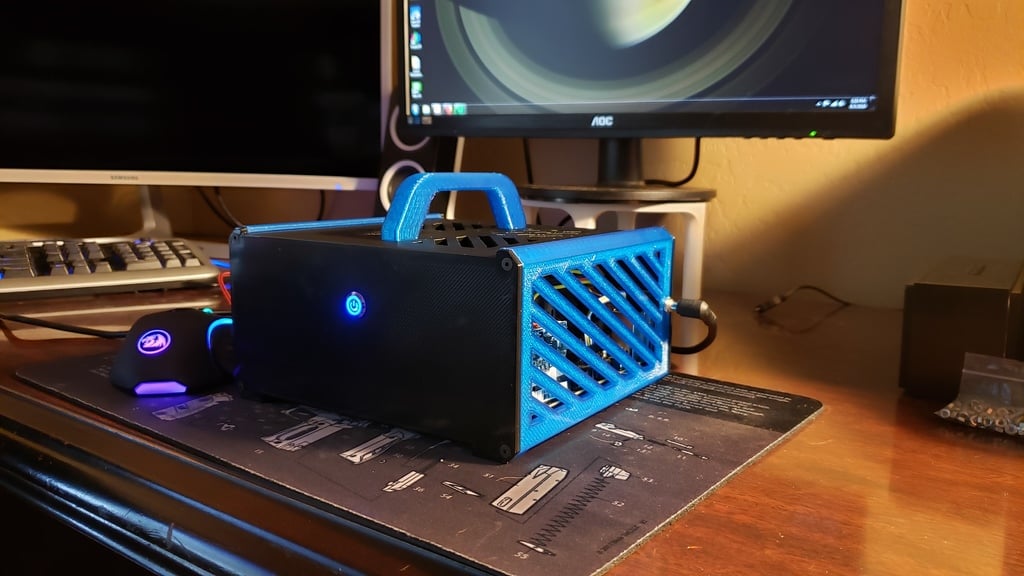
A compact ITX case I designed because I needed a small, spare graphics card (Quadro 600) and a Pico PSU to work together seamlessly. The design measures 5.0" (to the top of the handle) x 7.0" x 7.75". I'm achieving CPU temps of 47°C at idle and 57°C at 100% load across all four cores. I've included all source files so you can modify anything to suit your needs, such as using a larger graphics card or adding card readers and USB slots. All modeling was done in SW2017, but I've also included step files compatible with any CAD software you prefer. Here are the specific parts this case is designed for: Gigabyte AB350N motherboard AMD Ryzen 3 2200 CPU with stock cooler Corsair Vengeance RAM (2x8gb) Crucial 500gb M2 hard drive Pico PSU Quadro 600 Graphics Card 12mm Computer Case Power Button To complete the case, you'll need additional hardware: M3 x 8mm flat head machine screws - qty 10 - https://smile.amazon.com/50pcs-Phillips-Cross-Recessed-Countersunk/dp/B07GRW77T5/ref=sr_1_15?keywords=m3x8+screw&qid=1565208253&s=gateway&sr=8-15 M3 x 8mm pan head Phillips screws (for motherboard) - qty 4 - https://smile.amazon.com/uxcell-Machine-Phillips-Stainless-Fasteners/dp/B07M6RKYLB/ref=pd_sbs_60_4/136-7479364-1950757?_encoding=UTF8&pd_rd_i=B07M6RKYLB&pd_rd_r=7f0b5112-08a4-4d69-9754-9c22107fbfe6&pd_rd_w=hfDve&pd_rd_wg=mYMFB&pf_rd_p=d66372fe-68a4-48a3-90ec-41d7f64212be&pf_rd_r=XS7M68NCG4S195JYQQDE&psc=1&refRID=XS7M68NCG4S195JYQQDE M3 x 5-8mm brass threaded inserts (5mm outside diameter) - qty 14 - https://smile.amazon.com/LICTOP-Threaded-M3x5mmx5mm-Cylindrical-Embedded/dp/B07GDGZWMV/ref=sr_1_34?keywords=m3+insert&qid=1565208003&s=gateway&sr=8-34 To assemble the case: 1. Use a soldering iron to heat and insert the brass inserts into all holes on the left, right side panels, and handle. 2. Screw the assembled motherboard down to the left and right side panels, attach the graphics card. 3. Insert the Pico PSU's power socket into the left panel's rear hole and fasten the nut to secure it. 4. Fasten the handle to the front panel enclosure with 2-M3 x 10mm FHMS. 5. Insert the 12mm power button through the front panel enclosure and secure it, hooking up leads to the motherboard. 6. Slide the front panel through the left and right panels' grooves and use 4-m3 x 10mm FHMS to secure it. 7. Pop the motherboard's back connector cover plate into the back panel's window and screw it down with the remaining 4-M3 x 10mm FHMS.
With this file you will be able to print Mini ITX Computer Case with your 3D printer. Click on the button and save the file on your computer to work, edit or customize your design. You can also find more 3D designs for printers on Mini ITX Computer Case.