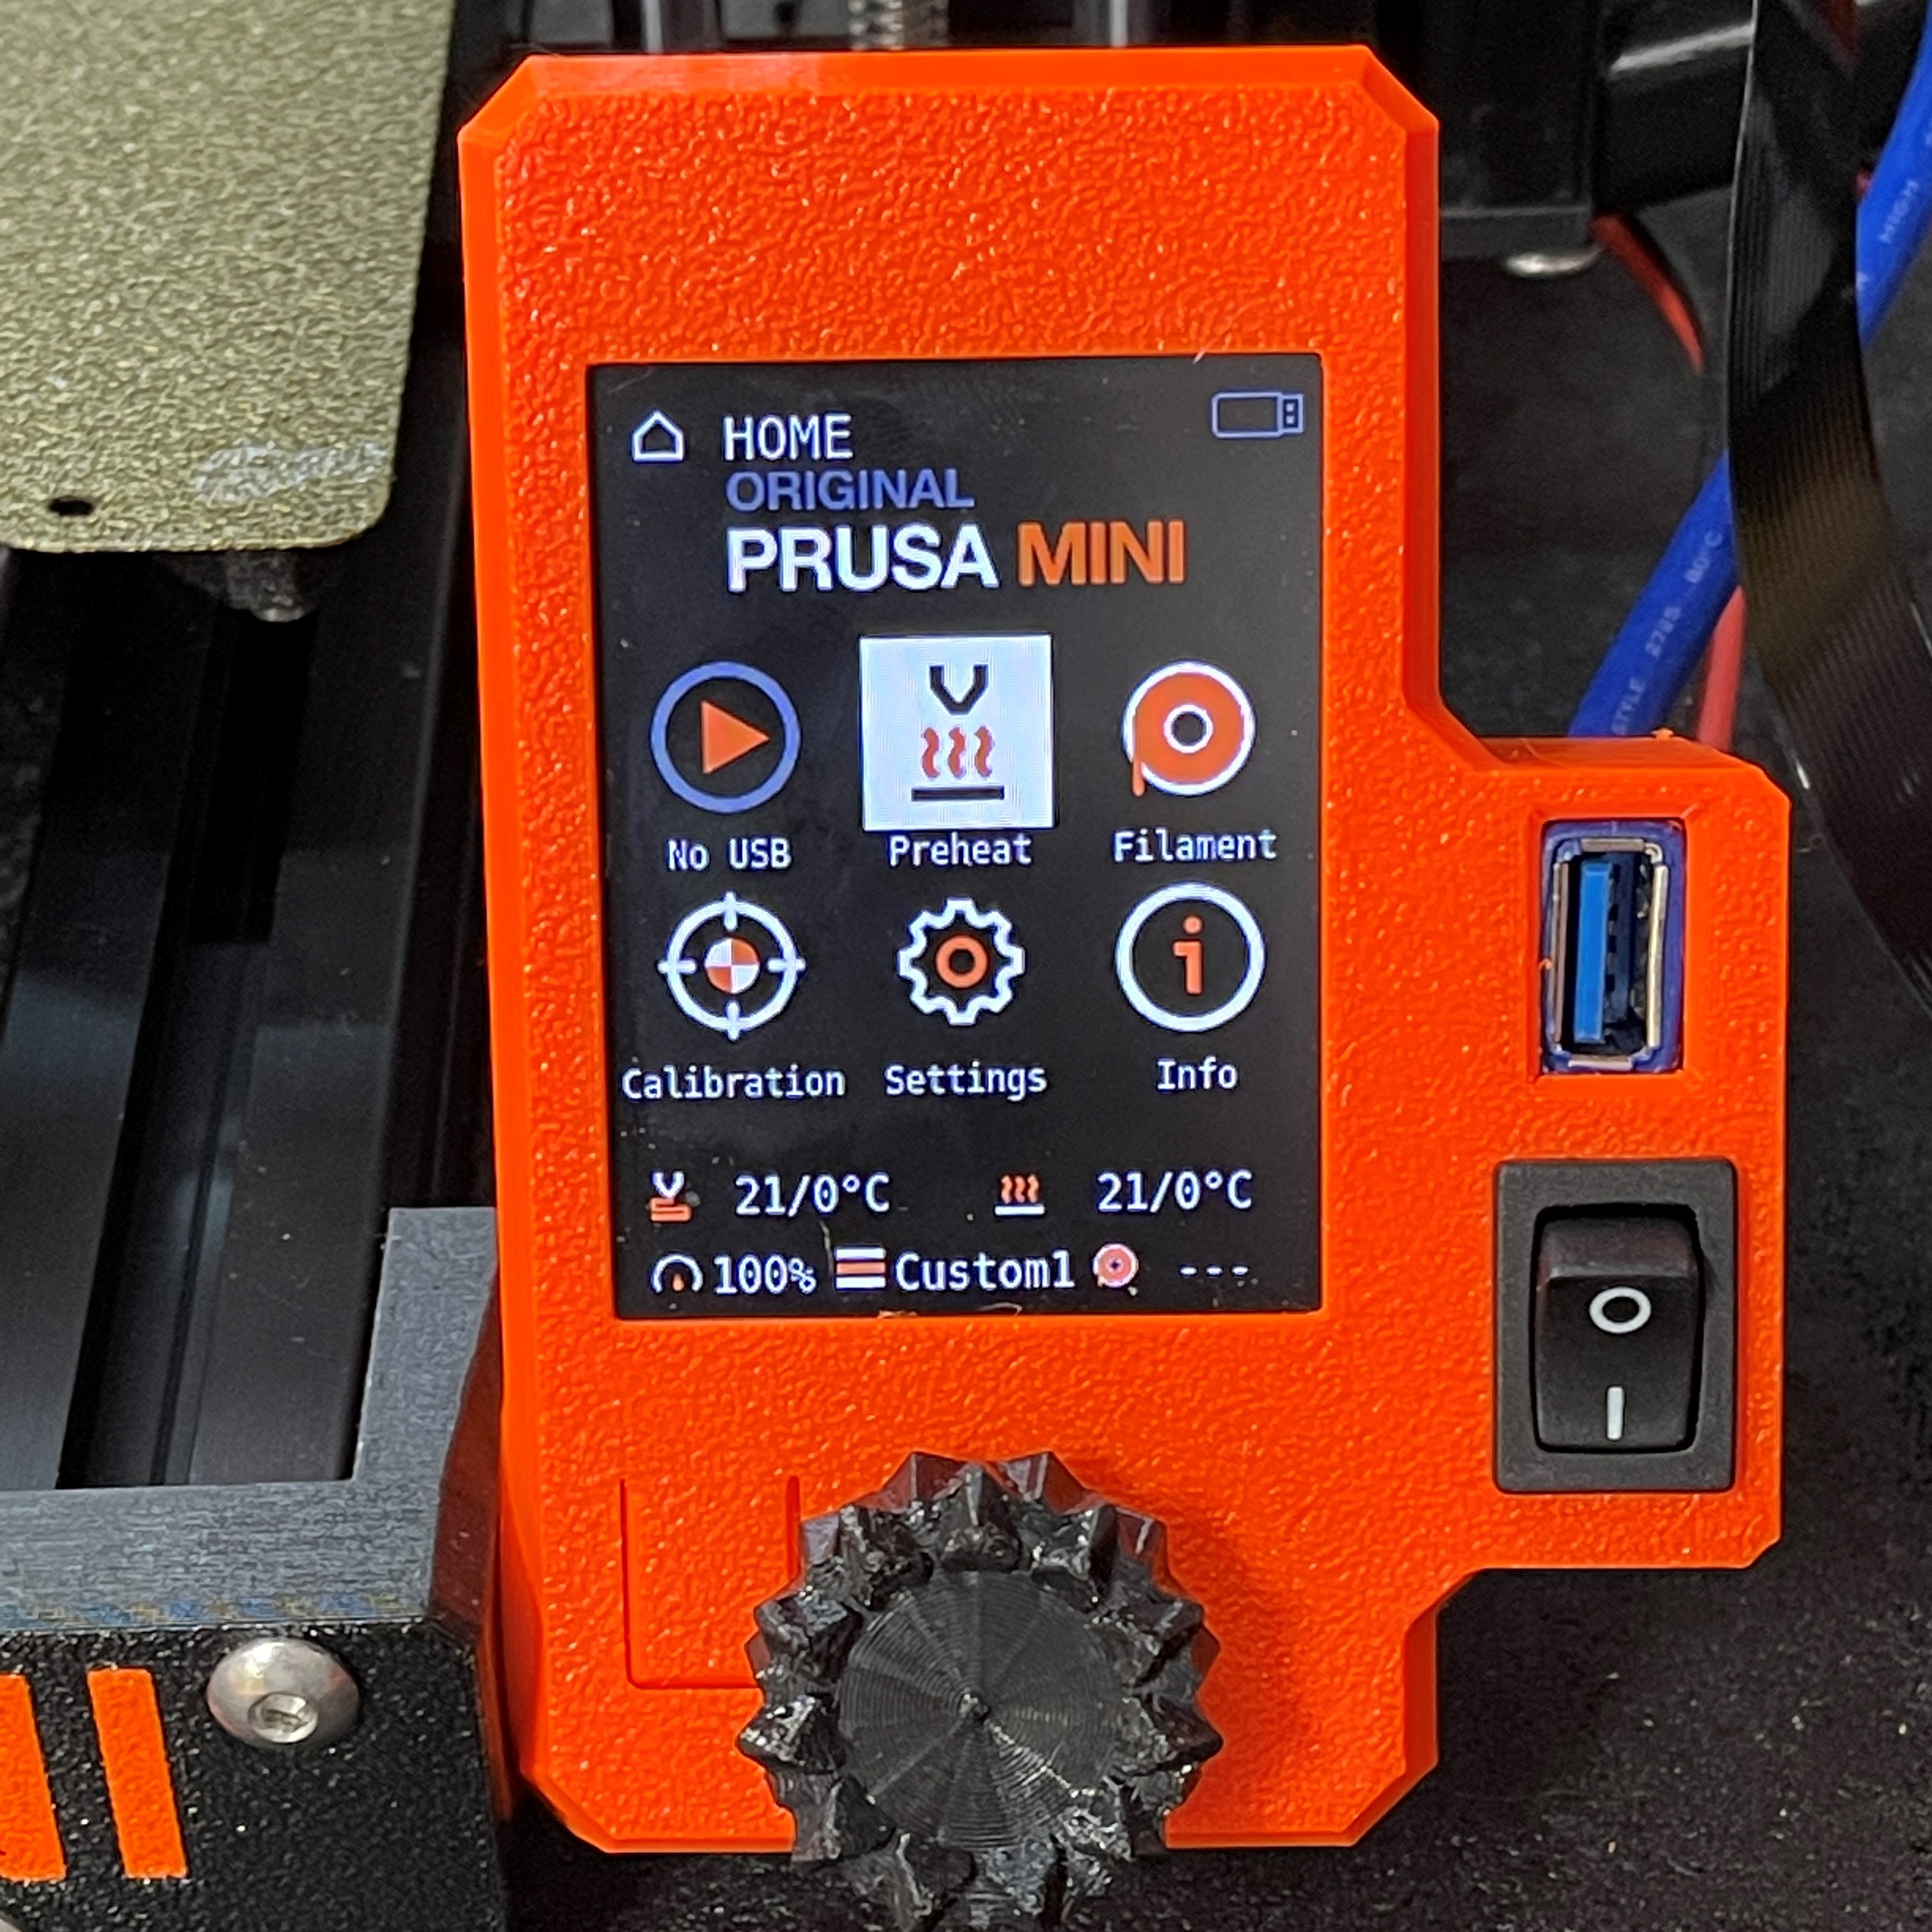
Mini+ LCD Case with USB and Power Switch plus Hole Cover
prusaprinters
<p>This adds a power switch to my <a href="https://www.prusaprinters.org/prints/66178-mini-lcd-case-with-usb">Mini+ LCD Case with USB</a>. Both USB port and power switch can now be reached easily from the front of the printer.</p><p>It is fully compatible with <a href="https://www.prusaprinters.org/prints/36645-prusa-mini-displaybox-cover-w-usb">@4nthonylin's excellent back cover</a>.</p><p>———</p><p><strong>Update 7/29/2021: </strong>Added a cover for the hole that's left in the electronics box. It printed fine for me without supports.</p><p>———</p><p>The 3mf contains the case, the USB cable holding pin ("stopper"), and a cover for the hole in the electronics box. It's set up for Prusament PETG. No supports required although you can add supports to the cutout for the stopper.</p><h4>Assembly</h4><p>Remove the LCD from the frame as in <a href="https://help.prusa3d.com/en/guide/5-lcd-assembly-electronics_202703#202749">Steps 2 and 3 of the Mini+ kit assembly guide</a>, in reverse order.</p><p>Remove the LCD from its holder.</p><p>Insert LCD into this new case. If you use <a href="https://www.prusaprinters.org/prints/36645-prusa-mini-displaybox-cover-w-usb">@4nthonylin's back cover</a>, it's easier to first insert the M3x20 screw before you add the cover, and use 4x M3x12 screws to secure the LCD and the back cover. </p><h5>USB port</h5><p>All you need is a 90° angled USB 2.0/3.0 cable with a length of around 30 cm (1 ft). The one I bought is <a href="https://www.amazon.com/gp/product/B08MKW47QD/.">https://www.amazon.com/gp/product/B08MKW47QD/.</a> Plug the end with the angle into the Mini's USB port, then slide the other end into the upper cutout of this case from behind. Slide the stopper in from the side to secure the cable. I used pliers to carefully push the stopper in until the cable no longer moved.</p><h5>Power switch</h5><p>You'll need about 30 cm (1 ft) of <a href="https://www.amazon.com/gp/product/B07RRPFL3Q">16 AWG (American Wire Gauge) twin electrical wire</a> and four <a href="https://www.amazon.com/gp/product/B06XCWHY1B">16-14 gauge (blue) female quick connectors</a>. </p><p>Open the Mini's electronic box and remove the lid. </p><p>Remove the power cable from the Buddy board and remove the on-off switch from the electronics box by following <a href="https://help.prusa3d.com/en/guide/5-lcd-assembly-electronics_202703#205922">steps 7 through 9</a> of the assembly guide in reverse order. To pull the power switch out, press on the safety latches on the switch's sides. Pull the power cable off the switch.</p><p>Strip a few mm off the one end of the twin wire and crimp on two quick connectors. Working from the inside of the electronics box, thread the end of the wire without the connectors first through the hole that used to hold the power switch, then through the hole cover (making sure the flat side is pointing outward). Press the hole cover in place. Reconnect the wire to the Buddy board (<a href="https://help.prusa3d.com/en/guide/5-lcd-assembly-electronics_202703#205984">step 9</a>).</p><p>Strip a few mm off the other ends of the twin wire and crimp on two quick connectors. Thread the wire through the lower cutout of this model and attach the new wire to the switch by pushing the two quick connectors onto the switch's terminals. Press the switch into its place in the case. </p><p>Cover the electronics (<a href="https://help.prusa3d.com/en/guide/5-lcd-assembly-electronics_202703#203441">steps 20 and 21</a>).</p><h5>Final assembly</h5><p>Reattach the LCD with the M3x20 screw to the frame (<a href="https://help.prusa3d.com/en/guide/5-lcd-assembly-electronics_202703#202787">step 3</a>).</p><p><br/> <strong>If you like what I'm doing…</strong><br/><strong> </strong><br/>…consider <a href="https://www.buymeacoffee.com/mix579">buying me a coffee</a>.<br/><img alt="orange_img.webp" src="https://media.prusaprinters.org/media/prints/51471/rich_content/8871d2db-9b5f-47c1-a4f7-fd6e73984904/image.png#%7B%22uuid%22%3A%22544551d0-597c-42c7-9c9b-1b838bdd2ace%22%2C%22w%22%3A170%2C%22h%22%3A37%7D"/><br/> </p>
With this file you will be able to print Mini+ LCD Case with USB and Power Switch plus Hole Cover with your 3D printer. Click on the button and save the file on your computer to work, edit or customize your design. You can also find more 3D designs for printers on Mini+ LCD Case with USB and Power Switch plus Hole Cover.
