Mini macro Studio
thingiverse
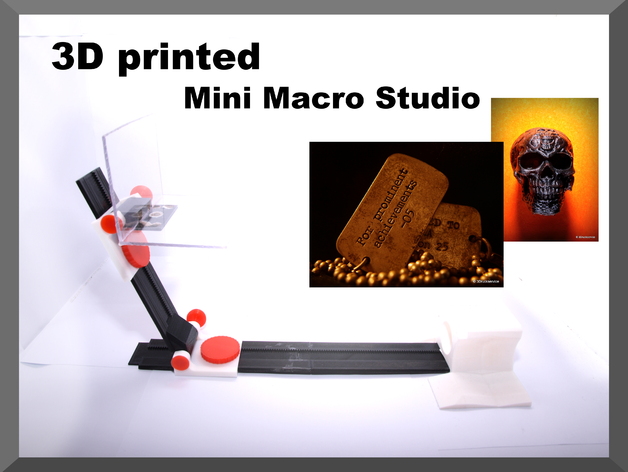
A compact, adjustable macro studio with easy printing is available. If you appreciate it, please vote for it on Instructables contest! Check it out at http://www.instructables.com/id/3D-printed-Mini-Macro-Studio/. For instructions, the following files are needed: 2 Adjuster.stl, 2 Bolt.stl, 1/2 Bottomtrail.stl, 2 lockpin.stl, 2 Slide.stl, 2 Gear.stl, 1 Mount.stl, 1 Toptrail.stl and 1 Stageholder.stl. You can print stages as needed or remix them. Print most parts with a layer height of 0.15mm and speed of 50-60mm/s; red parts require a 0.1mm layer height and printing speed of 30mm/s. Red parts should be printed together to avoid overheating issues. Bottom trails need minor support, which shouldn't be an issue for any slicer. One or two bottom trails may be required based on the size of your camera. A clip.stl can be printed to slide the camera into the mount; it requires a screw that fits. Alternatively, you can use a tripod clip from an existing tripod. After printing, assemble all parts which should be straightforward due to simple design. Use a knife or rasp if parts don't fit correctly and glue the little gear under the slide. If two bottom trails are printed, glue them together with pressure for flat alignment. Lock pin tightens everything; turn it in or out to adjust strength. Get creative with stages that can be customized using pre-made ones or DIYstage.stl without a 3D printer.
With this file you will be able to print Mini macro Studio with your 3D printer. Click on the button and save the file on your computer to work, edit or customize your design. You can also find more 3D designs for printers on Mini macro Studio.