Mini Mil X axis CNC conversion
thingiverse
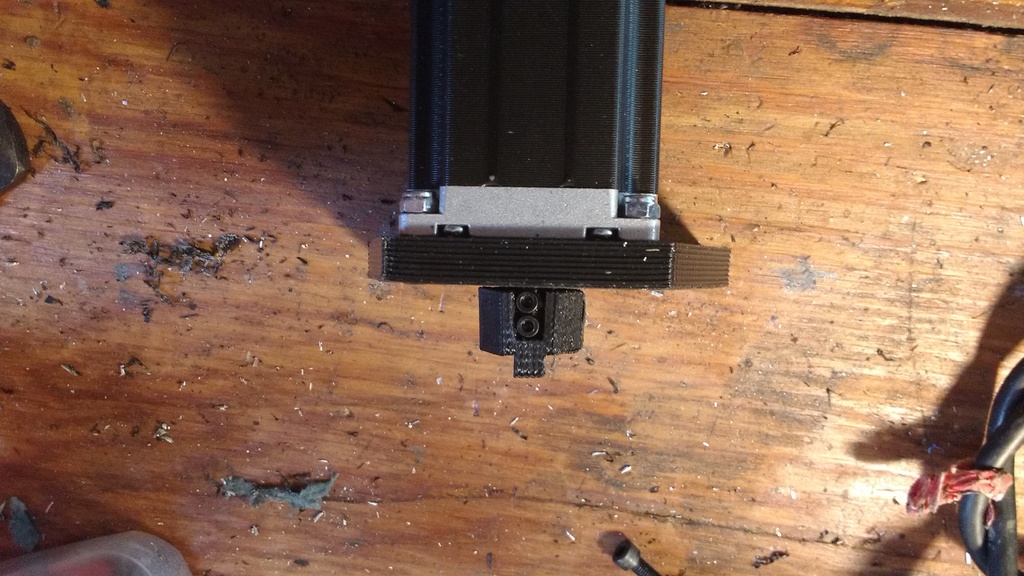
These are the parts needed to convert a mini mill (specifically: harbor freight. Verify dimensions and interfaces with your other-branded mini mill prior to printing) to CNC using NEMA 23 steppers. Print with ABS at 100% infill. You might be tempted to print the oldham coupler vertically but don't do it, the z layers are the weakest interface and they will fail in torque more readily than one printed along the X or Y axes. The plate is a substitute for the existing (plastic) plate. Only downside of this is, it makes chips harder to clean out (since the original plastic plate isn't structural you can leave the screws a bit loose and just pop the plate up/down and brush out chips). However I deemed this advantageous as I wanted the handwheel on the other side and bumping it out 6" or so (using a dual shaft stepper) was unattractive at best. You need two M6x20 bolts for bolting to the mill, four M5x20 for bolting to the motor (with lock nuts) and some m3 bolts for the oldham coupling. Unloaded this works fine. Under load the coupling on the motor side slips against the motor shaft. This part needs to be made out of aluminum - pretty straightforward if you have the mill in functioning shape. I am fairly confident the other two parts of the coupler can remain printed (at least long enough to get full CNC capability, then make some sweet CNC parts) video: https://www.youtube.com/watch?v=7KXM-7N3lYo I have a blog where I am documenting the conversion of my mini mill in near-real-time: http://harborfreightcnc.blogspot.com
With this file you will be able to print Mini Mil X axis CNC conversion with your 3D printer. Click on the button and save the file on your computer to work, edit or customize your design. You can also find more 3D designs for printers on Mini Mil X axis CNC conversion.