Miniature 3 Axis Robotic Arm for Arduino
thingiverse
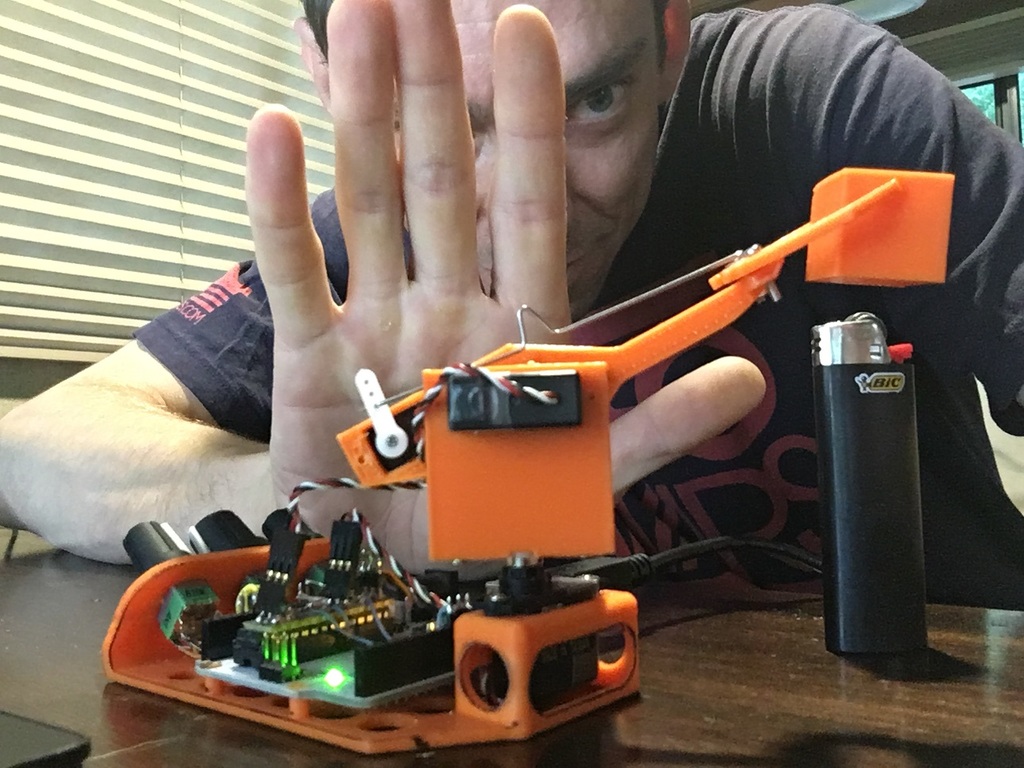
two sample videos: https://youtu.be/_UM77V36zMo https://youtu.be/nGtOsG2f58E I designed. printed and built this little 3 axis robotic arm with three GWS Pico STD servos, three potentiometers and a arduino uno while off grid as a proof of concept. This is only V1 and does not work perfectly but as you can see in the video it's not bad for a first version. I'll be working on more updates sooner or later. The hardware was basically just screws included with the servos plus some miniature screws I had laying around. I just self threaded them all in. No biggie. couple washers as well and you're good to go. It's just a mini robot arm. The potentiometers are 10K alphas pots with some eurorack knobs. very basic. All the servos and pots are wired to 5v supply bus and ground. The pots are input to analog ins 0,1 and 2. The servos come out digital pins 8,9 and ten. The LED is set to blink a bit to look like a construction zone while the robot moves around. so far the code only has movement from potentiometer but I'll be adding some basic automation routines soon to lift and move a 20mm test cube around. Stay tuned. this is only the very basic V1. UPDATE 1/22/23 I added some files for a new gripper with less slop. Works much better. The code is posted as follows and very simple: // this is posted so you can copy the code. Remove when you compile it //---------------------------------------------------------------------------------------- // you need to add a pound sign before the word include and put the word Servo.h in //triangle brackets. You can't post the code here or thingiverse chops it up. //use typical arduino syntax to format this next line of code as stated above include Servo.h Servo myPANservo; Servo myTILTservo; Servo myGRIPservo; int potpina = 0; int potpinb = 1; int potpinc = 2; int val; const int outputLed = LED_BUILTIN; int LEDstate = LOW; unsigned long previousMillis = 0; const long interval = 500; void setup() { myPANservo.attach(9); myTILTservo.attach(10); myGRIPservo.attach(8); pinMode(outputLed, OUTPUT); } void loop() { val = analogRead(potpina); val = map(val, 0, 1023, 20, 160); myPANservo.write(val); delay(5); val = analogRead(potpinb); val = map(val, 0, 1023, 31, 130); myTILTservo.write(val); delay(5); val = analogRead(potpinc); val = map(val, 0, 1023, 80, 105); myGRIPservo.write(val); delay(5); unsigned long currentMillis = millis(); if (currentMillis - previousMillis >= interval) { previousMillis = currentMillis; if (LEDstate == LOW) { LEDstate = HIGH; } else { LEDstate = LOW; } digitalWrite(outputLed, LEDstate); } }
With this file you will be able to print Miniature 3 Axis Robotic Arm for Arduino with your 3D printer. Click on the button and save the file on your computer to work, edit or customize your design. You can also find more 3D designs for printers on Miniature 3 Axis Robotic Arm for Arduino.