Miniature Hydro Flask
prusaprinters
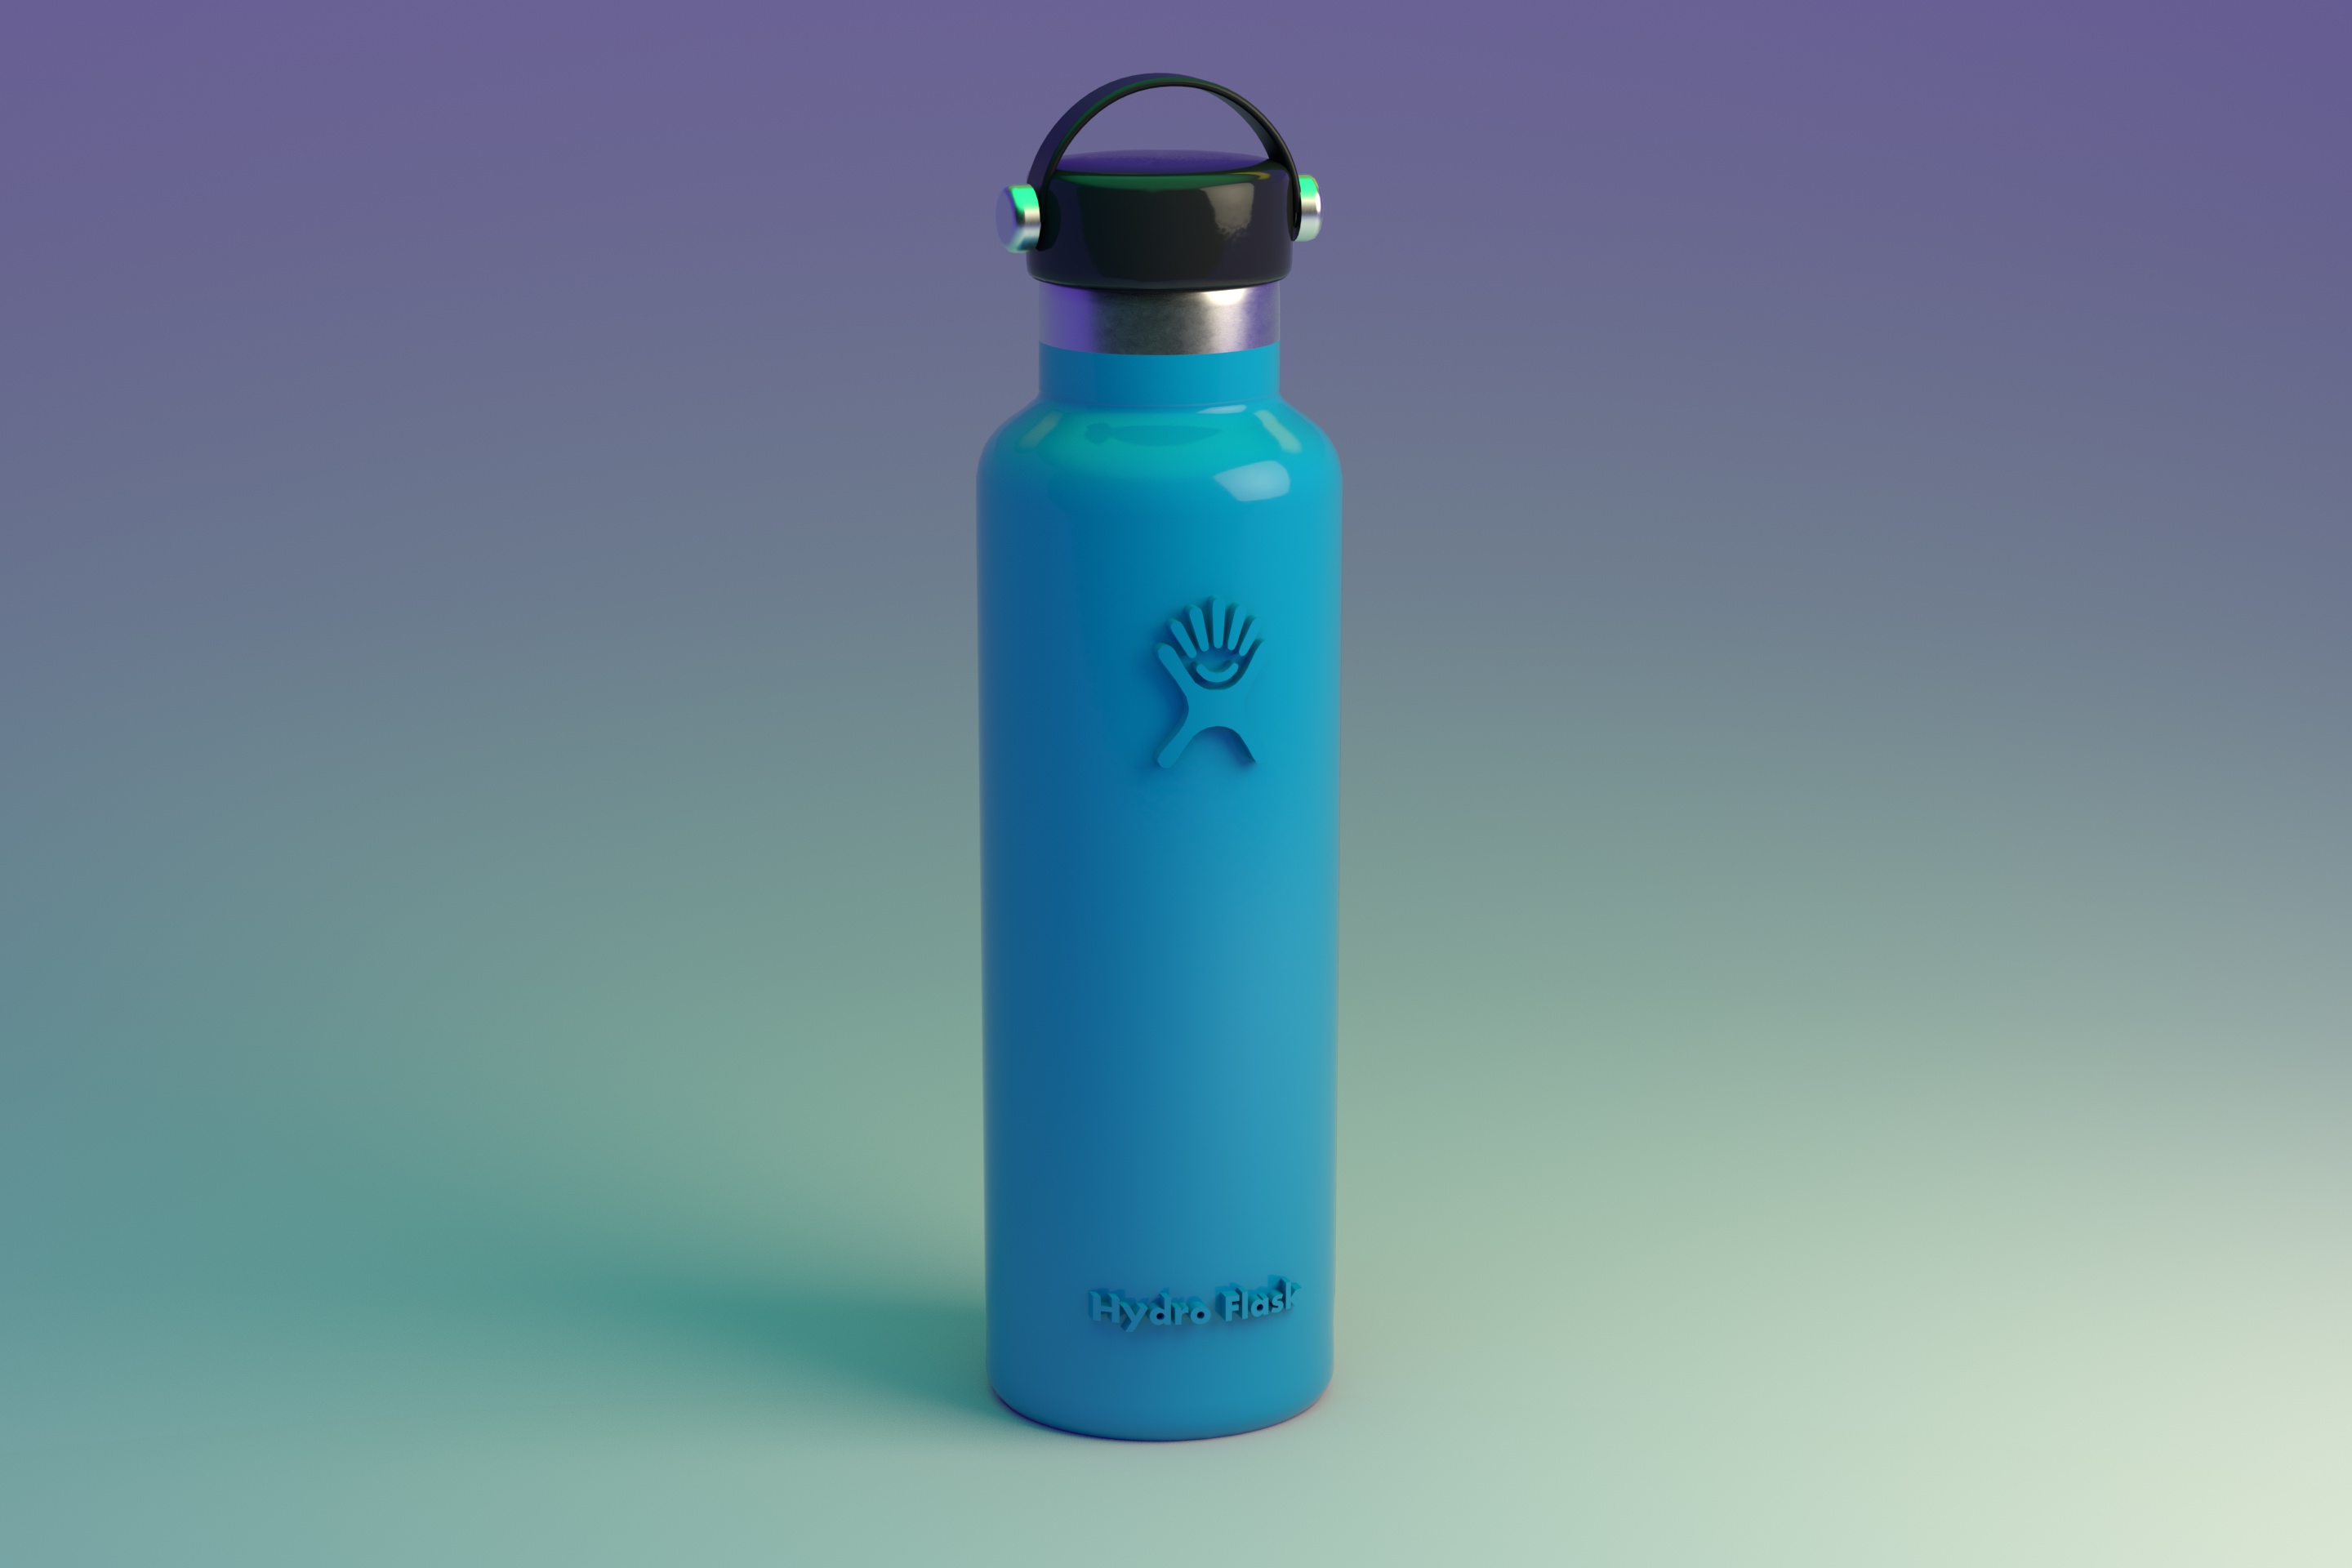
<p>For whatever reason, the Hydro Flask bottles have become very popular in my daughter's middle school. I admit, they are really nice and well made. She asked if I could make some for her and her friends on my 3D printer, so I made a scale model based on the real one. Not sure what they to do with them.</p> <p>The main part is to be printed in two different colors, and the included gCode has the color change built in. The "metal" parts (the top of the main body along the two screws) were printed in Polyalchemy Lucid Pearl Elixir which looks so much like stainless steel. The strap needs to be printed in TPU (or any black flexible material), but is an easy and small print. Everything else is printed in PLA. I designed the cap to screw into the body and will line up correctly when tight.</p> <p>This was designed in Fusion 360. The first two images are renders done in Cinema4D with the Arnold render. The third image is an actual print. The remaining images are of each component rendered in Fusion 360.</p> <h3>Print instructions</h3><p><b>General Printing Guidlines</b><br/> Printing the parts in a certain order will help a little. I would start with the main body (the flask itself) because you will be changing the filament to some type of metal looking or silver PLA. When the print is finished you can then print the two screws (since you already have the metal looking/silver PLA loaded.) When the screws are printed you can then print the cap and strap (in no particular order.) Don't worry too much about the the TPU since it is a small flat print. Just remember to <u><b>not</b></u> use the smooth Prusa build plate for TPU unless you use some type of release agent! The cap and strap should be printed in black.</p> <p><b>Using the Included gCode Files</b><br/> I included four gCode files, one for the main body (which has the color change already set (at 6h and 26m into the print), one for the screws (two screws are needed and the gCode has both), one for the cap, and one for the strap. The main body, the screws, and the cap are prepared for PLA. Make sure you use a silver or metal looking PLA for the top of the main body (when your printer asks for a filament change) and the screws. I used Polyalchemy Lucid Pearl Elixir for the metal parts because I really like how it looks. The cap is also set up for PLA and you should use black. The profile I used for the strap is a slightly modified generic flex and should be printed in black TPU. I changed the generic flex profile on the strap to lower the bed temperature to 35C which should help keep it from sticking too much to the power coated build plate. Just remember to let it cool to room temperature before you remove it. Again, do not use the smooth build plate with TPU or it may become a permanent part of your print bed!</p> <p><b>Included stl Files</b><br/> There are four stl files included with this if you choose to use them instead of the prepared gCode files. These include the main flask, a screw (you need two), the cap, and the strap. You should do a filament change on the main flask, or paint the top of it. You will need to print two screws. Both the top of the flask and screws should be painted or printed in silver or some metal looking filament. The cap needs to be black. The strap must be printed in black flexible material. No supports are needed for any of the prints. Be aware that this cannot be resized because of the threads.</p> <p><b>Assembly</b><br/> Take the strap and attach it to one side of the cap by screwing the screw in to the cap. Then bend the strap and attach it to the other end of the cap with the other screw. Then screw the cap assembly into the top of the flask. I designed the threads of the flask so when the cap is tight it is lined up correctly with the orientation of the flask. You are all done!</p> <p><b>Final Comments</b><br/> I have included the STEP file for this, as I do for most of my prints. 3D printing is all about making something new, or customizing something for your use.</p> <p>I really don't recommend drinking from this as this should be considered a form of art. Additionally, listing this as art and not charging for it means that I am legally allowed to post this (at least in US law.)</p> <p>While PLA is said to be food safe, your printer is not. Furthermore, this flask cannot be cleaned safely. For one, this is not dishwasher safe (PLA will melt!) And secondly, there are too many places for bacteria to gather within the print and this will eventually lead to a bad day. The prints I gave to my daughter for her friends actually have a hole in the bottom to prevent any attempt to use it as a drinking bottle. As I said earlier, the real Hydro Flask is a well made water bottle and I would really recommend getting one of those instead of using this. Besides, this is small and really will not hold much water!</p> <p>Finally as I have done on my other prints posted here on PrusaPrinters, I downloaded and tested each file just to make sure nothing went wrong during the upload. I know this is probably an unnecessary step, but I would feel real bad if you had something go wrong.</p>
With this file you will be able to print Miniature Hydro Flask with your 3D printer. Click on the button and save the file on your computer to work, edit or customize your design. You can also find more 3D designs for printers on Miniature Hydro Flask.