Mirko - automata butterfly toy MMU friendly
prusaprinters
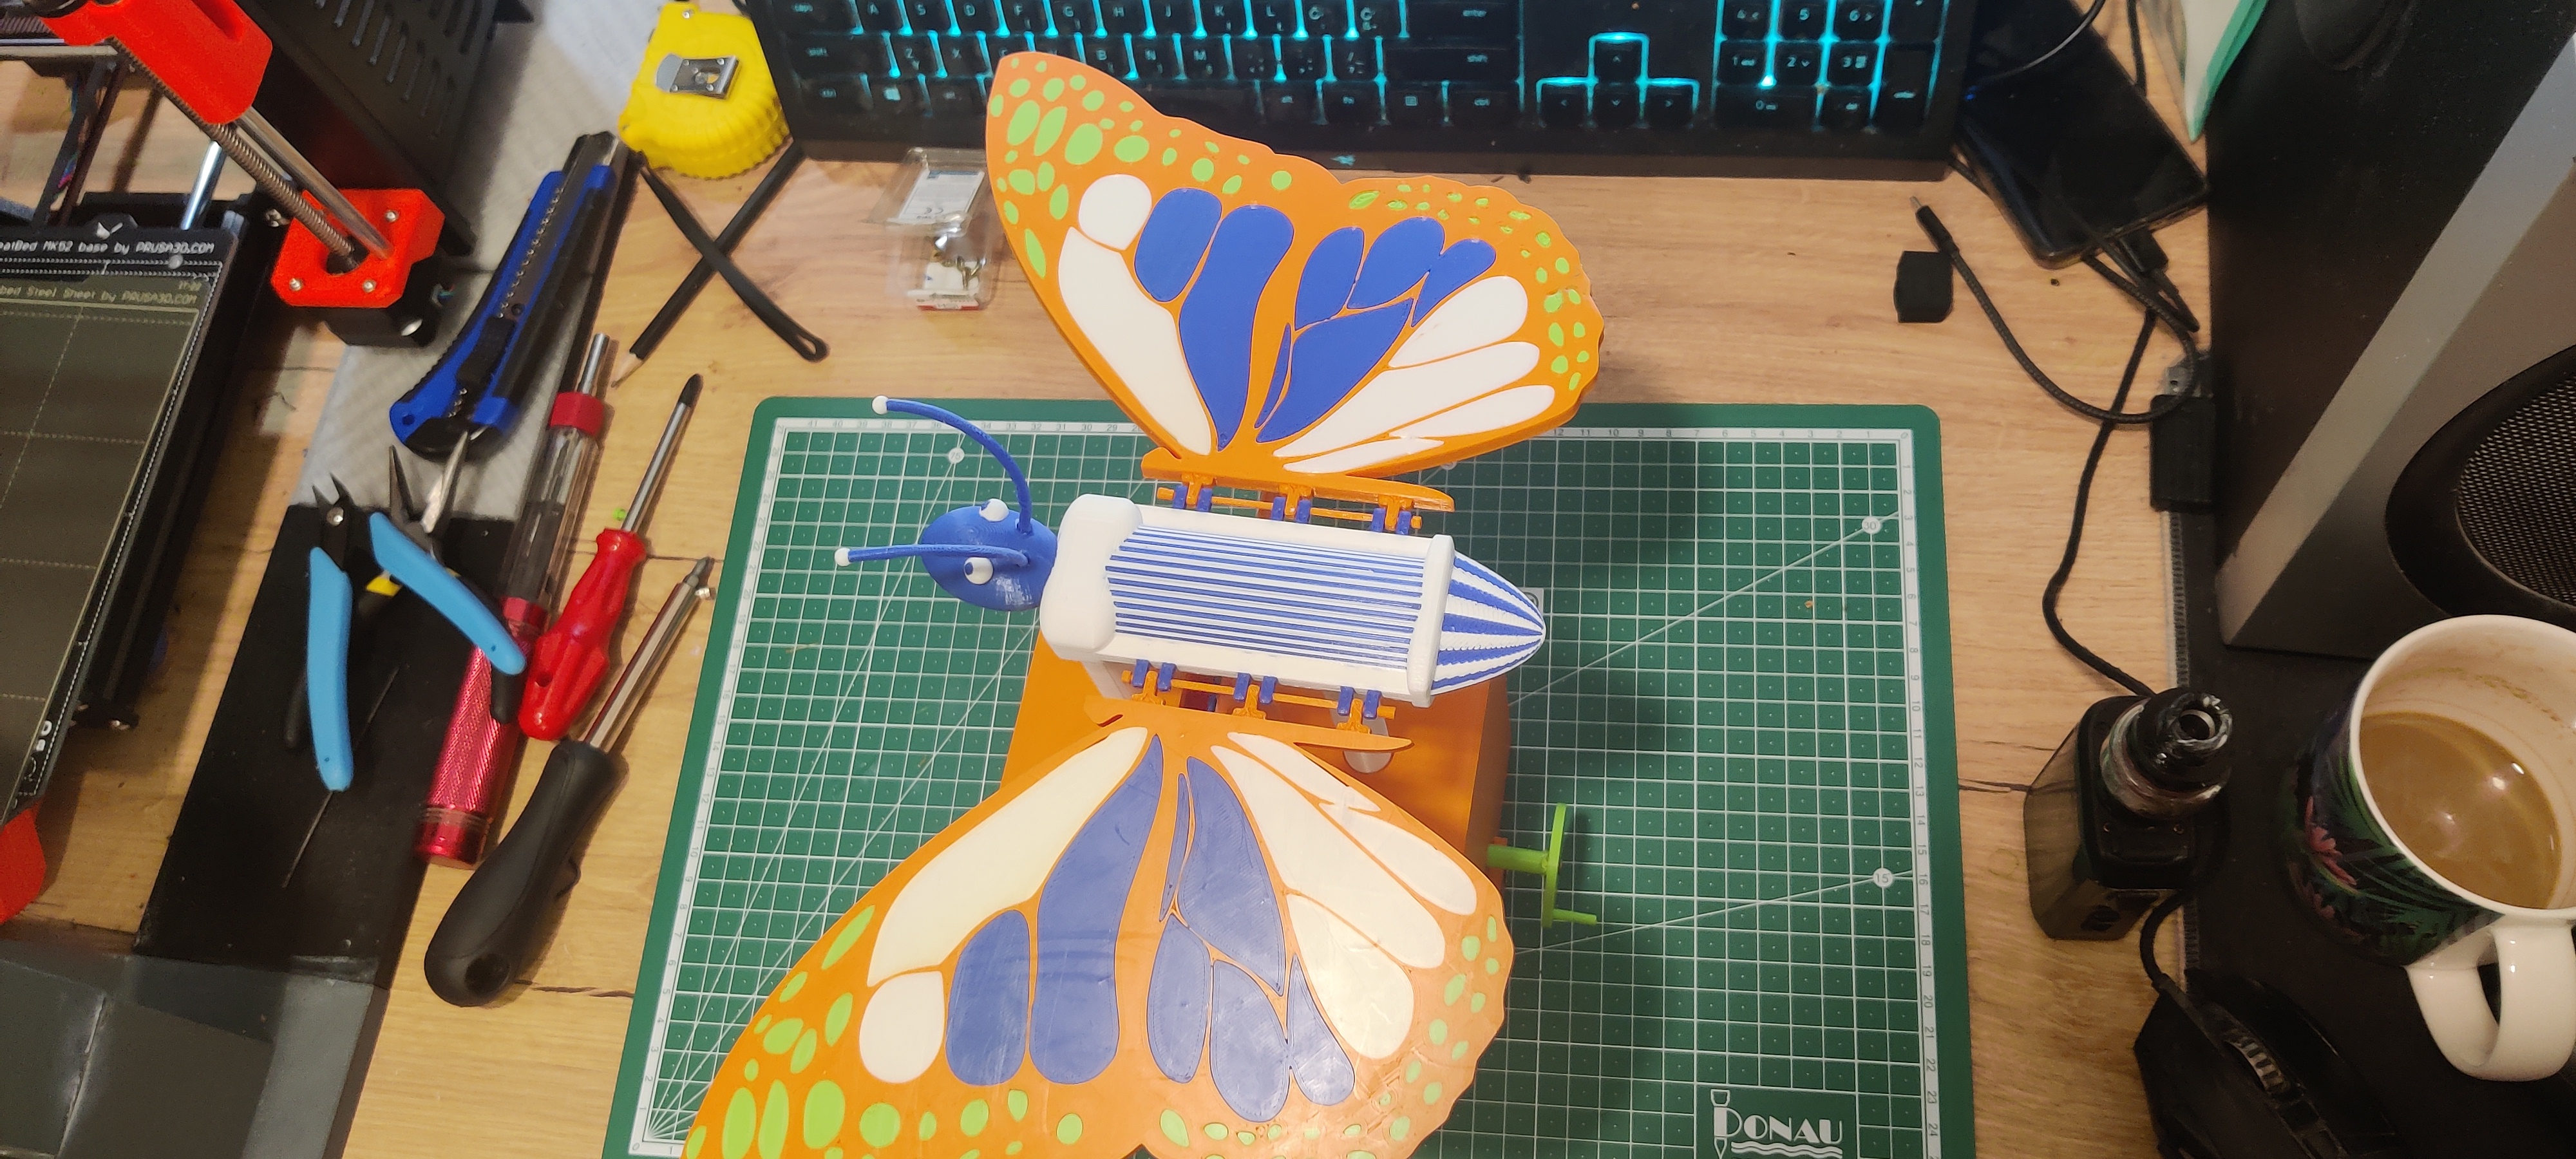
<p>Mirko - automata butterfly toy is made to fulfil all necessary requirements defined by Printables for Technical Marvels competition.</p><p> </p><p>It is made out of several parts that can be glued or secured by screws, there are moving parts (I chose to use old steam engine mechanic :D), and at the end it is visually appealing…at least for me…but you can change that easily….just read on.</p><p>That lead us to other hidden feature of the design I have made for all of us that have and use MMUs.</p><p>When you open wings (as well as body STL file) in PrusaSlicer you will notice how easily is to change color patterns so if you don't like my color choice, please change it. It is easy.</p><figure class="image"><img src="https://media.printables.com/media/prints/294419/rich_content/9fff98b7-063c-4a83-8117-a0a08d67578e/image.png#%7B%22uuid%22%3A%229f6970b2-4662-4f8d-bca0-498a7f015258%22%2C%22w%22%3A1457%2C%22h%22%3A997%7D"></figure><p>I have used 9 m3x10 screws to put it together but there is option to print bolts and glue them.</p><p>You will need to glue tentacles anyway…</p><p>Up to you and your preference.</p><p> </p><p>So when you print it it look like this:</p><figure class="image"><img src="https://media.printables.com/media/prints/294419/rich_content/8d579eb3-b6f8-4a80-890e-affb2d509357/img_20221014_221628.jpg#%7B%22uuid%22%3A%224a13cbfe-a2a0-4d14-9ea2-c1b8bae26d6f%22%2C%22w%22%3A3566%2C%22h%22%3A1790%7D"></figure><p>All that you need is in this picture.</p><p><img src="https://media.printables.com/media/prints/294419/rich_content/7ca4b839-1930-4e6c-9cab-ffdfb523d3ae/img_20221014_221633.jpg#%7B%22uuid%22%3A%2280e7f144-7705-4fcf-a14b-6a0a461334c6%22%2C%22w%22%3A4000%2C%22h%22%3A1800%7D"></p><p>First you need to connect wing holder and Connection clip - wing holder like it is shown on picture above. Use small bolts, glue them and cut them so they are in line with external perimeter. Also connect wings to body using long bolts.</p><p> </p><figure class="image"><img src="https://media.printables.com/media/prints/294419/rich_content/9ae1abb8-0b50-499f-ade5-f35ad378a3e7/img_20221014_221951.jpg#%7B%22uuid%22%3A%2232145f46-b169-4978-a856-3c0616388595%22%2C%22w%22%3A4000%2C%22h%22%3A1800%7D"></figure><p>Now take both rotator holders (you need to print 2 of those), rotator without handle, rotator with handle, connection between clip and rotator and bottom holder for box and rotators and connect them like it is shown on picture. Use M3X10 screws to secure them…Not big deal …really. :)</p><p> </p><figure class="image"><img src="https://media.printables.com/media/prints/294419/rich_content/c5fe4a44-bb23-45bb-baea-83a23ff20df1/img_20221014_222104.jpg#%7B%22uuid%22%3A%22be4bbee5-5816-4390-91bd-80a4411b7064%22%2C%22w%22%3A1800%2C%22h%22%3A4000%7D"></figure><p>Push them all together on bottom of box. It will need a bit force since you need to put handle through that hole on side…but hey it is plastic it can bend…just don't be too aggressive. Use 2 M3X10 screws to secure bottom holder on both sides to box.</p><p> </p><figure class="image"><img src="https://media.printables.com/media/prints/294419/rich_content/ccec9c87-3784-4cfa-b065-9f73c3afa9a0/img_20221014_222416.jpg#%7B%22uuid%22%3A%2251d7299c-73f3-4be2-96b7-1e8e4706c5fc%22%2C%22w%22%3A1800%2C%22h%22%3A4000%7D"></figure><p>Use another M3X10 screw to secure rotation handle. I have used a bit of glue too just to be sure it is well secured.</p><p> </p><figure class="image"><img src="https://media.printables.com/media/prints/294419/rich_content/18b9e279-fc43-4b06-9dc8-8f64112cd062/img_20221014_222616.jpg#%7B%22uuid%22%3A%2277bd3e2f-6dae-4aae-8e8a-e434f16d2328%22%2C%22w%22%3A1800%2C%22h%22%3A4000%7D"></figure><p>Connect clip with connection clip - wing holder using Secure bolt for clip - big through top of the box, inside cylinder. Now after you have done that rotate clip and connector for 90° so it can move as it needs to later. as you can see on picture bellow. </p><figure class="image"><img src="https://media.printables.com/media/prints/294419/rich_content/faf7e05e-a4fb-4af8-8ef5-b6ac48aa497e/img_20221014_222626.jpg#%7B%22uuid%22%3A%2240090b2f-42bc-4005-9550-2f64395b0fe9%22%2C%22w%22%3A1800%2C%22h%22%3A4000%7D"></figure><p> </p><figure class="image"><img src="https://media.printables.com/media/prints/294419/rich_content/4b19da5c-c486-408a-97eb-716ea23e997a/img_20221014_222846.jpg#%7B%22uuid%22%3A%2252f56e36-ef79-4766-9406-6cc00d6d7497%22%2C%22w%22%3A4000%2C%22h%22%3A1800%7D"></figure><p>Mount butterfly body to top of box using 2 M3X10 screws.</p><p> </p><figure class="image"><img src="https://media.printables.com/media/prints/294419/rich_content/2ff47ed8-03fe-4444-92cc-4a2ff946d118/img_20221014_223221.jpg#%7B%22uuid%22%3A%2213e4592c-2306-4075-a76f-03af6746baad%22%2C%22w%22%3A4000%2C%22h%22%3A1800%7D"></figure><p>Now this is kind of tricky part. Connect lower and upper part using Secure bolt for clip - small… I have glued cap with bolt just to be sure it doesn't fall out. But be careful since bolt needs to be free inside so it can move.</p><p> </p><p>At the end secure top and bottom of the box with 4 M3X10 screws and wings with wings holder using Short secure bolt for wings. </p><p>Don't forget to glue tentacles ;) </p><figure class="image"><img src="https://media.printables.com/media/prints/294419/rich_content/27de6907-cb77-4382-beff-89fb2f6af020/img_20221014_224916.jpg#%7B%22uuid%22%3A%220a64fb82-8d72-407e-a3db-71928b9fd587%22%2C%22w%22%3A2947%2C%22h%22%3A1632%7D"></figure><p> </p><p>Enjoy it. And have fun!</p><p> </p>
With this file you will be able to print Mirko - automata butterfly toy MMU friendly with your 3D printer. Click on the button and save the file on your computer to work, edit or customize your design. You can also find more 3D designs for printers on Mirko - automata butterfly toy MMU friendly.