Missouri S&T HSG Hard Shield
thingiverse
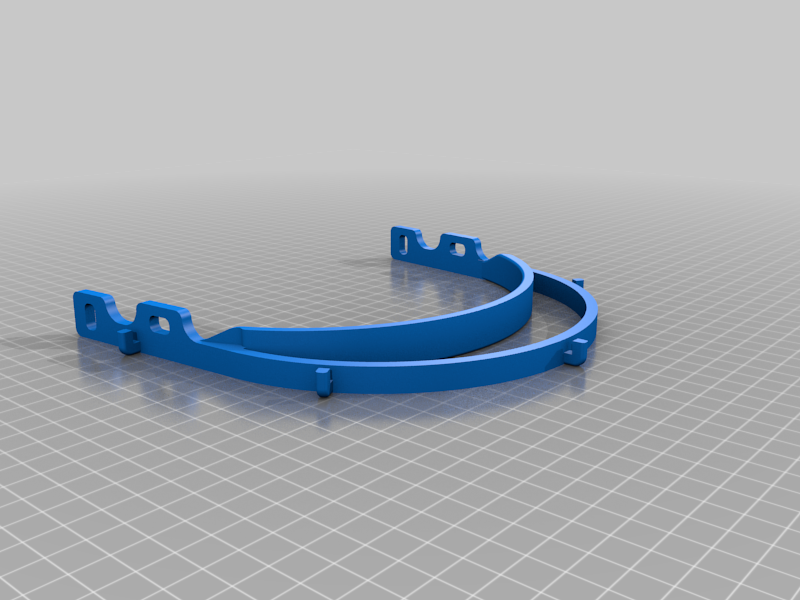
Missouri S&T Health Support Group (HSG) Hard Shield Frame HSG Project Lead: Dr. Chris Ramsay HSG Design Lead: Dr. Ryan Hutcheson HSG Project Coordinator: Jennifer Nixon Hard Shield CAD and Design Lead: G. Fielder Hard Shield Manufacturing Lead, Model Feedback Coordinator, and Design Support: Daustin Hoelscher Created and designed in association with the Missouri S&T Makerspace (https://sites.google.com/mst.edu/mstmakerspace/home) and additional support provided by the Experiential Learning Center (design.mst.edu) and ITRSS (https://itrss.mst.edu/). Created in collaboration with Phelps Health in Rolla, MO. Additional feedback is appreciated. Design inspired by Thingiverse model created by user gizehtriana: https://www.thingiverse.com/thing:4204061 *A huge thanks to everyone involved in the Missouri S&T HSG project. ***ALL MODELS (PAST, PRESENT, AND FUTURE) SHALL REMAIN OPEN SOURCE AND ACCESSIBLE TO THE PUBLIC*** There are five models: REV 4.2: Can use with different types of straps. REV 4.7: Same as 4.2, but thicker. REV 4.6B: Same as rev 4.7, but optimized for use with elastic straps. REV 4.5B: Same as 4.6B, but thicker. REV 5.0B: Same as 4.2, but includes a visor. Some hospitals might require this visor addition. PRINTER CAPACITIES: Creality Ender 3 - 2 (Yes, they fit. Included GCODE is for two models.) Lulzbot TAZ 6 - 3 Raise3D Pro 2 - 4 Ultimaker S5 - 3 Prusa Mk2.5 - 2 (See .3mf export) RECOMMENDED PRINT SETTINGS: Physical Properties: Layer Height: 0.25mm - Feel free to adjust layer height as needed. - Larger layer height results in reduced print time, and detail really isn't a concern. Wall Line Count: 2 Top/Bottom Thickness: 0.8mm Top/Bottom Layers: 4 Infill: 15% Temperatures in Celsius (Adjust as Needed): PLA: Print Temp: 205 Bed Temp: 60 ABS: Print Temp: 230 Bed Temp: 105 Speeds (Adjust as Needed): Print Speed: 70 mm/s Infill Speed: 80 mm/s Outer Wall Speed: 60 mm/s Inner Wall Speed: 70 mm/s Top/Bottom Speed: 60 mm/s Travel Speed: 120 mm/s Initial Layer Speed: 25 mm/s Retraction Distance: 4.5mm Retraction Speed: 50 mm/s - Retraction settings optimized for Creality Ender 3, adjust as needed. Supports: NONE Build Plate Adhesion: NONE - Thank you to Stephen Williams for assistance in determining recommended print settings. ASSEMBLY INSTRUCTIONS: Equipment: 3D Printer (Bed at minimum 195x173mm) Water Jet or Laser Cutter (CNC Cutter) - Scissors, a dry erase marker, and a single hole hole-puncher will work just fine for smaller production runs. Materials: ~20 Grams 3D Printing Filament (PLA Recommended) ~.5mm 16x8.5" Clear Plastic (Polycarbonate, Acetate, etc., Thinner (.25mm) and thicker (.75mm) works too) 14" Elastic Strap or Bungie Cord (Essentially just something to be used as a band) 0.625" x 7.5" Art Foam (Or other Foam) to assist in comfortability - OPTIONAL (We find it's relatively comfortable w/o this) - Super glue to attach foam to frame. Tape (Only if you don't have a CNC) - Adjust materials as needed, make sure whatever materials you're using will play nice with whatever sanitation method your hospital is using. Safety and Workspace Cleanliness: If you want to manufacture shields for others PLEASE READ THIS CAREFULLY - Act as if you were infected by the COVID-19 virus. Wear a face mask and a fresh pair of gloves when collecting each batch of printed parts. Store the parts immediately in a sealable bag. - Talk with whoever you’re making the shields for, let them know about your manufacturing environment - There is still debate about how long the virus survives on plastic, but most sources mention 2-3 days. That means that by letting the packed face shields sit for 2-3 days before distributing them, you’ll greatly reduce risk of transmission - Do not store the entire stock in one place, minimize the risk of cross contamination Procedure: 1) Import the newest preferred revision (.STL format) from the GitHub repository into your prefered slicer. Set speeds as necessary (you may need to play around with them for your printer, but see the recommendations above). 2) Print the model, making sure that the first few layers adhere to the bed properly. 3) While the model is printing, cut your desired (preferably elastic) strap to an approximate length of 14 inches (adjust as needed). 4) If you don't have an CNC cutter, go to step 6. If you do, skip step 6. *Locate the appropriate 2D sketch for the clear faceplate in the GitHub repository. 5) Locate a clear plastic sheet at least 16x8.5 inches (make more plates out of larger sheets as needed). Follow the instructions that came with your machine to cut out the faceplate sketch keeping in mind the proper safety and sanitation precautions. Go to step 7. 6) Print the PDF file for the drawing (...TILED_LETTER.pd) *located in the GitHub repository (dimensions are inches) and follow the noted instructions. PRO TIP: If you have an adjustable 3-hole hole puncher, you can adjust the distance between the holes to reflect the distance between the holes. 7) Once the faceplate and frame are complete, attach the elastic strap to the frame. There are multiple brackets (included in this repo) available for different types of straps. 8) Glue the foam to the inside of the frame where the frame rests on your forehead. 9) Attach the faceplate to the frame by first starting with the center hole and attaching it to the center pin. Do the same to the rest of the pins working outward from the center pin. *The latest drawing for the faceplate is under "Shields" -> "Hard Shields" -> "FacePlate". Document created by Daustin Hoelscher in association with the Missouri S&T Makerspace. Moral support provided by G. Fiedler. Last updated 4.8.2020 at 3:09 P.M. by Daustin Hoelscher Missouri S&T Makerspace: https://sites.google.com/mst.edu/mstmakerspace/home - For sponsor inquiries please email us at stmakerspace@mst.edu.
With this file you will be able to print Missouri S&T HSG Hard Shield with your 3D printer. Click on the button and save the file on your computer to work, edit or customize your design. You can also find more 3D designs for printers on Missouri S&T HSG Hard Shield.